![]()
In this lesson you create an introductory Web page and modify the look and feel of the page. Not all functionality is added at this time. The purpose is to demonstrate how easy it is to create a working Web site.
In this lesson you create a Welcome.jsp page. This page provides access to other pages you create in this tutorial. You use the 4GL JSP Page wizard to create the Welcome page. 4GL capabilities make it easy to develop pages with dynamic user-driven content.
4GL JSP pages are enhanced Web pages that incorporate extensions to the Web Target object model to produce template (source) files for dynamic Web pages (where part of the Web page content changes without changing the Web page). 4GL JSP pages rely on the object model to handle data transfer, HTML generation, and JavaScript generation for server scripts.
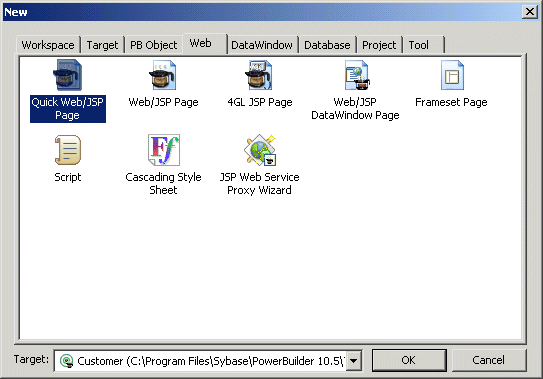
Right-click on the Customer target icon and select New. Click the Web tab in the New dialog box.

Five wizards are available to create Web pages: Quick Web/JSP Page, Web/JSP Page, 4GL JSP Page, Web/JSP DataWindow Page, and Frameset Page. In this lesson and the next two lessons, you will use the Web/JSP Page, the 4GL JSP Page, and the Web/JSP DataWindow Page wizards.
Double-click the 4GL JSP Page icon.
Click Next.
Type the Title Welcome in
the Title text box and press Tab.
The filename in the File Name text box defaults to Welcome.jsp.
Click Next until the Specify Background Characteristics page displays.
Specify yellow as the background color.
Click Next until the Define Page Parameters page displays, accepting the wizard defaults.
Type ID for the
Parameter Name and leave the Default value empty.
Click Next.
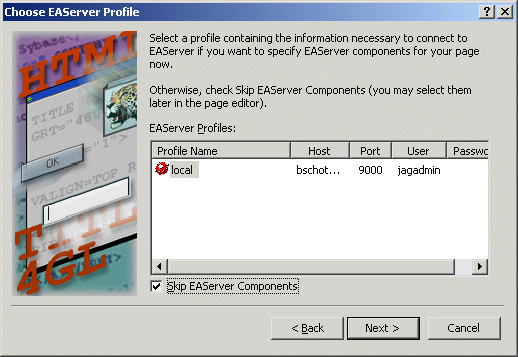
Select the Skip EAServer Components check box.

You add EAServer information in the next lesson.
Click Next.
Click Finish.
The wizard creates the new Web page and the page opens in Page view. The filename is Welcome.jsp.
In Page view, select the default text Put
your data here.
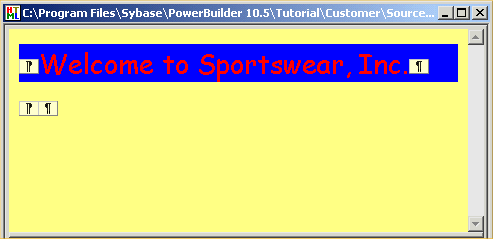
Type Welcome to Sportswear Inc.
In this tutorial, you make all changes to Web pages in Page view. Knowledge of HTML is required to make the same changes in Source view.
Select File>Save from the menu bar to save the changes.
It is easy to change the look of a Web page in the HTML editor.
Place the cursor at the end of the text and press Enter.
Place the cursor in the text Welcome to Sportswear Inc.
Right-click and select Paragraph Properties from the drop-down list box.
Click the Inline Styles tab.
Select Inline and click the Edit button, then click the Font tab.
Scroll through the Available Fonts list and select the Comic Sans MS font.
Click the arrow button to move Comic Sans MS to the Selected Fonts list box.
In Font Size click the Specific radio button.
Type 20 and select pt (point
size) from the box next to the Specific radio button.
Select Red from the Color Selection drop-down list box.
Click the Background tab, then click the Relative radio button.
Select center from
the drop-down list box under Horizontal and Vertical.
Select Blue from the drop-down list box next to Background Color.
Click OK twice.
Your type face changes are applied to the text.

The paragraph tags display only if the Show Non-Visual Tags menu item is checked in the Page view pop-up menu. You access the pop-up menu by right-clicking the page in Page view.
Select File>Save from the menu bar.
Next you add an image file to the Welcome page.
Right-click on the Customer target in the System Tree.
Select New Folder from the pop-up menu.
Type Graphics for the folder name and press Enter.
Right-click on the Graphics folder and select Import Files.
Select All Files from the Files of Type drop-down list box.
Navigate to the Tutorial folder and select Image Files for the file type.
Select tshirtw.jpg and click Open.
The image file is copied to the Graphics folder.
Click in the Welcome.jsp page.
Place the cursor in the paragraph below the Welcome title.
Press Enter to add more space below the title.
Place the cursor again in the paragraph below the Welcome title.
Select Insert >Image from the menu bar.
Click the browse button (...) next to the Image Location text box.
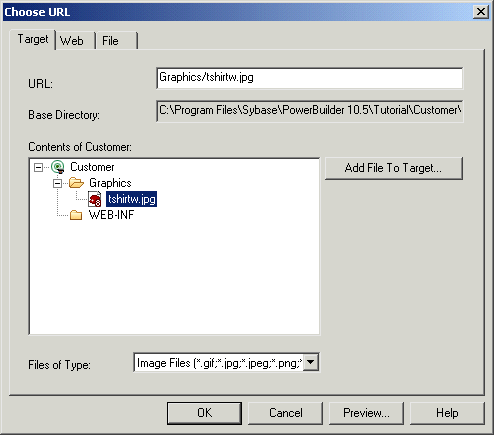
Open the Graphics folder on the Target page of the Choose URL dialog box.
Select the filename tshirtw.jpg from the folder.

Click OK in the Choose URL dialog box, and again in the Image Properties dialog box.
The white T-shirt (tshirtw.jpg) image displays on the Welcome page.
Now you fix the image at a specific location on your page. Absolute positioning lets you fix where the graphic displays on the page regardless of screen size.
Right-click on the T-shirt graphic. Select Position>Use Absolute Positioning from the pop-up menu.
Drag the graphic below the heading, centering it under the blue bar.

Click the Preview tab to view what the page looks like when deployed.
Select File>Save from the menu bar.