![]()
JavaServer Pages (JSP) technology provides a quick and easy way to create Web pages with both static and dynamic content. JSPs are text-based documents that contain static markup, usually in HTML or XML, as well as Java content in the form of scripts and/or calls to Java components. JSPs extend the Java Servlet API and have access to all Java APIs and components.
You can use JSPs in many ways in Web-based applications. As part of the J2EE application model, JSPs typically run on a Web server in the middle tier, responding to HTTP requests from clients, and invoking the business methods of Enterprise JavaBeans (EJB) components on a transaction server.
You begin creating a JSP Web site by creating a JSP target that provides a directory structure for creating, storing, and managing your JSPs. Then you create JSPs to add to the target.
In PowerBuilder, select File>Open Workspace and navigate to the Tutorial folder.
Select MyWorkspace.pbw and click Open.
If you recently completed the first tutorial, this workspace might already be open. If you did not, and you cannot find MyWorkspace.pbw, make sure you follow the instructions in “Setting up for the tutorial”.
Click the New button in the PowerBar.
Click the Target tab in the New dialog box and select JSP Target.
Click OK.
The introductory page of the JSP Web Target wizard displays.
Click Next.
The Specify New JSP Target wizard page displays. The default name for the Web target is Target1.
Type Customer.pbt in
place of Target1.pbt.
Press the Tab key.
PowerBuilder automatically changes the name of the JSP target source folder to \Customer\Source and the name of the build folder to \Customer\Build.
Click Next.
You accept the default deployment configuration name.
Click Next.
Select the check box for automatically clearing the temp folder for the XML Web DataWindow.
You accept use of the default object model. By accepting the default Web target object model, you can write server-side logic that can be deployed to several server platforms from a single source. The deployment engine converts the source to the appropriate syntax for these target platforms.
You also specify temp folder clearing for the XML Web DataWindow; you will be creating and using an XML Web DataWindow for your Web site in the next lesson.
Click Next until the Ready to Create JSP Target page displays.
You accept the default setting for the following items:
Wizard Option |
Default |
|---|---|
Select JSP Server |
EAServer |
Choose EAServer Profile |
local |
HTTP Port |
8080 |
Choose File Deployment Options |
Deploy All or Nothing |
Rebuild |
Incremental |
Specify Local Copy Folder |
\Program Files\Sybase\PowerBuilder 10.5 \Tutorial\Customer \CustomerDeployConfiguration1 |
WAR Filename |
Customer.war |
Review your selections on the Ready to Create JSP Target page.
Click Finish to accept the selections.
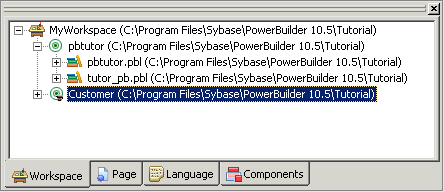
The wizard creates the Customer target, a directory structure that stores your files, and a deployment configuration. If you expand MyWorkspace in the System Tree, you can see Customer, your new Web target, listed under it.
