![]()
![]()
![]()
Now you attach the DataWindow object to a DataWindow control in the w_emplist_tutorial_main window.
Expand the emplist_tutorial.pkl branch in the System Tree.

Right-click w_emplist_tutorial_main and select Edit from the pop-up menu
or
Double-click w_emplist_tutorial_main in the System Tree.
The Window painter displays the w_emplist_tutorial_main window.
Select Insert>Control>DataWindow from the menu bar.
Click the main window in the Layout view.
A DataWindow control displays.
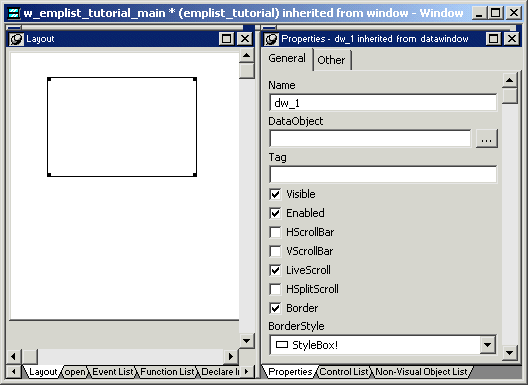
In the Properties view, select HScrollBar and VScrollBar to enable you to scroll through the list of employees when you run the application.
Now you need to associate the d_sqlgr_employee DataWindow object with the DataWindow control in the window.
In the Properties view, click the button next to the DataObject text box.
Select the d_sqlgr_employee DataWindow.
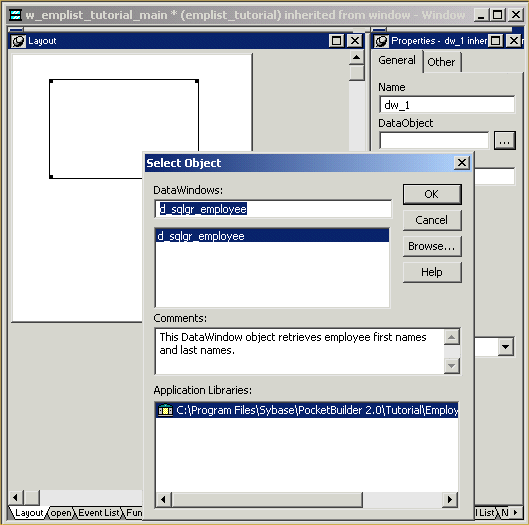
Click OK.
PocketBuilder associates the d_sqlgr_employee DataWindow object with the DataWindow control.
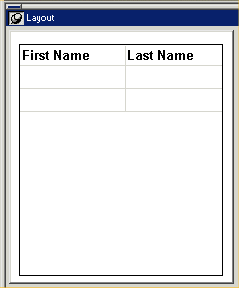
The Layout view now shows the d_sqlgr_employee DataWindow headings inside the DataWindow control, but you do not see any data yet. The DataWindow does not execute its SELECT statement until you run the application.
Select the DataWindow control and then and drag its borders so the control takes up most of the space in the main window.
When you are done, the window should look something like this:
| Copyright © 2004. Sybase Inc. All rights reserved. |
|
|
