

![]()
Now you create a new DataWindow object and display it in the DataWindow painter. Like other painters, the DataWindow painter has an assortment of views that you can open simultaneously.
![]() About the Design view in the DataWindow painter
The Design view in the DataWindow painter is similar to the
Layout view in other painters. You can open only one Design view
at a time.
About the Design view in the DataWindow painter
The Design view in the DataWindow painter is similar to the
Layout view in other painters. You can open only one Design view
at a time.
The Design view is divided into four areas called bands: header, detail, summary, and footer. You can modify the contents of these bands. For example, you can change their sizes, add objects (controls, text, lines, boxes, or ovals), and change colors and fonts.
In the Preview view of the DataWindow painter, you can see how the object looks in an application at runtime, complete with table data.
Select File>New.
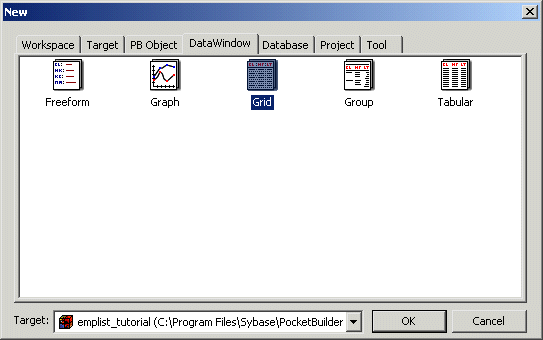
In the DataWindow tab, select Grid from the list of presentation styles. Click OK.
The Choose Data Source for Grid DataWindow page of the DataWindow wizard displays.
Choose SQL Select as the data source.
Be sure the Retrieve on Preview check box is selected.
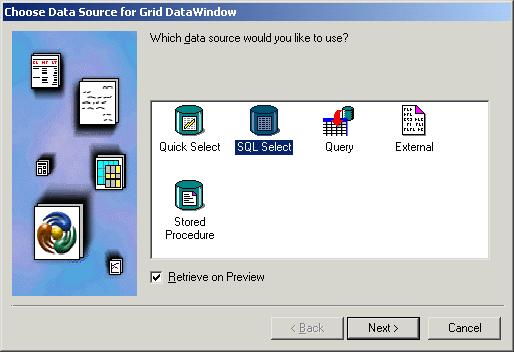
Click Next.
The Select painter displays the tables in the ASA demo database.
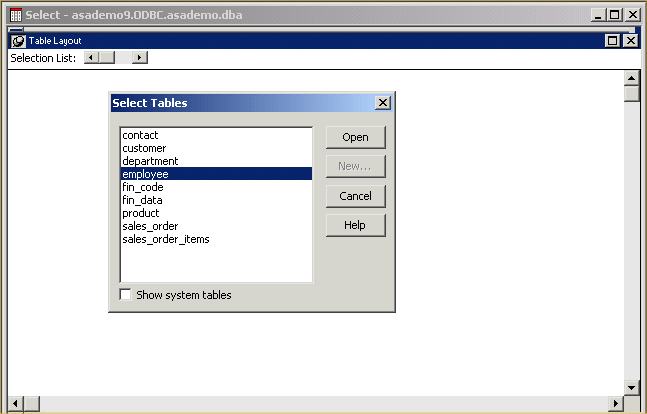
Select the employee table.
Click Open.
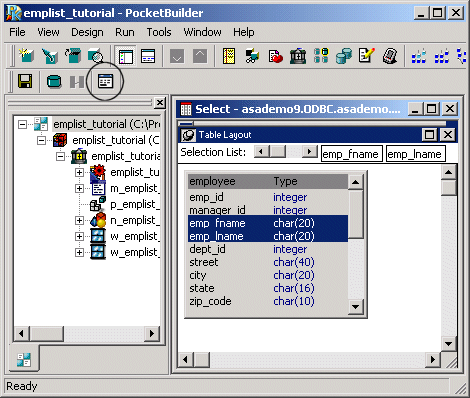
The Select painter displays the Employee table. In the Select painter, you select table columns for the DataWindow.
Select the emp_fname and the emp_lname columns.
Click the Return button (circled below) or select File>Return to DataWindow Painter from the menu bar.
The Select Color and Border Settings page displays.
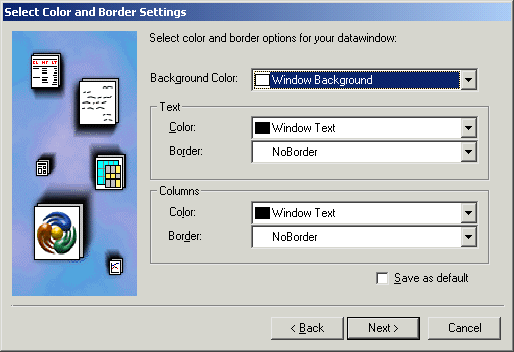
The DataWindow wizard asks you to select the colors and borders for the new DataWindow object. By default, there are no borders for text or for columns.
Click Next.
You accept the border and color defaults. The DataWindow wizard summarizes your selections.
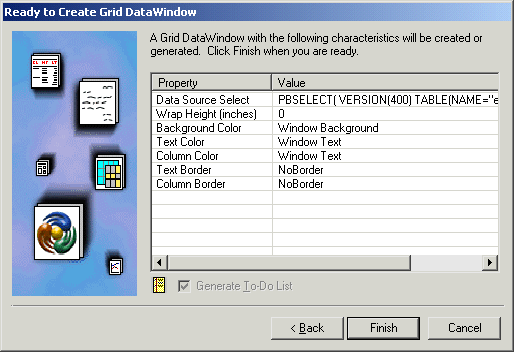
Click Finish.
PocketBuilder creates the new DataWindow object and opens the DataWindow painter. In the Design view, PocketBuilder displays a Header band with default headings and a Detail band with the columns you selected.
Select the DataWindow column borders (the light gray vertical lines) one at a time and drag them to adjust the column widths of the DataWindow so they are small enough for deployment to a Pocket PC.
When you are done, the columns should look something like this:
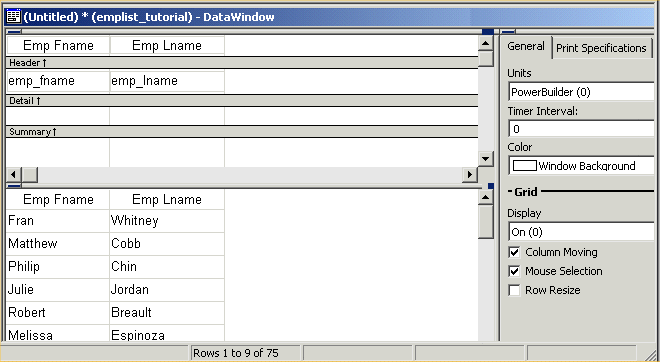
The Preview view below the Design view displays the DataWindow as it appears during execution. PocketBuilder displays data for all customers.
![]() Changing the layout of the DataWindow painter
If the Preview view is not displayed, select View>Preview
from the menu bar. If Preview is grayed, it is already displayed
and you cannot select it. You can open only one Preview view at
a time. If
your layout does not look at all like this, you can change your
layout to the default layout by selecting View>Layouts>Dafault from
the menu bar.
Changing the layout of the DataWindow painter
If the Preview view is not displayed, select View>Preview
from the menu bar. If Preview is grayed, it is already displayed
and you cannot select it. You can open only one Preview view at
a time. If
your layout does not look at all like this, you can change your
layout to the default layout by selecting View>Layouts>Dafault from
the menu bar.
In the Design view, click the Emp Fname header.
In the Properties view, change the Text property to First Name.
Change the Alignment property to Left.
Click the Font tab and select Bold.
Click the Emp Lname header.
In the Properties view, change the Text property to Last Name.
Change the Alignment property to Left.
Click the Font tab and select Bold.
| Copyright © 2004. Sybase Inc. All rights reserved. |

|
|