![]()
![]()
![]()
![]()
![]()
Now you use the Ad Hoc button to run several different reports based on the criteria you specify.
Click the Ad Hoc button.
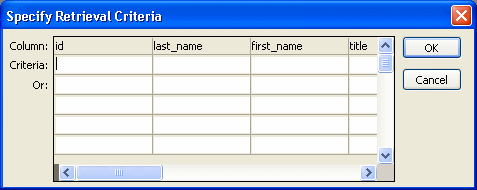
The Specify Retrieval Criteria dialog box displays. This dialog box displays because you selected Prompt For Criteria for this report. Whenever you run this report, you are first prompted for criteria.
Click OK.
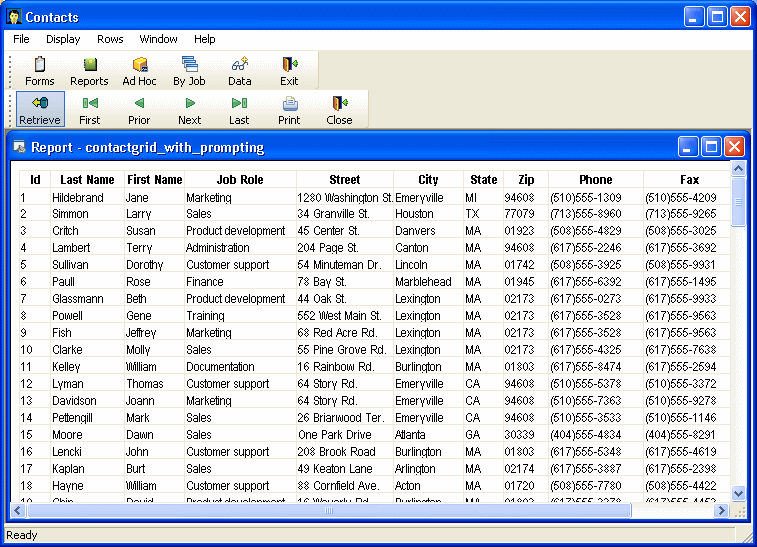
Because you did not specify any criteria, the report retrieves all your contacts.
Select Rows>Retrieve from the menu bar.
The Specify Retrieval Criteria dialog box displays again. This time you enter criteria.
Go to the title column.
Select Documentation from the drop-down list.
Click OK.
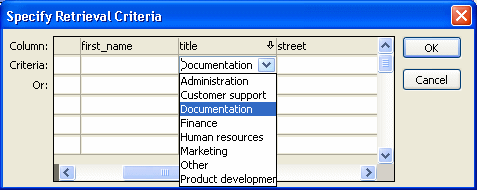
You have specified that the report is to list only contacts who have jobs in documentation.
Click the Retrieve button.
The Specify Retrieval Criteria dialog box displays again. Notice that the criterion in the title column is still in effect. To specify different criteria, you are now going to delete Documentation. Then you enter new criteria.
Select the Documentation entry in the title column.
Press delete.
This deletes criteria from the title column. Now you are going to enter new criteria.
Click in the first box underneath last_name.
Type like "c%".
Click OK.
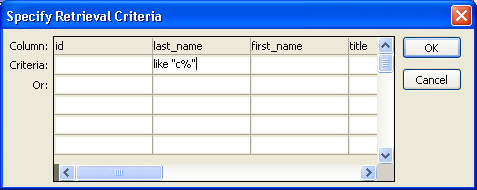
This entry (like "c%") helps you find a name you cannot remember. All you can remember is that it starts with C.
The like operator specifies that only rows that match what follows should be retrieved. The quotes are required. The c means that the first character must be C. The % sign means any characters can follow the C.
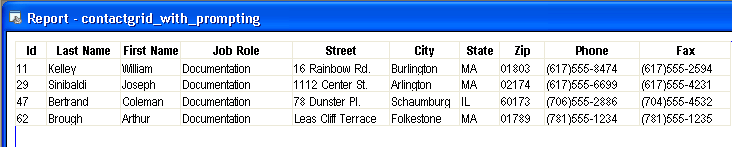
This is the report.
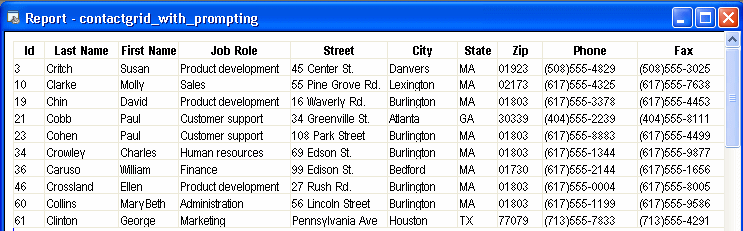
Click the Retrieve button.
The Specify Retrieval Criteria dialog box displays again. The requirement that the last name begin with C is still in effect. Now you add an additional requirement. The report is to list contacts whose last names begin with C and who are from Burlington.
Use the scroll bar to display the city column.
Click in the first box underneath city and type Burlington.
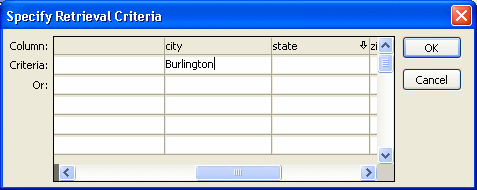
Click OK.
Now the report has only contacts whose last names begin with C and who are from Burlington.
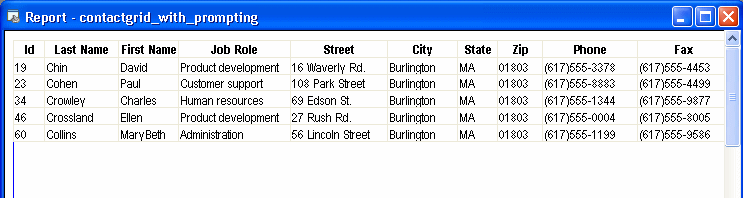
Click the Retrieve button.
The Specify Retrieval Criteria dialog box displays again. The requirements that the last name begin with C and that the city be Burlington are still in effect.
Now you change the city requirement slightly. The report is to list contacts whose last names begin with C or who are from Atlanta. To be listed, contacts have to meet either requirement; they do not have to meet both.
Use the scroll bar to display the city column.
Select Burlington and press delete to delete Burlington.
Press the down arrow key to move down one row.
Type Atlanta.
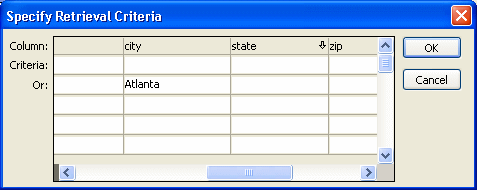
Click OK.
By specifying criteria in two different rows in the dialog box, you are specifying that the report should retrieve rows from the database that meet the first row of criteria or the second row of criteria.
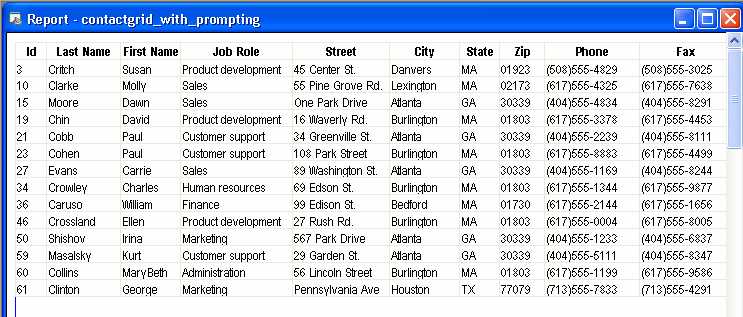
Your report retrieves all contacts whose names begin with C. It also retrieves all contacts who are from Atlanta. It is hard to look at the two sets of rows, so now you sort by city. Then all the Atlanta rows will be together.
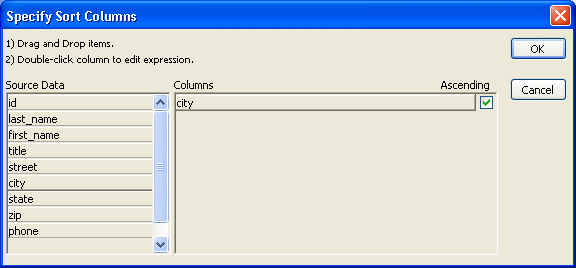
Select Rows>Sort from the menu bar.
The Specify Sort Columns dialog box displays.
Drag the Id column out of the Columns box and the city column into the Columns box.
Click OK.
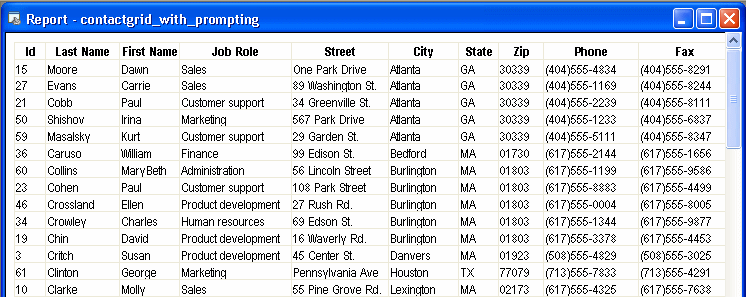
InfoMaker sorts the rows by city. Now you can see the Atlanta contacts first. These are followed by contacts whose names begin with C.
Now you are finished using this report and using the application.
Click the Exit button.
This closes the report and the application.
Congratulations. Now you have done it all. You have created data, maintained it, and reported on it. And you have put all your work together into your own application. See the next page for some suggestions on what to do next.
