![]()
Now you make the application easy to access. To do this you create a shortcut on the Windows desktop.
Move the pointer to an empty area of the desktop and press the right mouse button.
The pop-up menu for the desktop displays.
Select New and then Shortcut.
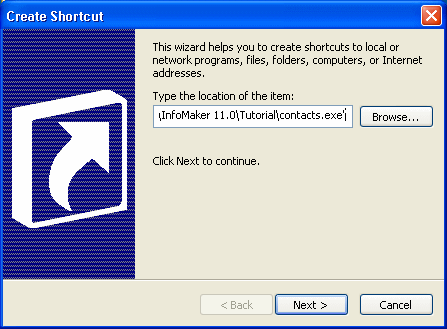
The Create Shortcut dialog box displays.
To locate contacts.exe, click the Browse button.
In the Browse dialog box, change folders to the Tutorial folder.
Select contacts.exe and click OK.
You return to the Create Shortcut dialog box with the full path of the contacts.exe file in place.

Click Next.
The Select A Title For The Program dialog box displays.
In the text box, type Contacts over the name offered as a default (contacts.exe).
This provides a better title to display under the icon on the desktop.
Click Finish.
Windows creates the shortcut to your application and displays it on the desktop. Now you must modify a property of the shortcut so that you can run your application.

Move the pointer to the icon and press the right mouse button to display the pop-up menu.
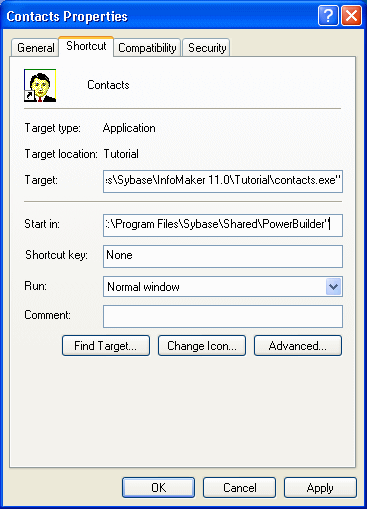
Select Properties to display the shortcut’s properties dialog box.
Select the Shortcut tab and type the location (path) of the Sybase system files in the Start in box.

![]() About the location of Sybase system files
When you install InfoMaker, the installation process automatically
puts the DLLs in a system folder. If you have changed the names
of the folders used for installing, you need to use your names in
this step.
About the location of Sybase system files
When you install InfoMaker, the installation process automatically
puts the DLLs in a system folder. If you have changed the names
of the folders used for installing, you need to use your names in
this step.
The folder path is C:\Program Files\Sybase\Shared\PowerBuilder.
You must specify the name of the drive. If you use backslashes to specify a relative path name, the application will be unable to locate the system files.
Click OK.
Windows modifies the shortcut to your application. This modification enables Windows to find some InfoMaker modules (DLLs) required for running your application.