![]()
Now you add new menu items to the m_salesdb menu.
In the System Tree, double-click m_salesdb.
The Menu painter opens.
In the Menu painter tree view, right click Order and then select Insert Menu Item.
In the blank box that displays, type File and press Enter.
The default name for the File menu, m_file, displays in the Name text box on the General tab of the Properties view.
Right click File and select Insert Submenu Item from the popup menu.
For the submenu item text, type Synchronize and press Enter.
Repeat the previous step but type Sync Options... for the submenu item text.
You will script the Synchronize and Sync Options menu items after you create synchronization objects using the MobiLink Synchronization for ASA wizard.
Repeat the step a third time but type Exit for the submenu item text.
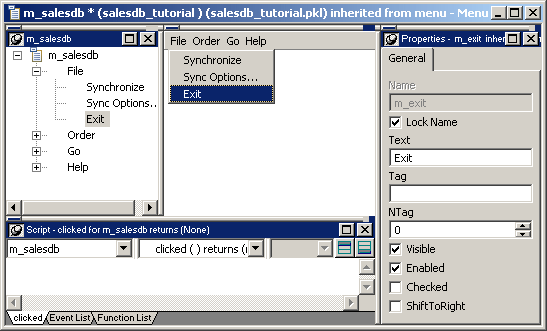
The File menu name properties should be m_file, m_synchronize, m_syncoptions, and m_exit. If any menu name is incorrect, clear the Lock Name check box in the Properties view and correct the menu name. The Menu painter should now look like this:

Double click the Exit menu item in the main menu tree view.
Be sure the drop-down menu at the top of the Script view displays the clicked( ) event for the m_file.m_exit object.
Type the following code in the Script view.
// Terminate application
f_disconn()
Halt Close
Select File>Save to save the changes.
Close the Menu painter.