![]()
The SalesDB application uses one consolidated database on the PC to store all data. A remote database is placed on the Pocket PC device and data is transferred to the consolidated database using MobiLink synchronization. In this lesson, you set up the remote and consolidated databases.
Locate the PocketBuilder 2.5\Tutorial\SalesDB\db directory.
Double-click MakeDB10.cmd.
When the command file finishes running, press any key to continue.
This creates and populates the remote and consolidated databases. The corresponding Data Source Name (DSN) entries are also be created.
![]() SQL Anywhere 10
The MakeDB10.cmd script creates SQL Anywhere
10 database only. If you are using ASA 9 or ASA 8, you must run
the MakeDB.cmd script instead, and you should
use the “Creating a Sales Application” lesson
in the previous version of this book. (That book is available on
the SyBooks Web site.)
SQL Anywhere 10
The MakeDB10.cmd script creates SQL Anywhere
10 database only. If you are using ASA 9 or ASA 8, you must run
the MakeDB.cmd script instead, and you should
use the “Creating a Sales Application” lesson
in the previous version of this book. (That book is available on
the SyBooks Web site.)
If you just installed SQL Anywhere and the MakeDB10.cmd script does not run, you might need to reboot your machine. The script requires the proper SQL Anywhere environment variables to be set.
Now you verify that the databases are created correctly.
From the Start Menu, select Programs>SQL Anywhere 10>Sybase Central.
Close the Tips window and the Welcome to Sybase Central window if either or both of these windows display.
Display the Folders view in the left pane of Sybase Central, then right-click SQL Anywhere 10 in this view, and click Connect in the pop-up menu.
You display the Folders view by selecting View>Folders from the Sybase Central menu. After you click Connect, the Connect dialog box displays.
Select the ODBC Data Source name radio button.
Click Browse and select SalesDB, and then click OK.

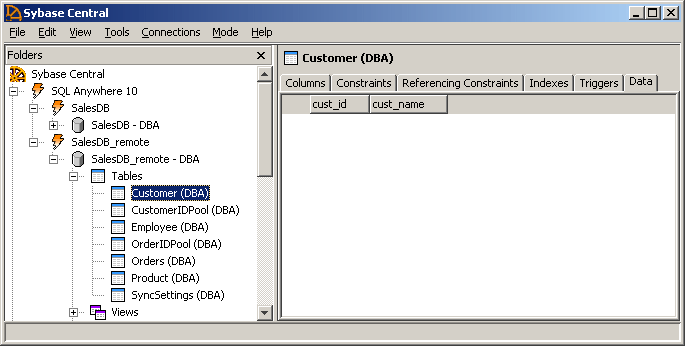
Verify that the SalesDB tables are created and sample data is provided by expanding the Tables node in the Folders view, selecting a table, and, in the right pane of Sybase Central, clicking the Data tab.

Repeat steps 4-6 for the SalesDB_remote remote database.
Notice that there is no data populated for this database.

Data will be transferred to this database during the first synchronization.
The consolidated database does not yet have the required MobiLink synchronization system tables. You add them next with the MobiLink Create Synchronization Model wizard.
In Sybase Central, select the Tools>MobiLink 10>Setup MobiLink Synchronization menu item.
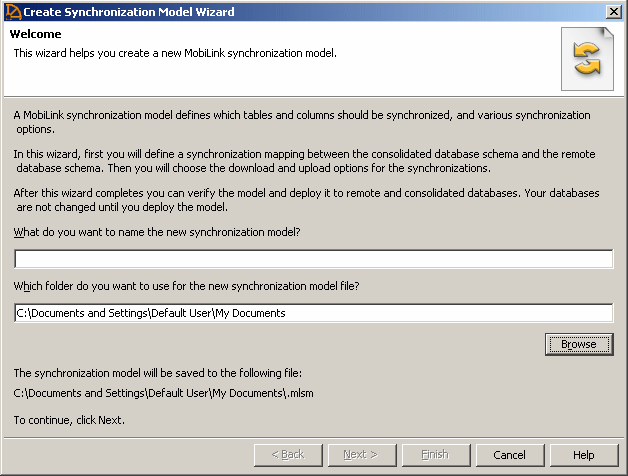
The Create Synchronization Model wizard displays.

Type Sales Tutorial for the name of the synchronization model and click Next.
If the Primary Key Requirements page displays, select all three check boxes and click Next.
On the Consolidated Database Schema page of the wizard, click the “Choose a consolidated database” button.
The Connect to Consolidated Database dialog box displays.
Select the ODBC Data Source Name radio button, select or browse to the SalesDB data source name in the corresponding drop-down list, and click OK.
The SalesDB database already has MobiLink system tables in it. If it did not, a message box would display, prompting you to install MobiLink system tables to the database under the owner ‘DBA’. Clicking Yes in this message box would add MobiLink system tables to the database.
An alternative way to add MobiLink system tables is to run the syncsa.sql script from the Interactive SQL utility while connected to the consolidated database. The syncsa.sql script is installed by the SQL Anywhere 10 setup program in the SQL Anywhere 10/MobiLink/Setup directory.
Note that the database user who runs the setup script is the only user who has permission to change the MobiLink system tables that are required for configuring MobiLink applications.
Click Next.
The Remote Database Schema wizard page displays.
Select the “Yes, use an existing remote database” radio button and click the “Choose a remote database” button.
The Connect to Remote Database dialog box displays.
Select the ODBC Data Source Name radio button, select or browse to the SalesDB_remote data source name in the corresponding drop-down list, click OK, then click Next on the wizard page.
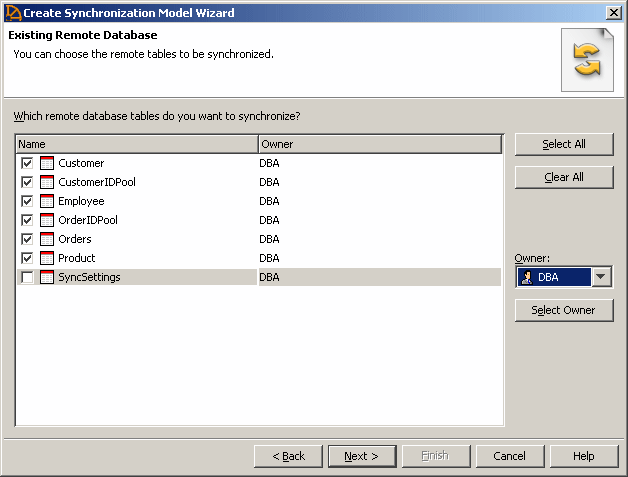
The Existing Remote Database page of the wizard displays.
Click Select All to select all the tables for synchronization, then clear the check box for the Sync Settings table, and click Next.

After you click Next, the Table Synchronization Mapping page displays. It allows you to change the table mappings, as well as the direction of synchronization. In this tutorial, the tables in the remote and consolidated databases have the same names and the synchronization is bidirectional for all tables.
The Download Type page of the wizard displays. A timestamp-based download is the default download type.
Click Next through the remaining wizard pages to examine the remaining defaults, then click Finish.
The Sales Tutorial synchronization model displays under the MobiLink node in the Folders view of Sybase Central. The MobiLink plug-in is set in the Model mode. If you switch to the Admin mode, the synchronization model is no longer is listed in the Folders view, but it is listed again if you switch back to the Model mode.
Click the Events tab of the Sales Tutorial synchronization model in the right pane of Sybase Central.
Default scripts display for five synchronization events and each of the tables that you mapped for synchronization. The scripted events for each table are: download_curser, download_delete_cursor, upload_delete, upload_insert, and upload_update.
The download_cursor event downloads data from the consolidated tables to the remote table if the timestamps indicate the data has changed since the last synchronization. The upload_insert event inserts new data from the remote database into the consolidated database and the upload_update event updates the consolidated database with any changes to existing data that were made in the remote database.
Close Sybase Central.
Click Yes if a dialog box prompts you to save changes to the Sales Tutorial synchronization model.