![]()
Now you use the form to add a new contact to the database.
Click the Run button.

Your finished form displays with data in place. The report on the form gives you a way to see all your contact data.
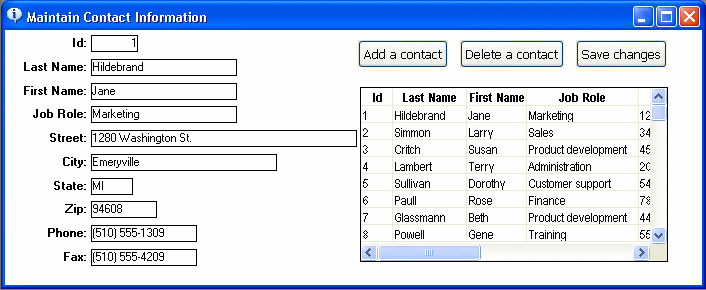
Click the Add a contact button in the form.
An empty form displays. You use this form to enter a new contact.
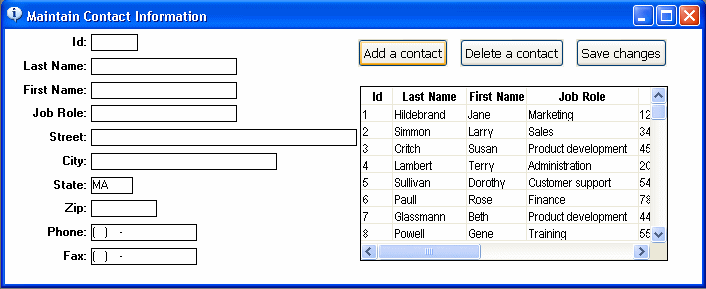
The cursor is in the Id box, but you do not know the next available number. You look in the report to see what number was used last.
In the report window, use the scroll bar to scroll down to the last row of the report and check the value in the Id column.
If the data has not been changed since installation, the value is 60, so the next available number is 61.
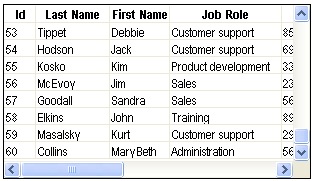
Click the Id column and type 61.

Press Tab and type Clinton for Last Name.
Press Tab and type George for First Name.
Press Tab.
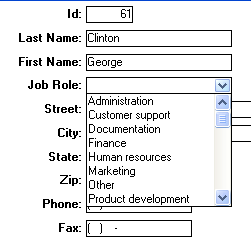
At this point you are on the Job Role box. In this box you cannot type. You must select a job role from a list of possible ones.
In the Database painter, the column was defined to be associated with a DropDownListBox edit style. The extended attribute system tables store this and other information about data.
Click the down arrow on the drop-down list to display the choices.
Select Marketing.
Press Tab and type Pennsylvania Ave for Street.
Press Tab and type Houston for City.
Press Tab and type T and select TX for State (another drop-down list).
Press Tab.
To determine what to enter for Zip, scroll the report until you find another Houston entry.
Then click the Zip box in the form and type the zip code you see in the report.
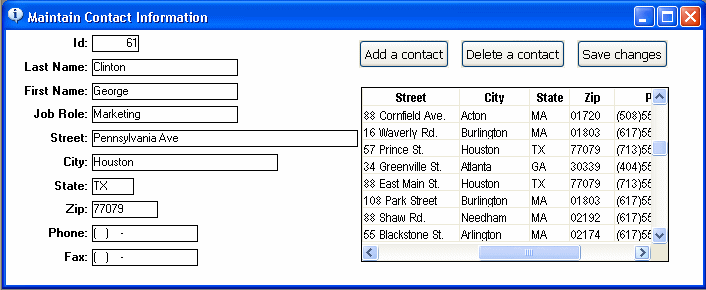
Press Tab and type 7135557833 for Phone.
Notice that you type only the digits. The form formats the phone number. An Edit Mask edit style was defined for this column to handle the formatting. This edit style is stored in the extended attribute system tables.
Press Tab and type 7135554291 for Fax.
This is what your screen should look like now.
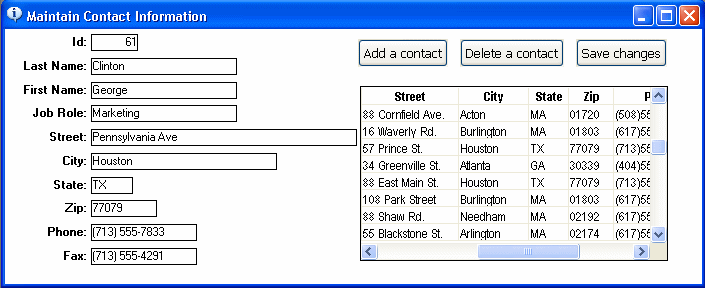
Click the Save changes button in the form to update the database with the new contact.
The database is updated.
Note that the report always displays the information from the database when you start running the form. If you update the database, the report does not show the updates. To update the report, you return to the workspace and rerun the form.
Click the Close button in the PainterBar to return to the Form painter workspace.

Click the Run button again and scroll the report to the 61st row in the report.

Notice that your report has been updated.
Click the Close button in the PainterBar to return to the Form painter workspace.

Select File>Close from the menu bar.
If you have not already saved the current version of the form, you are prompted to save changes.
Click Yes.
The Form painter closes.