Create a Web page and bind it to the business logic in the Java managed bean you just created. Then, test the Web page by running it on the runtime server.
![]() Creating a Web page
Creating a Web page
Select File|New|Web Page from the menu bar.
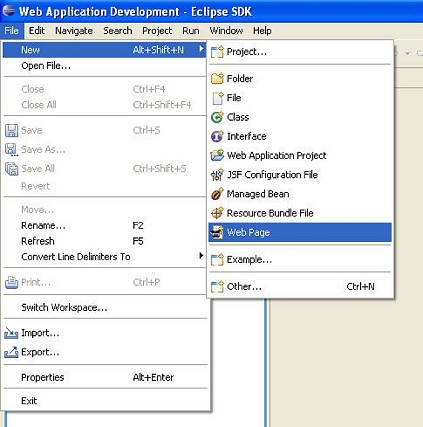
The New Web Page File wizard opens.
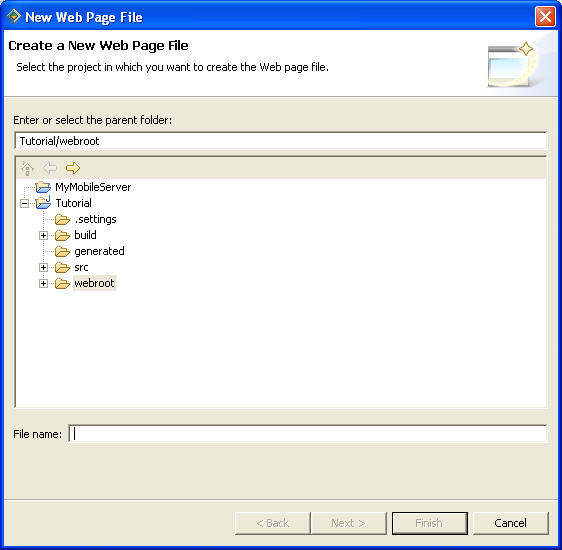
In the File name field,
enter login.
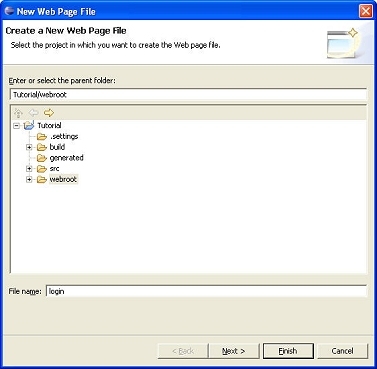
Click Finish to create the login.jsp page.
Sybase WorkSpace creates the login.jsp page and displays its preliminary contents in an editor.
![]() Generating the page layout
Generating the page layout
Generate the layout of the login.jsp page, using the login bean that you just created.
In the Data Binding view, expand the tree to see the contents of loginBean.
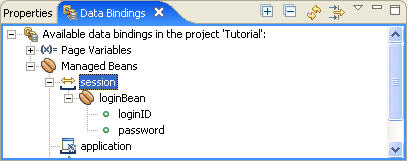
Drag and drop loginBean to the design pane of the login.jsp page to open the Create JSF Components wizard to create JSF components that map to the managed bean’s attributes.
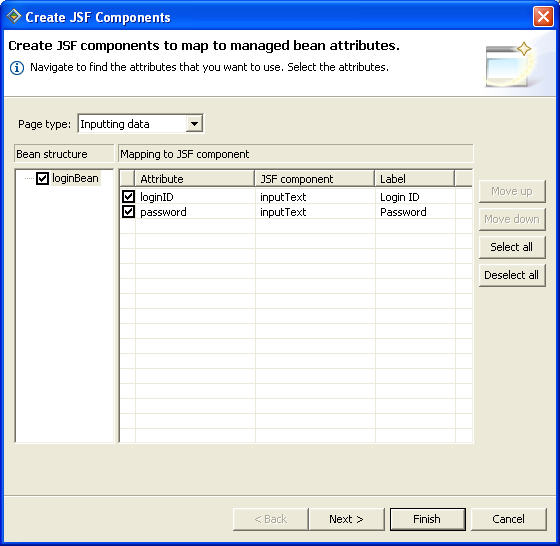
Accept the default settings for the loginID class member.
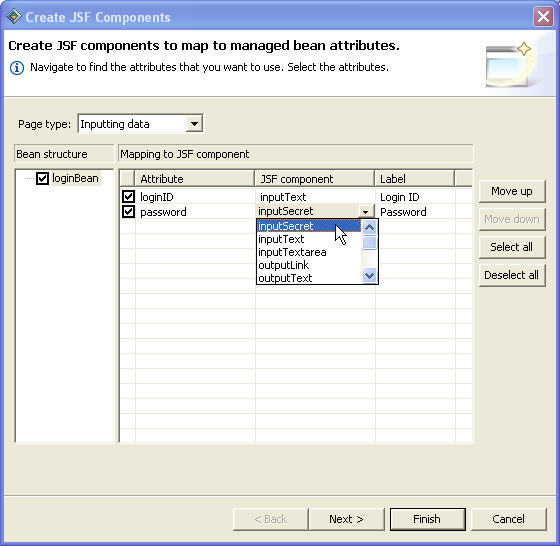
To define the JSF component for the password class member, click the JSF component column in the password row, select inputSecret from the drop-down list, and click Next.
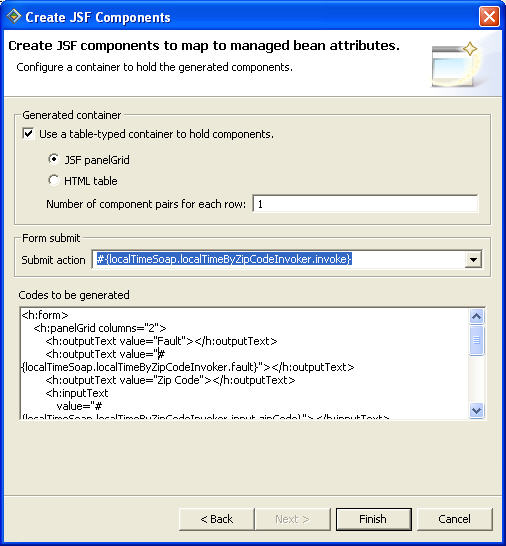
On the next page, accept the defaults and click Finish to generate a panel grid layout.
![]() Adding a messages control
Adding a messages control
Add a messages control to the Web page to display a message when the user inputs do not pass the validation of the business logic.
In the Web Page editor, select the Design tab, if necessary.
Place your cursor in the design pane at the end of the Submit button, and press Enter twice to add two hard breaks in the Web page.
The line breaks appear as <br> <br> in
the Web Page editor’s source pane.
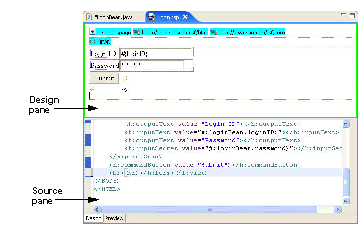
Select Window|Show View|Palette to display the Palette view.
In the Palette view, click to expand the JSF HTML folder and drag and drop the Messages control in the design pane directly below the hard breaks.
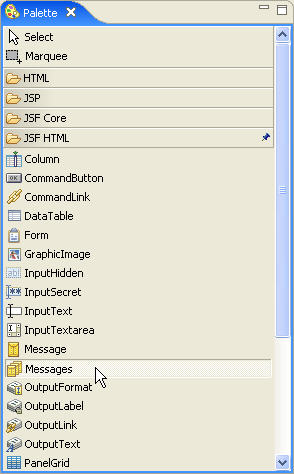
Double-click the Messages control in the design pane to display the Quick Edit tab in the Properties view.
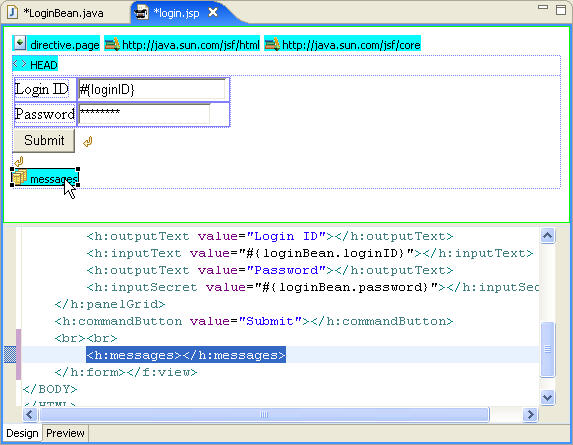
In the ID field, enter Message.

Next, modify the loginBean class, as described in the next section, “Editing the Java file.”
![]() Editing the Java file
Editing the Java file
Add the validateLogin() method to the loginBean class.
In the Data Bindings view, right-click loginBean and select Open to open the LoginBean.java file in the editor.
Add the following import statements under the package statement:
import javax.faces.application.FacesMessage;
import javax.faces.context.FacesContext;
Ignore the warning markers in the marker bar to the left of the Java editor. The warning messages resolve once you add the code for the validateLogin() method.
![]()
If you manually enter the code, the Content Assist tool prompts you with code selection. Double-click the code in the list to select it.
If you want to undo or redo a code entry, select Undo or Redo from the Edit menu in the menu bar.
If error markers appear in the marker bar to the left of the editor, hover over the marker to identify the error. It is recommended that you resolve all errors before continuing.
Add the validateLogin() method into the loginBean class.
public String validateLogin()	{		if (this.loginID.equals("sybase") && (this.password.equals("sybase")))				return "success";			FacesMessage fm = new
			FacesMessage(FacesMessage.SEVERITY_ERROR,
				"Invalid Username / Password","");
			FacesContext.getCurrentInstance().addMessage
				("login button",fm);			return "failed";	}
The formatted code looks like this in the Java editor.
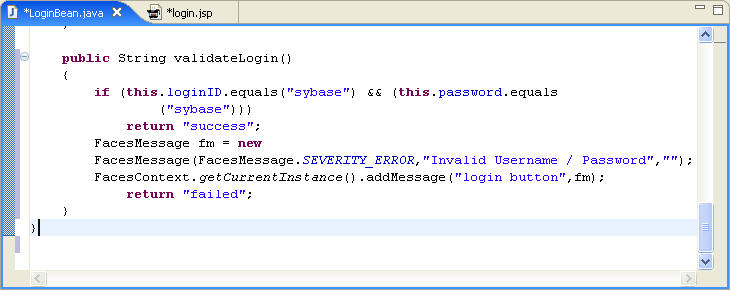
Select File|Save from the menu bar to save the LoginBean.java file.
The Data Bindings view displays the validateLogin() method.
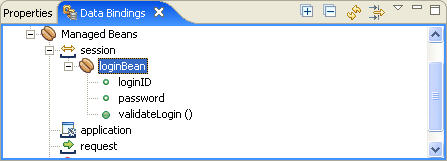
To associate the validateLogin() method with the Submit button, return to the login.jsp file.
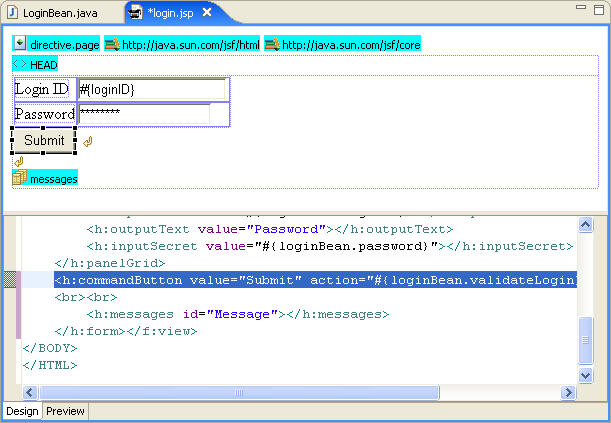
Expand the loginBean session in the Data Bindings view and drag and drop the validateLogin() method onto the Submit button in the design pane.
Sybase WorkSpace adds the following code to the JSP page.
<h:commandButton value="Submit" action="#{loginBean.
validateLogin}"></h:commandButton>
View the following code change in the Web Page editor’s source pane.
![]() Editing the attributes
for the Submit button
Editing the attributes
for the Submit button
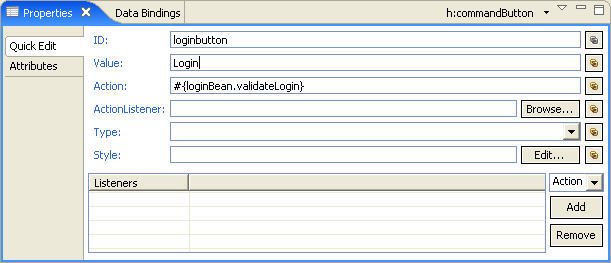
Double-click the Submit button in the design pane to display the Quick Edit tab in the Properties view.
In the ID field, enter loginbutton.
In the Value field, overwrite
the default value, Submit, and enter Login.
Select File|Save from the menu bar to save the login.jsp file.
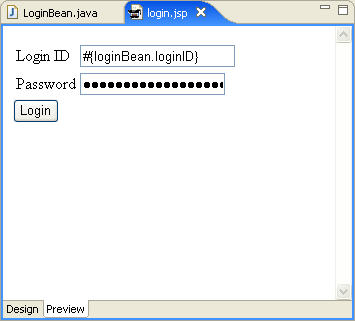
Select the Preview tab at the bottom of the editor to preview the Web page.
![]() Testing the login.jsp Web page
Testing the login.jsp Web page
Run the Web page on the Tomcat 5.0 server.
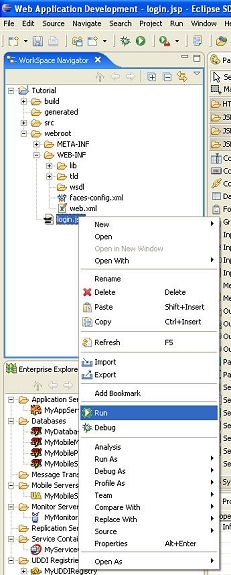
In the WorkSpace Navigator, expand the webroot folder, right-click login.jsp and select Run from the context menu.
![]() If you receive an error, compile the Java code. In the WorkSpace Navigator view,
right-click Tutorial and select Build from
the context menu.
If you receive an error, compile the Java code. In the WorkSpace Navigator view,
right-click Tutorial and select Build from
the context menu.
In the Run On Server wizard, select Choose an existing server, and select Tomcat v.5.0 Server @ localhost from the list.
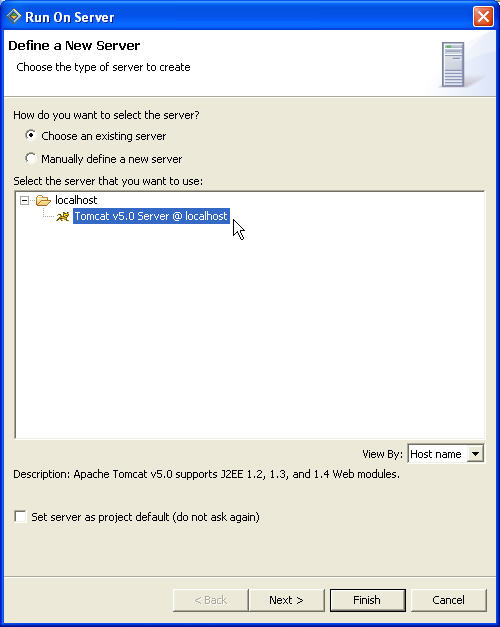
If you do not see an existing server, you must define one. See “Starting the Tomcat 5.0 server” for step-by-step instructions.
Click Finish.
The Apache Tomcat server starts, and the JSF Page Template view displays your Web page.
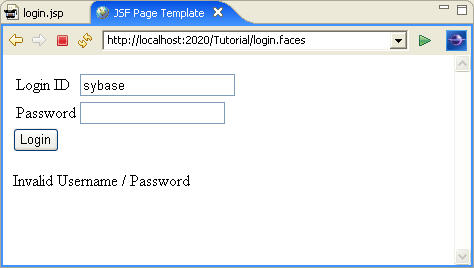
To test the Web page in the browser, enter anything in the Password field and click Login.
The JSF Page Template view displays Invalid
Username/Password. Once you create
a service managed bean and link its associated JSF page with this
one in subsequent lessons in this tutorial, the password functionality
works.
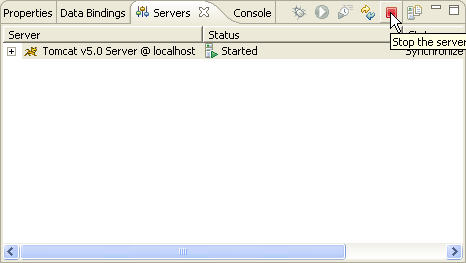
Click the Stop the server icon in the Servers view to stop the server before continuing.
You are now ready to create a service managed bean that displays the local date and time for a specified zip code. Continue to Chapter 4, “Using Service Managed Beans.”
![]() Starting the Tomcat 5.0
server
Starting the Tomcat 5.0
server
If you try to run a JSP page and notice that you do not have a previously defined server, you can manually define and start the Tomcat 5.0 server necessary to run and test the JSP file.
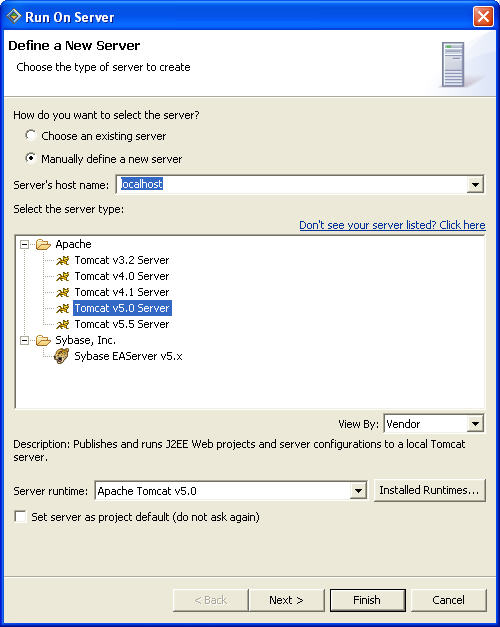
In the Run On Server wizard, click Manually define a new server.
In the Apache folder, click Tomcat v5.0 Server and click Next.
In the Available projects list, select Tutorial and click Add to add the project to the Configured projects list.
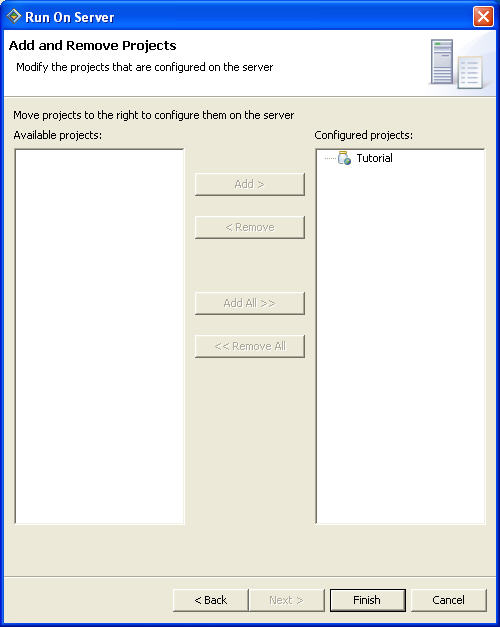
Click Finish.
The Servers view displays the server
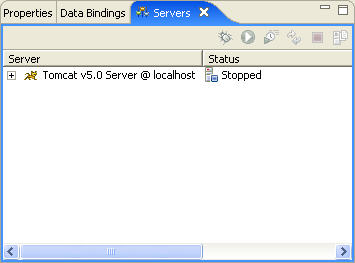
You are now ready to run the JSP file on the server.
To run the login.jsp page, see “Testing the getTimeService.jsp Web page”.
To run the getTimeService.jsp page, see “Testing the getTimeService.jsp Web page”.