Next, create a Web page, bind it to the business logic in the service managed bean you just created, generate the Web page layout, and then test the Web page by running it on a server.
![]() Creating the Web page
Creating the Web page
Select File|New|Web Page from the main menu.
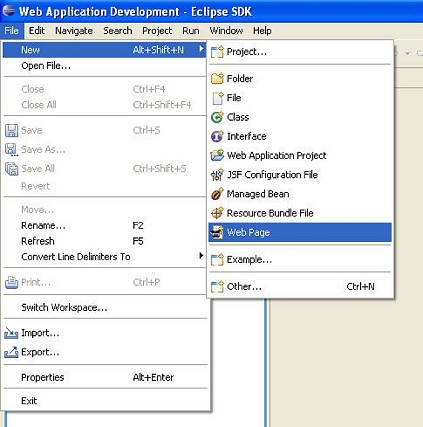
The New Web Page File wizard opens.
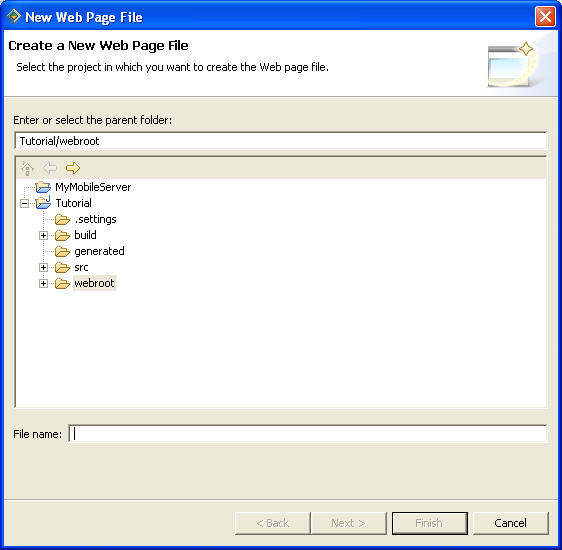
In the Create a New Web Page File page, make sure the parent folder is Tutorial\webroot.
In the File name field,
enter getTimeService.
Click Finish to create the getTimeService.jsp page.
Sybase WorkSpace creates a getTimeService.jsp file with default JSF contents and opens it in the Web Page editor.
![]() Mapping the JSF components to the beans attributes
Mapping the JSF components to the beans attributes
Map the appropriate JSF components to the service managed bean attributes and then generate the layout of the getTimeService.jsp page using the service managed bean that you just created..
In the Data Bindings view, drag and drop the LocalTimeSoap bean onto the design pane of the getTimeService.jsp page to open the Create JSF Components wizard to create JSF components that map to the managed bean’s attributes.
As required, expand the wizard and the columns to see the entire attribute name and/or label.
Move the Fault class member to the bottom of the list.
Select the row and click Move Down multiple times until the Fault class member is at the bottom of the list.
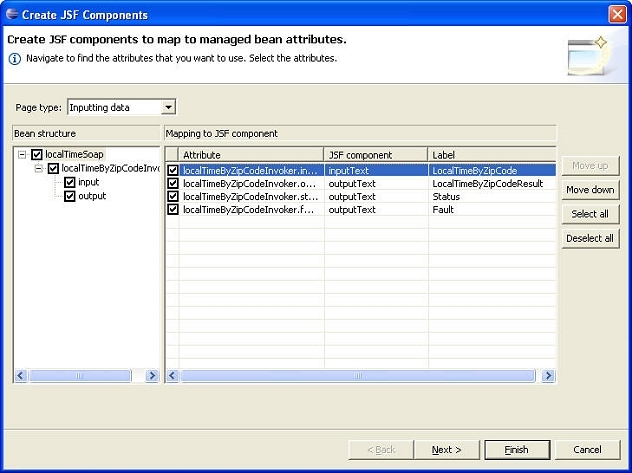
Accept the default values in the Label field and click Next.
Make sure that JSF panelGrid is selected as the generated container, accept the remaining default values, and click Finish.
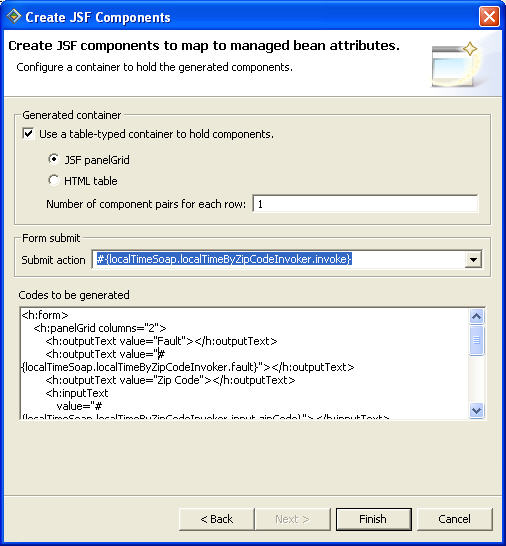
The Create JSF Components wizard generates a Web page grid with ZipCode as the input value and Local Time as the output value.
Select File|Save from the main menu bar to save the getTimeService.jsp page.
Select the Preview tab at the bottom of the editor to preview the Web page in the Web Browser view.
![]() Testing the getTimeService.jsp
Web page
Testing the getTimeService.jsp
Web page
In the WorkSpace Navigator, expand the webroot folder, right-click the getTimeService.jsp, and select Run from the context menu.
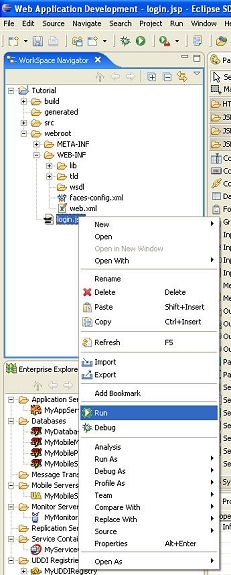
In the Run On Server wizard, select Choose an existing server, and select Tomcat v.5.0 Server @ localhost from the list.
![]() If you completed all previous tutorials in this guide,
you already defined the Tomcat server. However, if it does not appear
on the list, see “Starting the Tomcat 5.0 server” for step-by-step instructions.
If you completed all previous tutorials in this guide,
you already defined the Tomcat server. However, if it does not appear
on the list, see “Starting the Tomcat 5.0 server” for step-by-step instructions.
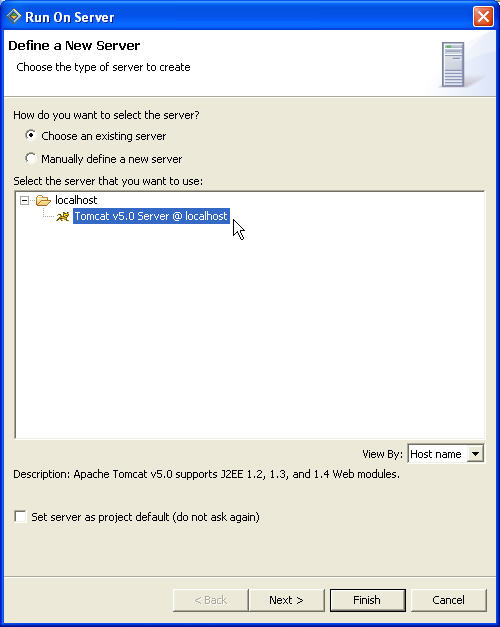
Click Finish.
The Apache Tomcat server starts, and the JSF Page Template view displays your Web page.
To test the Web page, enter a zip code in the Zip Code field, and click Submit.
View the results in the Local Time By Zip Code Result field.
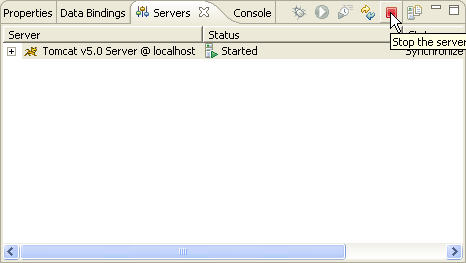
Click the Stop the server icon in the Servers view to stop the server before continuing.
You are now ready to link the two Web pages you previously created, login.jsp and getTimeService.jsp. Continue to Chapter 5, “Linking Web Pages.”