![]()
![]()
![]()
![]()
Now you extend the basic definitions of the columns in the table.
The following table summarizes how you extend the column definitions of the contact1 table columns.
Column name |
What you do to extend its definition |
|---|---|
id last_name first_name |
Nothing. |
title |
Define a DropDownListBox edit style of job roles, change the column header and label to Job Role, and enlarge the display width of the column to 1.5 inches. |
street city |
Nothing. |
state |
Assign the DropDownDataWindow edit style for state to the state column. Set the default value of state to MA. |
zip |
Nothing. |
phone fax |
Define an Edit Mask edit style for a phone number and apply it to phone and fax. |
![]() About extended attribute information
InfoMaker stores extended attribute information in the extended
attribute system tables and uses it to display and validate data
in forms and reports. In the Report painter or Form painter, you
can override whatever you specified in the Database painter, which
is where you are now.
About extended attribute information
InfoMaker stores extended attribute information in the extended
attribute system tables and uses it to display and validate data
in forms and reports. In the Report painter or Form painter, you
can override whatever you specified in the Database painter, which
is where you are now.
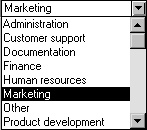
Now you define a DropDownListBox edit style that has the valid job roles for the title column. When you have finished, this is what it looks like in a form.
Select View>Layouts>(Default) from the menu bar.
Click the Extended Attributes tab to bring the view to the front.
In the Extended Attributes view, display the pop-up menu for Edit Styles and select New.
Edit Style settings display in the Object Details view.
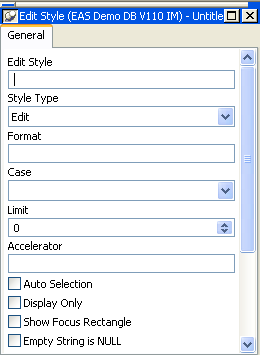
Enter the name JobRoles1.
Select DropDownListBox in the Style Type box.
Check Sorted to alphabetize your entries.
Check Vertical Scroll Bar to display a vertical scroll bar on your list.
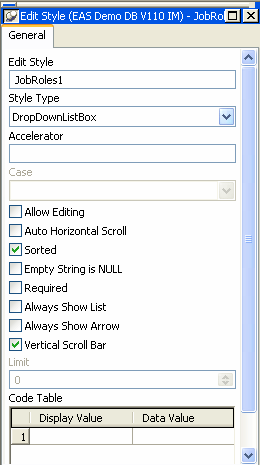
Enter the Display Values and Data Values shown in the table below.
Be sure to use lowercase for the data values.
To enter each pair of values, type the values and press the Tab key.
For the last pair of values, do not press Tab.
Display Value |
Data Value |
|---|---|
Sales |
sa |
Customer support |
cs |
Product development |
pd |
Administration |
ad |
Training |
tr |
Documentation |
do |
Marketing |
ma |
Human resources |
hr |
Finance |
fi |
Other |
ot |
Select Save Changes from the pop-up menu.
InfoMaker adds the JobRoles1 edit style to the extended attribute system tables in the database and lists it as one of the available edit styles in the Extended Attributes view.
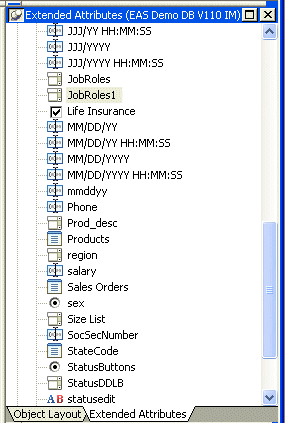
Expand the tree view of Edit Styles by clicking the plus (+) sign.
Use the scroll bar to scroll down to the JobRoles1 Edit Style.
Now that JobRoles1 is defined in the extended attribute system tables, you can use it for any appropriate column in any table in the database. You are going to assign it to the title column in the contact1 table.
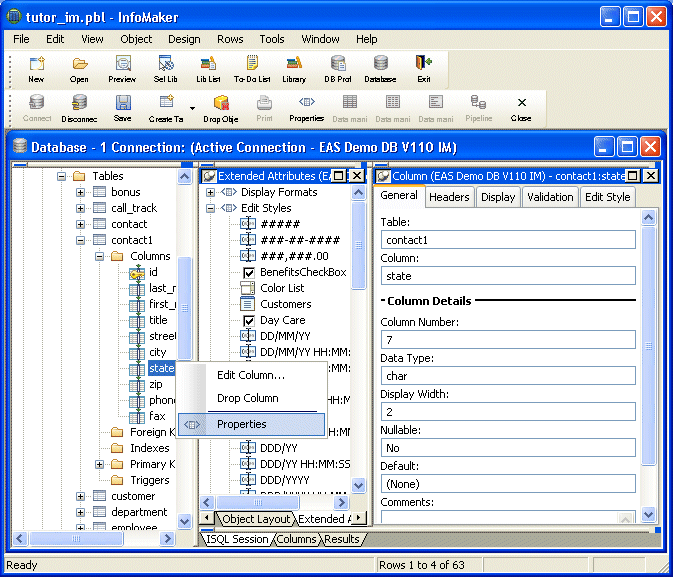
Expand EAS Demo DB V110 IM in the Objects view to display Tables and then the Columns in the contact1 table.
Display the pop-up menu for the title column and select Properties.
The Object Details view now includes the properties dialog boxs for the title column.
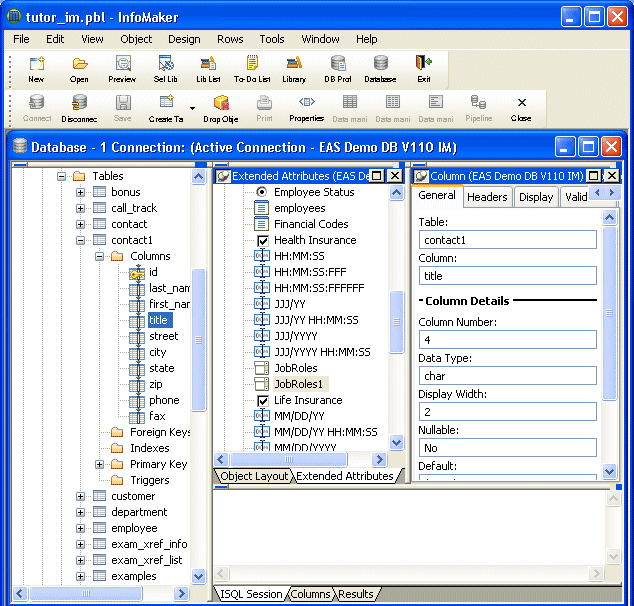
If the Edit Style tab is not visible, use the arrows in the upper-right corner of the Object Details view to display the Edit Style tab.
Click the Edit Style tab to bring it to the front.
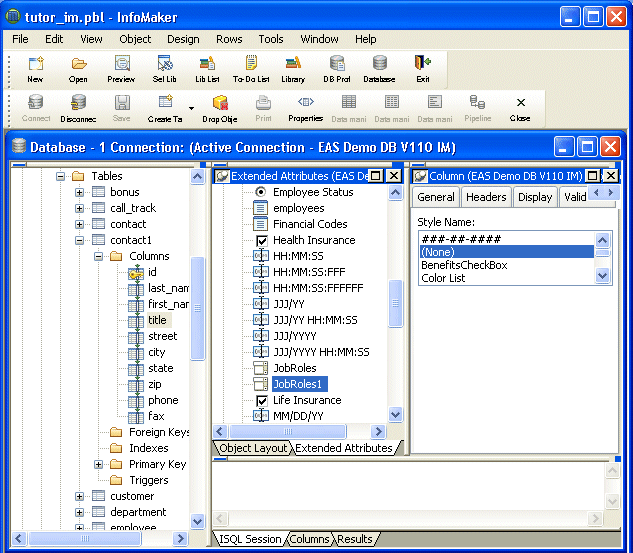
Scroll the list of edit styles until JobRoles1 displays.
Click it to apply the edit style JobRoles1 to the title column.
Select File>Save from the menu bar.
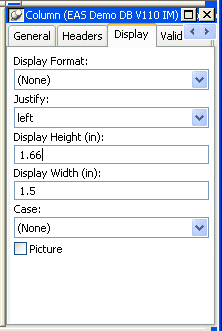
Now you change the label and header text for the title column. The text you supply appears on forms and reports you create.
The column name is title, but the text you want to display is Job role. Also, you change the display width to 1.5 inches. The internally stored data value is only two characters, but the values you intend to display are longer.
The title column should still be current (if not, display its pop-up menu and select Properties). Click the Headers tab to bring the Headers property page for the title column to the front in the Object Details view.
All the extended attribute information for a column is definable using the various pages in the Object Details view.
Type Job Role in the Label box.
Type Job Role in the Heading box.
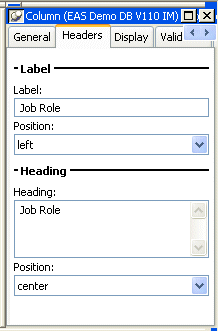
Click the Display tab to bring the Display page to the front.
Type 1.5 in the Display Width box.
Select File>Save from the menu bar.
InfoMaker adds the extended attribute information for the column to the extended attribute system tables.
For the state column, you assign an edit style that includes all the state names (as well as the provinces of Canada). Then when you enter information into this field, you pick from a list of states. You also set the initial value to MA, since many of your contacts are in Massachusetts.
In the Extended Attributes view, display the pop-up menu for Edit Styles and select New.
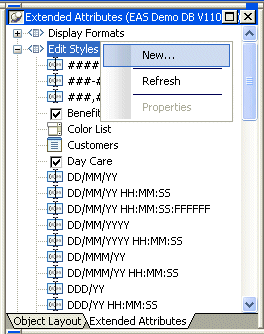
Edit Style settings display in the Object Details view.
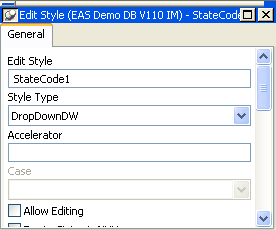
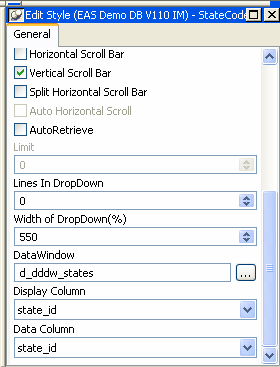
Type StateCode1 in the Name box.
Select DropDownDW from the Style Type drop-down list.
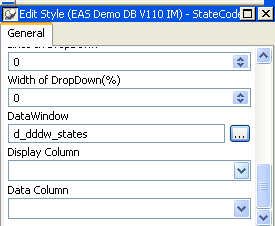
Scroll down to the bottom of the view and click the browse button next to the DataWindow box.
Select d_dddw_states from the DataWindow list.
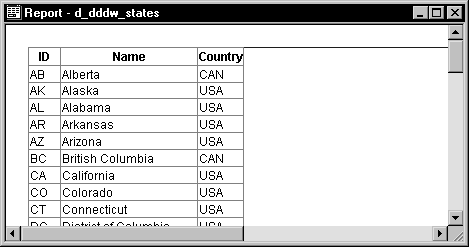
The StateCode1 edit style uses a report (DataWindow) named d_dddw_states. The report gets its values from the state table.
![]() About DropDownDataWindow edit styles
A DropDownDataWindow edit style gets its values from a report
that it references. The report gets its values from the database.
About DropDownDataWindow edit styles
A DropDownDataWindow edit style gets its values from a report
that it references. The report gets its values from the database.
This is what the d_dddw_states report looks like.
Select state_id from the list for Display Column and for Data Column.
Type 550 for the Width of DropDown.
Select Vertical Scroll Bar.
Select Save Changes from the pop-up menu to accept the definition of the StateCode1 edit style.
InfoMaker adds the StateCode1 edit style to the extended attribute system tables, where it is available to be assigned to any appropriate column in the database. Now you assign it to the state column in the contact1 table.
Display the pop-up menu for the state column in the contact1 table and select Properties.
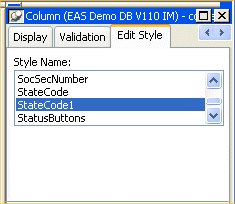
In the Column Properties view, select the Edit Style tab.
Select StateCode1 for the edit style to assign to the state column.
(If the StateCode1 edit style is not listed, select View>Reset View. This refreshes the list of edit styles.)
This assigns the StateCode1 edit style (which includes 63 entries—states, territories, and possessions of the United States and provinces of Canada) to the state column in the contact table. The values that this edit style displays and the values that it stores are state postal abbreviations (such as MA for the state of Massachusetts).
Select File>Save from the menu bar.
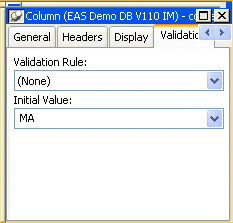
Click the Validation tab.
Make sure the Validation Rule setting is (None).
Type MA in the Initial Value box.
This assigns an initial value of MA to the state column.
The Validation page lets you create and assign a validation rule to a column and enter an initial value for the column.
You are not going to assign a validation rule. You have handled validation by forcing the user to select from exactly 63 valid values presented in the States drop-down DataWindow.
![]() About column validation rules
You can use column validation rules to express requirements
for entries in a column. For example, you could define a rule for
a salary column that requires salaries to be
greater than $15,000 and less than $100,000.
About column validation rules
You can use column validation rules to express requirements
for entries in a column. For example, you could define a rule for
a salary column that requires salaries to be
greater than $15,000 and less than $100,000.
When you assign a column validation rule to a column, no one can enter a value that breaks the rule.
Select File>Save from the menu bar.
InfoMaker saves the extended attributes you just defined for the state column in the extended attribute system tables.
Now you define an Edit Mask edit style to display phone and fax numbers for both viewing and editing.
In the Extended Attributes view, display the pop-up menu for Edit Styles and select New.

Edit Style settings display in the Object Details view.
Type TelephoneNumber1 in the Name box.
Select EditMask in the Style drop-down list.
Delete xxx and type (###) ###-#### in the Mask box.
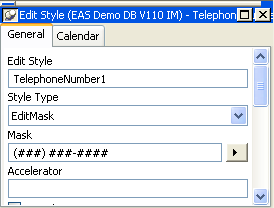
The pound signs (#) in the Mask box are placeholders for numbers. Only numbers 0 through 9 can be entered in each of these positions. Parentheses, the hyphen, and the space are where you want them to display. When you type a telephone number in the Test box, you can see the effects of the edit mask.
Select Save Changes from the pop-up menu to accept the definition of the Edit Mask edit style named TelephoneNumber1.
InfoMaker adds the TelephoneNumber1 edit style to the extended attribute system tables in the database and lists it as one of the available edit styles in the Extended Attributes view.
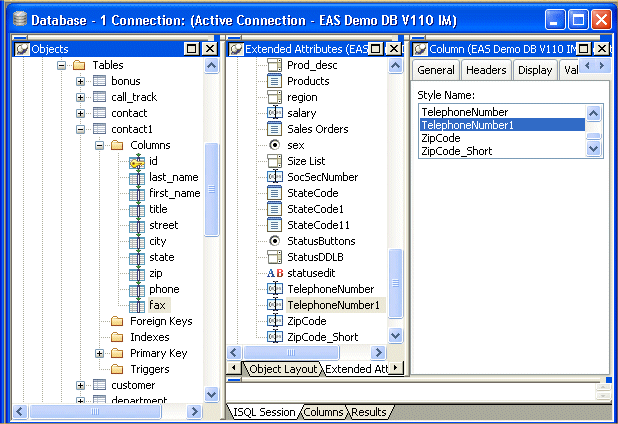
Display the pop-up menu for the phone column and select Properties.
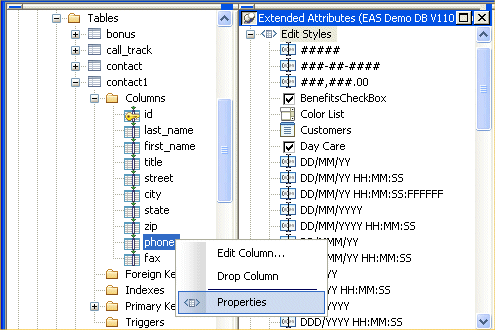
In the Object Details view, click the Edit Styles tab, then scroll the list and select the TelephoneNumber1 edit style.
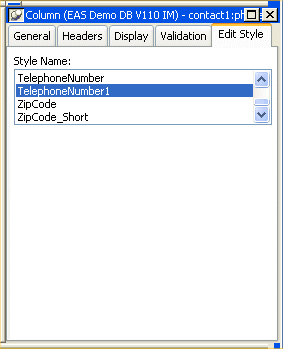
This assigns the TelephoneNumber1 edit style to the phone column. Now you use the same edit style with the fax column. Once you have created an edit style, it is available for any column.
Display the pop-up menu for the fax column and select Properties.
InfoMaker prompts you to save the changes you just made in assigning the TelephoneNumber1 edit style to the phone column.
Select Yes.
In the Object Details view for the fax column, select the Edit Style tab and the TelephoneNumber1 edit style.
Select File>Save from the menu bar.
Now you have finished extending the definitions of your columns. Next you add data to the table.
