![]()
![]()
![]()
![]()
![]()
First you learn about using the Library painter to open forms, reports, and queries. When you open one of these, you automatically go to the appropriate painter. (This is also true for pipelines, but you do not work with pipelines in this tutorial.)
![]() If you have not installed the Form painter
A few of the steps in this tutorial and the next one refer
to forms. Just skip those steps. You can do the tutorials without
the forms.
If you have not installed the Form painter
A few of the steps in this tutorial and the next one refer
to forms. Just skip those steps. You can do the tutorials without
the forms.
Click the Library button in the PowerBar.
The Library painter workspace displays.
Select View>Most Recent Object from the menu bar.
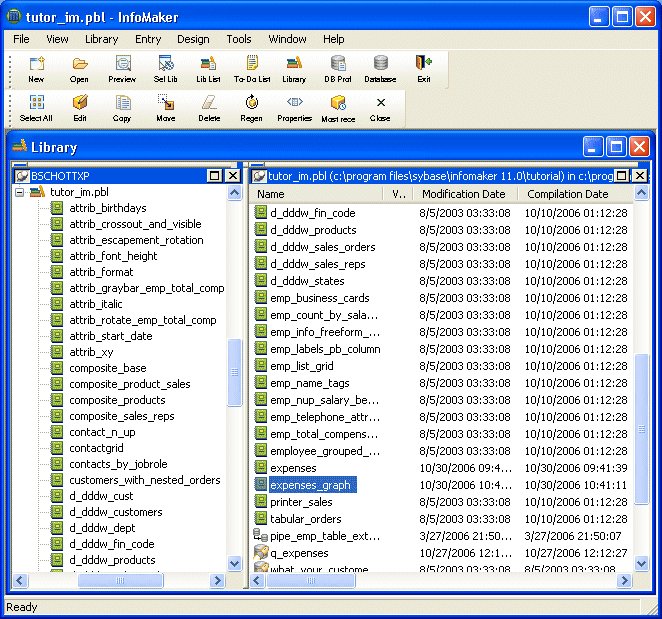
The painter lists the forms, queries, reports, and pipelines in the current library and selects the object you worked on most recently. When you install InfoMaker, the current library is the InfoMaker sample library (tutor_im.pbl).
The list includes many samples as well as the form, query, and reports you created earlier.
Scroll the list to the bottom until you see the form contact_maintenance, which is the form you created earlier.
Double-click the form.
The form displays in the Form painter. Accessing your form by double-clicking its name in the Library painter is the same as opening the form in the Form painter.
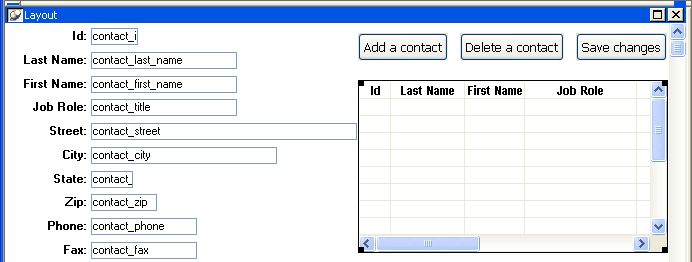
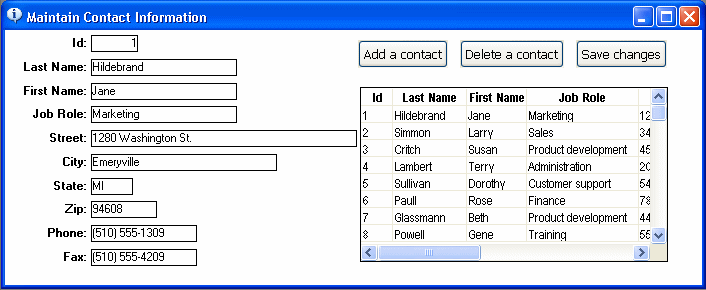
Click the Run button in the PainterBar.

Your form runs.
Click the Close button in the PainterBar.

The running form closes.
Select File>Close from the menu bar.
You return to the Library painter. Now you look at some other forms.
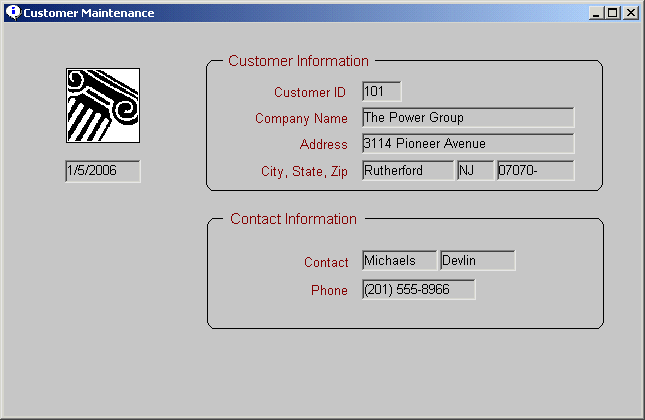
Double-click the form customer_maintenance.
Click the Run button in the PainterBar.
This form is for maintaining customer information.
Click the Close button to return to the Form painter workspace.
Select File>Close from the menu bar to return to the Library painter.
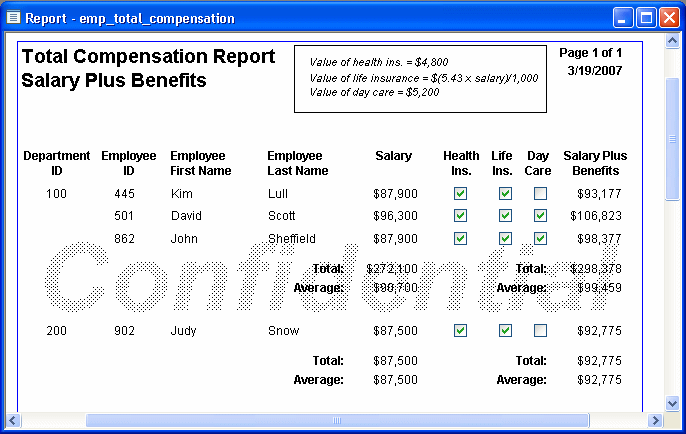
Double-click the report emp_total_compensation.
The report displays in the Report painter.
Scroll the report in the Preview view.
Select File>Close from the menu bar.
The Report painter closes and the Library painter displays.
