![]()
![]()
![]()
![]()
![]()
Now you copy a form, a query, and two reports into the library on the shared drive. Then you can make them available to another InfoMaker users who can use them as is or modify them as needed.
Remember that the other users must also be able to access the database. All InfoMaker users have SQL Anywhere and the contact table. That means other InfoMaker users can run the form, query, and reports you have created in this tutorial.
Drag tutor_im.pbl from the Tree view in the left pane to the List view in the right pane.
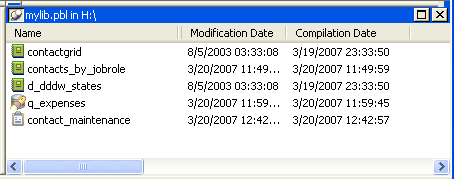
In the List view of the Library painter, click contactgrid (scroll the list in the Library painter as necessary).
Press Ctrl and click contacts_by_jobrole.
Press Ctrl and click d_dddw_states.
Press Ctrl and click q_expenses.
Press Ctrl and click contact_maintenance.
The five objects you selected are highlighted. You can copy, move, or delete them. You are going to copy them to the shared drive.
![]() Tip
You can sort the view by modification date to make it easier
to locate objects you have just created or changed.
Tip
You can sort the view by modification date to make it easier
to locate objects you have just created or changed.

![]() Why you include the report named d_dddw_states
The contact_maintenance form
uses a DropDownDataWindow edit style for the state column.
That edit style uses the report named d_dddw_states, which
must be present in the library when you run the form.
Why you include the report named d_dddw_states
The contact_maintenance form
uses a DropDownDataWindow edit style for the state column.
That edit style uses the report named d_dddw_states, which
must be present in the library when you run the form.
If you create a new library for objects you create using the EAS Demo DB, you need to copy the eight reports that begin with d_dddw from the tutor_im.pbl to the new library. These reports go with the DropDownDataWindow edit styles that the tables in the EAS Demo DB use.
There is a way to make the reports centrally available. See the InfoMaker User’s Guide.
Click the Copy button in the PainterBar.

The Select Library dialog box displays.
Change drives to the shared drive.
Select mylib.pbl.
Click Open.
InfoMaker copies the selected objects to the shared drive. It takes a minute or so. You can see messages about the copying at the bottom of your screen.
Navigate to the shared drive.
The Library painter lists the contents of mylib.pbl, the current library.