This section describes how to create a master application called RemedyHPDList, using a Remedy AR system 7.0.x HelpDesk Web service example. See “Creating the master application” for detailed procedures, and the UA 8.0 Developer’s Guide for additional information about Web Service Element.
![]() Creating the RemedyHPDList application
Creating the RemedyHPDList application
From Mobile Web Studio, select Applications in the left pane, select New in the Application Manager Status menu, and click the New button to launch Application Builder.
Click the down arrow to the right of Add, and select Web Service Element.
In the Web Service Element Definition window, make sure the WSDL option is selected, then identify the Web service to use:
In WSDL URL, enter:
http://itsm7rtm.sybase.com/arsys/WSDL/public/itsm7rtm/HPD_Incident
Interface_WS
![]() You must replace the string itsm7rtm with
the host name and the middle-tier server specific to your installation.
You must replace the string itsm7rtm with
the host name and the middle-tier server specific to your installation.
Click Get Method. Several methods are returned.
In Method, select HPD_IncidentInterface_WSPortType:HelpDesk_QueryList_Service from
the list.
Make sure Enable Grid Rules is selected.
In the Web Service Element Definition window, define an XSLT template, which transforms output from XML format to the grid format required to build mobile applications:
Next to Content XSLT, click Create.
In Web Services Output XSLT Template Customization, enter:
Name – enter a name such as RemedyHPDList.
Roles – click Add All to add all the roles to Assigned Roles.
Select Output Parameters for Display – highlight
a parameter, such as getListValues.Last_Name.
The value displays in Update Output Display Name.
Select Node Level That Contains One or More Child Records – click Select.
The Select Node Level window displays. Select getListValues,
and click OK. The selected value displays in the field.
In the Web Services Output XSLT Template Customization Window, click Save, then click OK in the confirmation window.
In Web Service Element Definition window, enter input parameter values:
Click Input to display input parameters.
Make entries in the input parameter fields for which
you want to establish default values. This example uses Demo for
userName, and 20 for maxLimit.
Click Next.
When you are asked if you want to proceed even though the parameters are not all filled in, click OK.
In the Define window, select Records Contain Labels,
accept 1 to indicate the
first row is a header row and not a data row, and click Next.
In the Filter window, click Next.
In the Configure Parameters window, configure the input parameters:
Configure – select the boxes for the parameters you want. For this example:
_HEADER.AuthenticationInfo.userName
HelpDesk_QueryList_Service.maxLimit
![]() The selected parameters move to the bottom of the list
as they are selected, in the order selected.
The selected parameters move to the bottom of the list
as they are selected, in the order selected.
Display Name – for the selected parameters, change the name to make it shorter or easier to read:
_HEADER.AuthenticationInfo.userName – change
to userName.
HelpDesk_QueryList_Service.maxLimit – change
to maxLimit.
Optional. You could make additional modifications to the configuration parameters using Table 2 as a guide. For this example, accept the default values.
Select Next.
The Preview window displays. In Element Name, enter RemedyHPDList and
click Finish.
In Application Builder, click Save.
On the Finish window, make these entries (accept the defaults for all other fields):
Mobile tab Select Make Available For Disconnected Mobile Devices.
Roles tab Click Add All to add all roles to this application.
Click Finish to save the application, and click OK to confirm.
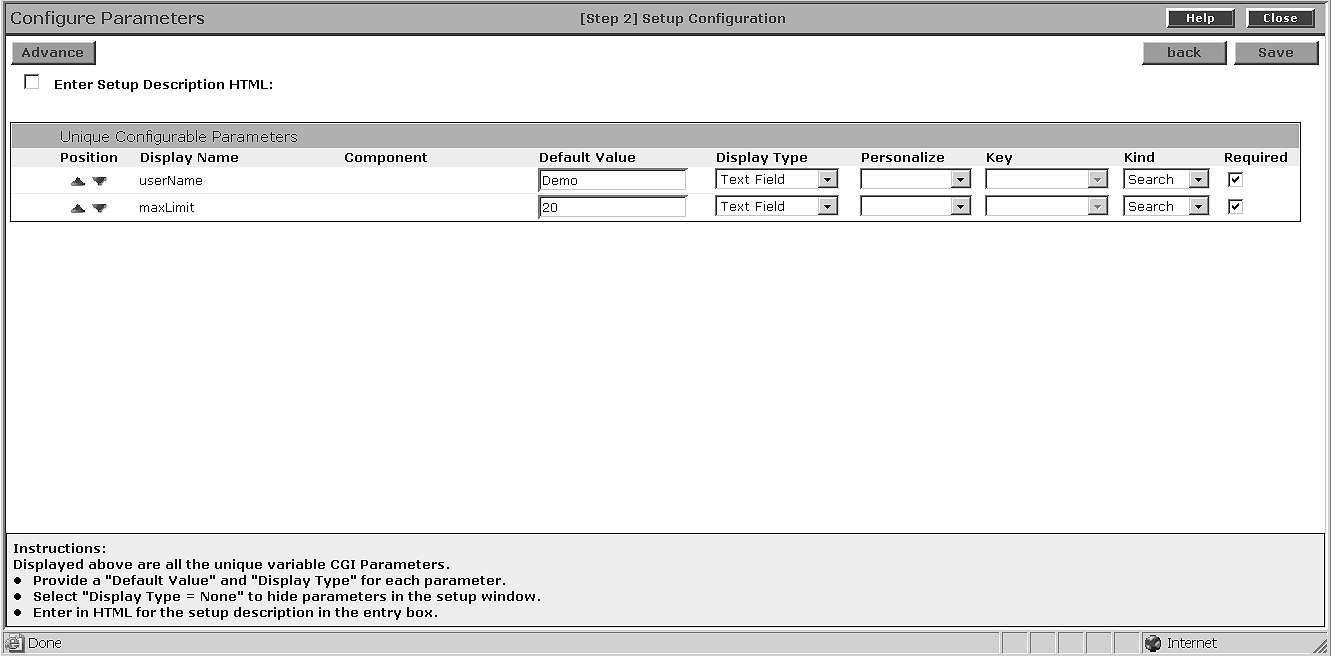
Optional. In Application Builder, select Params, then click Next to view the parameter settings. The Configure Parameters window displays, as shown in Figure 19. Click Close to exit Configure Parameters.
![]() If you choose to change the parameter settings, be sure
to click Save, then return to Application Builder and click Save,
and OK to confirm.
If you choose to change the parameter settings, be sure
to click Save, then return to Application Builder and click Save,
and OK to confirm.
Figure 19: RemedyHPDList parameters – Remedy AR 7.0.x example

In Application Builder, click Close in the upper-right corner to close the window.
When you return to the Mobile Web Studio main window,
select New from the Application Builder Status menu. The RemedyHPDList application displays
in the detail pane.
In Mobile Web Studio, right-click the RemedyHPDList application
in the detail pane, and select Approval Status | Approved.
Click OK to confirm.
Select Approved from the Application Manager Status
menu. You see the newly approved RemedyHPDList application
in the detail pane.
Optional. Select RemedyHPDList and
click Preview to view the application. Required fields are marked
with an asterisk. Close the window to exit.