![]()
![]()
![]()
![]()
In this lesson, you configure a connection profile to a generic JMS messaging transport provider. Before you begin, you must complete “Lesson 1: Specifying the location of generic JMS client JAR files”.
Select Window|Show View|Enterprise Explorer.
In the Enterprise Explorer, right-click the Message Transports folder and select New.
When the New Connection Profile dialog box opens, select JMS and click Next.
On the New JMS Connection Profile page,
enter a Name for this connection profile;
for example MyJMSConnectionProfile. You
can also type an optional description for the JMS provider.
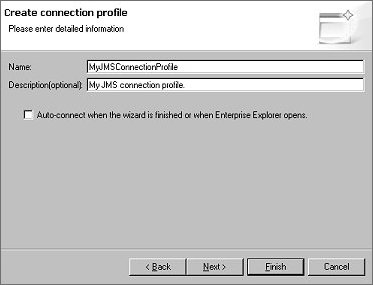
Click Next.
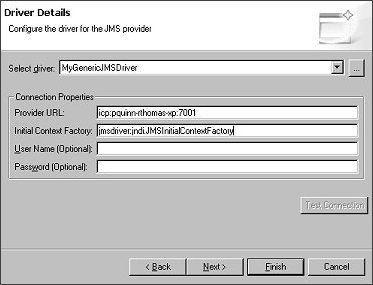
On the Driver Details page, choose the name of the driver that you specified in “Lesson 1: Specifying the location of generic JMS client JAR files” from the Select driver list, fill in the remaining fields as appropriate, then click Next.
When the Queues Contained Within page opens, specify the connection parameters for a queue hosted by the provider. The screen below shows the connection parameters for a BEA WebLogic server hosted queue; choose the connection parameters for a queue hosted by the particular generic JMS provider you are using:
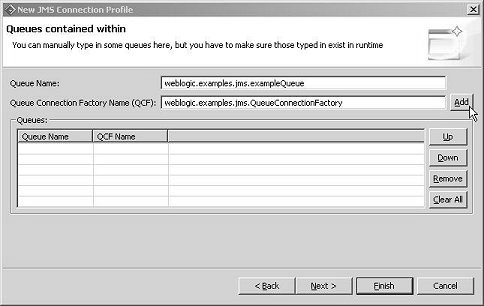
Click Add. Continue to add any other queues as necessary, and click Finish.
You have specified the connection parameters for a queue hosted by a generic JMS transport provider. Now you can create a message service from this queue definition.
