This lesson teaches you how to add your Web page to a page group. Only pages that belong to a page group can be deployed to a portal.
Select File|New|Other from the WorkSpace main menu bar to open the wizard.
Select Sybase/Mobile Development/Mobile Page Group and click Next.
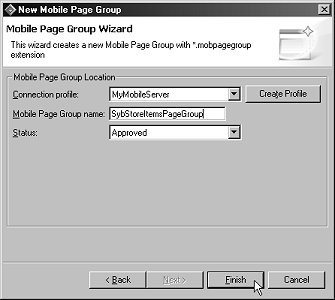
When the Mobile Page Group Wizard opens, complete these options:
Connection Profile – select MyMobileServer as the connection profile to use when deploying this page group.
Mobile Page Group Name – enter SybStoreItemsPageGroup.
Status – select Approved as the status to give this page group.

Click Finish.
You have created a new mobile page group. Now you will add the page to the new page group.
Select the Layout tab.
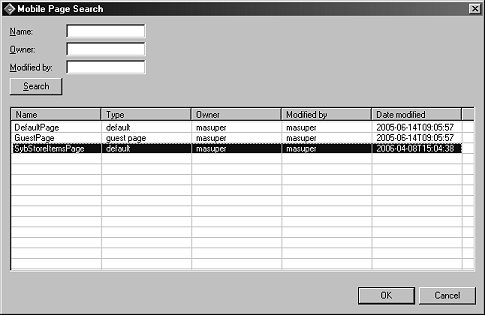
Click Add to open the Mobile Page Search wizard.
Click Search to display all approved mobile pages.

Select SybStoreItemsPage and click OK.
Select File|Save from the main menu to save the page. The page now appears in the Mobile Pages/Approved folder.
Now you can deploy the new page group, which allows access to the mobile application by browsing the portal.
In the WorkSpace Navigator, expand the MyMobileServer/Mobile Page Groups/Approved folder.
Right-click SybStoreItemsPageGroup and s elect Deploy from the context menu to deploy the new page group that contains the new page, which contains the new mobile application.
You have finished placing the page in a new page group and deployed the newly created objects. We can now access them via browsing the portal.