When a form submits directly to another page, the data passed to the target page must already be available from the linking page. The following data is available to the target page:
Values for server-scriptable controls
Client-side parameters (including parameter values set on the client)
On 4GL Web pages, a form represents a page. When a user action submits a page form, the form can submit to the same page (self-navigation) to refresh a page in the user’s browser or to prepare for a server redirection. Otherwise, it can be submitted directly to another page (form submit). For more information about server redirection, see “Managing server redirection”.
For a form submit, the names of the client controls must map to (match) the names of the parameters on the target page. To take advantage of the Web Target interface for the form submit navigation style, you must first set the parameter names on the target page.
![]() No forms on 4GL Web pages
You should not add FORM tags to 4GL Web pages. If you change
a non-4GL page to 4GL mode, you must manually remove any FORM tags
in Source view. For 4GL Web pages, the entire page is represented
as a single form.
No forms on 4GL Web pages
You should not add FORM tags to 4GL Web pages. If you change
a non-4GL page to 4GL mode, you must manually remove any FORM tags
in Source view. For 4GL Web pages, the entire page is represented
as a single form.
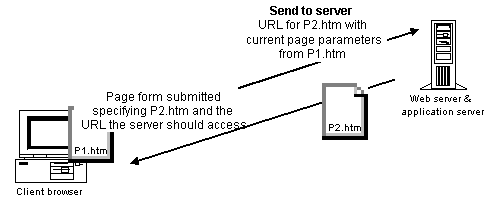
The following drawing illustrates how parameters get passed when a page form submits directly to another form in a Web site target or a non-4GL JSP target. Parameters are passed the same way for JSP targets, except that the target and linking pages would typically have .jsp extensions instead of the .htm extensions displayed in the drawing:
Figure 10-2: Passing parameters in a form submit

For a fuller description of how to pass parameters using the form submit navigation style, see “Using parameters and variables”.
![]() To set parameter bindings for a 4GL form submit:
To set parameter bindings for a 4GL form submit:
Right-click the linking page in the HTML editor, then select Page Properties from the pop-up menu.
The Page Properties dialog box displays.
Click the Parameters tab
or
Click the Variables tab.
Click the New button, and add a parameter or variable with the same name as a parameter on the target page.
For parameter binding purposes, the names you type are case sensitive. The parameter or variable name on the linking page must exactly match the parameter name on the target page.
For steps to add a parameter, see “Setting up page parameters”. For steps to add a variable, see “Setting up page and session variables”.
Repeat steps 2 and 3 for each parameter and variable you want to add to the current (linking) page.
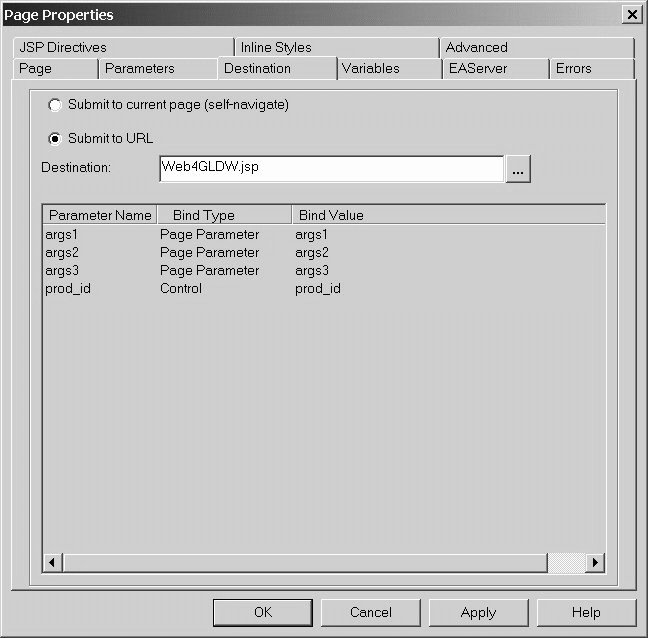
Click the Destination tab on the open (linking) page.
Select the Submit To URL radio button option.
Click the browse (...) button and select your target page from the Choose URL dialog box.
The parameters of the target page are listed in the Parameter Name column of the grayed-out list box. You cannot directly modify the items in this list.
If a parameter or variable name on the current (linking) page matches a parameter on the target page, the matching name is listed in the Bind Value column. The Bind Type indicates whether the matching name is a page parameter or page variable on the current page.

Click Apply.