![]()
Now you attach the DataWindow object to a DataWindow control in the w_customers window.
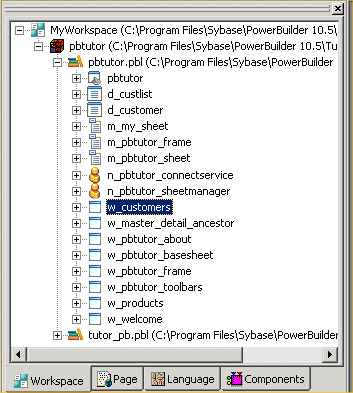
Expand the pbtutor.pbl branch in the System Tree.

Right-click w_customers and select Edit from the pop-up menu
or
Double-click w_customers in the System Tree.
The Window painter displays the w_customers window.
Right-click the top DataWindow control (dw_master) in the Layout view.
If the Properties view is not displayed, select Properties from the pop-up menu.
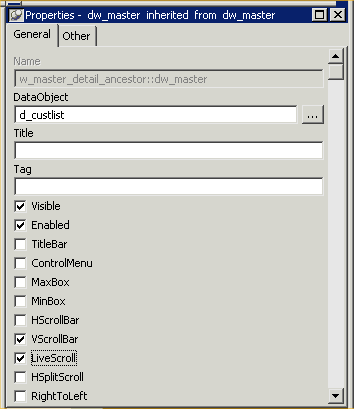
Click the ellipsis button next to the DataObject box in the Properties view.
The Select Object dialog box displays.
Select d_custlist in the DataWindows list box and click OK.
PowerBuilder associates the d_custlist DataWindow object with the dw_master DataWindow control.
The Layout view now shows the d_custlist DataWindow headings inside the dw_master control, but you do not see any data yet. The DataWindow does not execute its SELECT statement until you run the application.

![]() Adding DataWindow objects to the window using drag
and drop
In this tutorial, you use a custom DataWindow control that
has built-in error handling. If you want to use the standard DataWindow
control, you do not need to add the control to the window and then
attach a DataWindow object to it as you did in this lesson. You
can simply select the DataWindow object you want from the System
Tree and drag it onto the window in the Layout view. PowerBuilder
creates the DataWindow control for you.
Adding DataWindow objects to the window using drag
and drop
In this tutorial, you use a custom DataWindow control that
has built-in error handling. If you want to use the standard DataWindow
control, you do not need to add the control to the window and then
attach a DataWindow object to it as you did in this lesson. You
can simply select the DataWindow object you want from the System
Tree and drag it onto the window in the Layout view. PowerBuilder
creates the DataWindow control for you.