![]()
In this lesson you create a simple JSP application. The non-4GL application consists of two pages; a start page where you select an item from a drop-down list that you pass as a page parameter, and a target page that includes a call to a Web service. The Web service is the currency exchange Web service available on the XMethods Web site.
You create two pages in the non-4GL part of this JSP Web Services tutorial: a start page and a main page. You then add a page parameter on the main page of the application that will be used to obtain a value submitted from the start page.
Select File>New from the PowerBuilder menu and click the Web tab.
Make sure jspTutorial is selected in the Target drop-down list at the bottom of the New dialog box.
If you do not have other Web targets in your workspace, jspTutorial will be selected automatically when you click the Web tab.
Select the Web/JSP Page icon, click OK, then click Next.
The Web Page wizard opens to the Specify New JSP File page.
Type simplestart in
the Title text box and click Next 4 times.
The name in the File Name field changes to simplestart.jsp.
You accept the defaults on the remaining wizard pages.
Click Finish.
The wizard creates the simplestart.jsp page in the jspTutorial target. The page opens in the HTML editor. It is also listed under the jspTutorial target in the System Tree.
Repeat steps 1-4, typing simple instead
of simplestart in step 3.
The wizard creates the simple.jsp page. The following default text displays in Page view: Put your data here.
Highlight the default text on the simple.jsp page.
Press Enter and type Currency Converter for
the new text.
Place the cursor inside the text you just typed and select Format>Paragraph in the PowerBuilder menu.
The Paragraph dialog box displays.
Select Heading 1 from the Paragraph Style drop-down list.
Select Center for the Align Text field, then click OK.
The text you typed is formatted in the Heading 1 font style.
Place the cursor at the end of the text and press Enter.
Type (Simple Version).
You will create a 4GL version of this page in the next lesson.
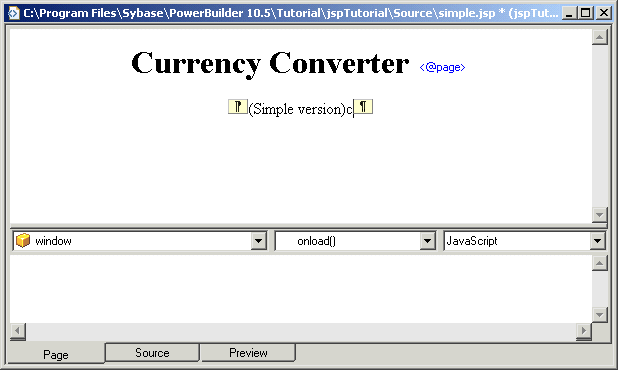
If you do not see the paragraph symbols in Page view, you can display them by right-clicking the page and selecting Show Non-Visual Tags from the pop-up menu.
Right-click the page in Page view and select Page Properties from the pop-up menu.
Click the Parameters tab.
Click in the first line under the Parameter Name
column, type country_2,
and click OK.
You cannot enter a default value for a page parameter on a non-4GL page. In this tutorial application, the column_2 parameter will be passed to the simple.jsp page from the simplestart.jsp page.
Click the Save button.
Now you complete the simplestart.jsp page by adding a drop-down list and a Submit button.
Select the simplestart.jsp page from the PowerBuilder Window menu.
The simplestart.jsp page receives the focus of the HTML editor. If you had already closed simplestart.jsp, you can open it again by double-clicking the simplestart.jsp entry in the System Tree.
Highlight the default text and press Enter.
Type the following lines directly in Page view or in Source view:
Select a country where you expect to be travelling:
Press Enter after the text you typed.
Select Insert>Form Field>List Box from the PowerBuilder menu.
Type country_2 in
the Name To Send To Server text box.
Click the Options tab, enter the following display text and values, and click OK:
Text |
Value |
|---|---|
China |
china |
France |
euro |
Germany |
euro |
Great Britain |
united kingdom |
Singapore |
singapore |
The list box is added to the page and is surrounded by opening and closing FORM tags.
Place the cursor after the list box but before the closing FORM tag.
Press Enter.
You can do this in Page view or Source view. The Submit button that you will add to the page must be inside the same FORM tag as the drop-down list.
Type the following text and press Enter:
Click the Submit Query button to find the value of an American dollar relative to the principle currency of the country you selected:
Select Insert>Form Field>Push Button from the PowerBuilder menu and click OK.
The Submit button is given the default label "Submit Query". You do not need to supply a name for the button, since you do not want to pass the name of the button to the simple.jsp page. However, you do want to pass the value of the drop-down list item that the user selects.
Right-click the button or the drop-down list and select Form Properties from the pop-up menu.
The Form Properties dialog box displays.
Type simple.jsp in
the text box for the "URL where form information is sent."
Instead of typing, you can click the browse button next to the text box to open the Choose URL dialog box. You can then select simple.jsp on the Target tab and click OK.
Select GET in the Submit Method drop-down list and click OK.
If you leave POST as the submit method, you will not see the parameter included in the URL to access the simple.jsp page after you click the Submit Query button.
The following picture shows how the simplestart.jsp page should look in Page view when the Show Non-Visual Tags pop-up menu item is not selected:
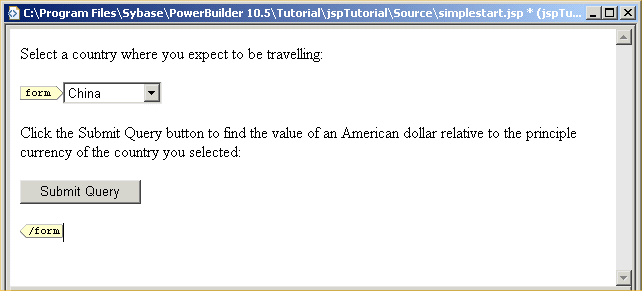
Make sure the Submit Query button is inside the FORM tags.
You can click the Preview tab in the HTML editor to view the simplestart.jsp page as it will look in a client browser. It will not have the FORM tags that you see in Page view.
Save your changes to the simplestart.jsp page.
Select File>Close to close the simplestart.jsp page.
The simple.jsp page remains open in the HTML editor.
Now you add a Web service to your JSP target.
Right-click the jspTutorial target in the System Tree and select New from the pop-up menu.
Click the Web tab if it is not already displayed.
Double-click the JSP Web Service Proxy Wizard and click Next.
The Select WSDL File page of the wizard displays. A WSDL file is a Web Service Definition Language file that defines a Web service.
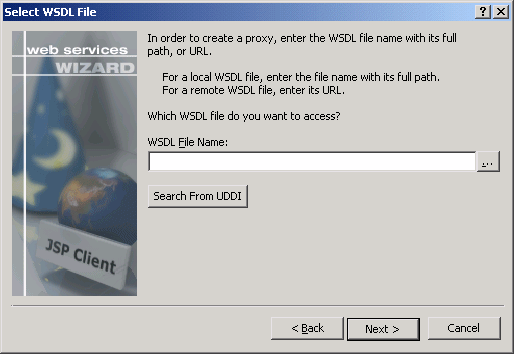
In the WSDL File Name box, type http://www.xmethods.net/sd/2001/CurrencyExchangeService.wsdl.
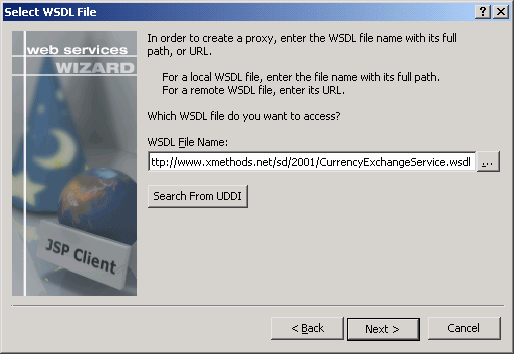
Click Next.
The CurrencyExchangeService Web service displays.
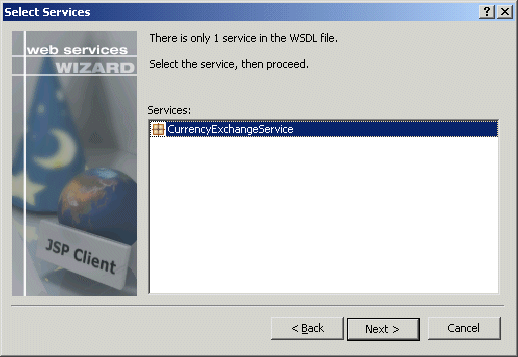
Click Next.
The getRate operation displays and it is selected by default.
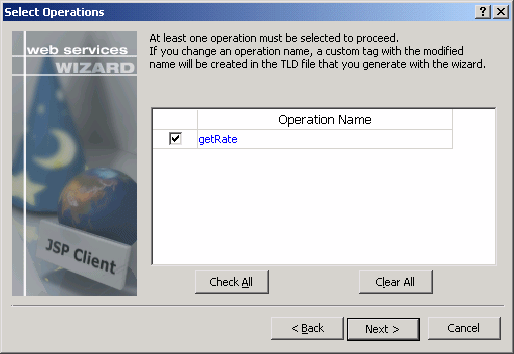
Click Next.
Click Next again.
![]() How you display parameter and port names
There is only one parameter and one port. To display the parameter
and port names in the wizard, you must select getRate in the left
frame of the Modify Parameters wizard page and the Select Ports
wizard page. The CurrencyExchangeService_getRate_returnValue parameter
is the only parameter and the CurrencyExchangePort is
the only port.
How you display parameter and port names
There is only one parameter and one port. To display the parameter
and port names in the wizard, you must select getRate in the left
frame of the Modify Parameters wizard page and the Select Ports
wizard page. The CurrencyExchangeService_getRate_returnValue parameter
is the only parameter and the CurrencyExchangePort is
the only port.
Click Next again.
The Input Destination Value page displays the package name for the Web service, the TLD file name, and the JAR file name.
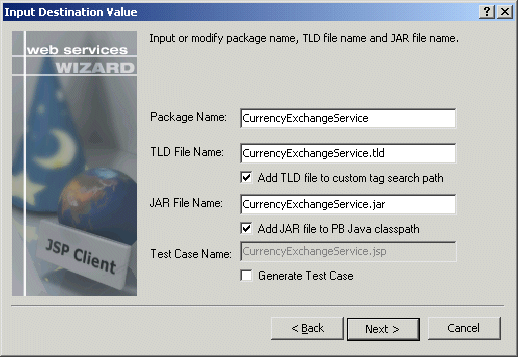
Click Next.
The Ready to Create Proxy page displays.
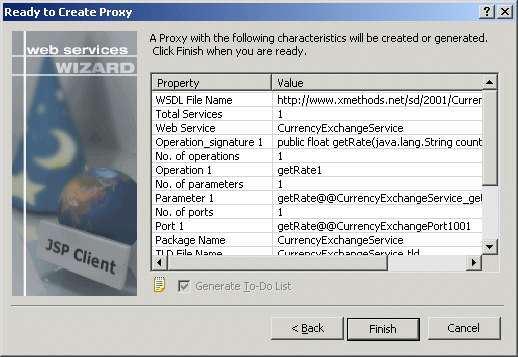
Scan the list of proxy characteristics.
Click Finish.
The wizard adds the following files to subdirectories of the target WEB-INF directory:
Subdirectory |
Files added |
|---|---|
Lib |
CurrencyExchangeService.jar |
Tlds |
CurrencyExchangeService.tld |
The wizard also adds the CurrencyExchangeService.tld file to your custom tag library search path and adds it to the Components tab of the System Tree.
Now you add a page directive to use the TLD with the simple.jsp page. You add a custom tag to define arguments for the getRate class of the Web service, and you add a server script to return a conversion rate calculated by the service.
Click the Components tab of the System Tree.
Expand the list of custom tag libraries to display the CurrencyExchangeService.tld file.
Drag the CurrencyExchangeService.tld file to the simple.jsp page in the HTML editor.
A dialog box prompts you to enter a prefix as a shorthand to refer to the TLD file.
Type cur for
the prefix and click OK.
PowerBuilder adds a taglib directive to the page.
Expand the listing for the CurrencyExchangeService.tld file on the Components tab of the System Tree.
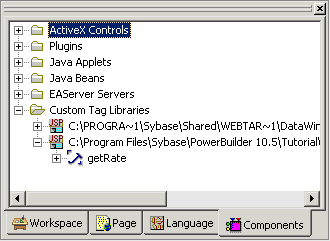
Drag the getRate class to the bottom of the simple.jsp page in Page view.
The cur:getRate Properties dialog box displays.
In the Values column, type the following values for the listed attributes and click OK:
Attribute Name |
Value |
|---|---|
country1 |
usa |
country2 |
<%= request.getParameter ("country_2") %> |
In Page view, the symbol: <ctl:/> displays on the page to indicate that a custom JSP action has been added. In Source view, the code for the custom action tag looks like the following:
<cur:getRate country1="usa" country2=
'<%= request.getParameter ("country_2") %>' />
Type the following line in Source view near the bottom of the page:
<P>The conversion rate for 1 US dollar to <%= request.getParameter ("country_2") %> currency is: </P>
This line contains both server script and HTML script. Each instance of the HTML script " " adds a nonbreaking space to the text at the location where you type it.
Switch to Page view and click the <%=> symbol in the line you just typed.
ServerScript[0] displays in the first drop-down list in the Script view. The server script is an expression script that you typed in Source view.
In Page view, place the cursor at the end of the line that you typed.
If you did not add a nonbreaking space after the colon in Source view, you can add it now in Page view by pressing the space bar.
Right-click in the Script view and select New Script>Server>"<%= ... %>" from the pop-up menu.
The Script view now displays ServerScript[1] in the first drop-down list box. In Page view you see a second <%=> symbol.
If the second <%=> symbol is not at the end of the line of text, select the symbol and drag it to the end of the line, making sure it is separated from the colon by a single space.
On the Components tab of the System Tree, expand the listing for the getRate class under the CurrencyExchangeService.tld listing.
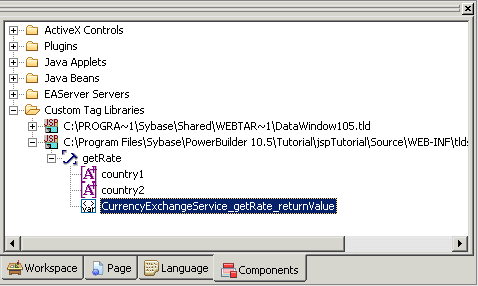
Drag the CurrencyExchangeService_getRate_returnValue variable to the Script view for ServerScript[1].
![Shown is the simple dot j s p page in Page veiw. Across the bottom is the Script view for Server Script [ 1 ] with the entry Currency Exchange Service _ get Rate _ return Value.](jsprtscr.gif)
Click the Save button.
(Optional) Close the simple.jsp page and the HTML editor.
Now you deploy and run the JSP application.
Make sure that the EAServer you selected in your target profile is running.
On the Workspace tab of the System Tree, right-click jspTutorial.
Select Deploy from the pop-up menu.
Deployment is done when the Output window displays Finished
Deploy of target jspTutorial.
Right-click the jspTutorial target again.
Select Properties from the pop-up menu.
Click the Run tab of the target properties dialog box.
Click the browse button next to the Start Page text box.
The Choose URL dialog box displays.
Select simplestart.jsp in the list box showing the contents of the jspTutorial target and click OK.
The target properties dialog box now displays /simplestart.jsp for
the target start page.
Select jspTutorialDeployConfiguration1 in the Deploy Configuration For Running drop-down list and click OK.
Select Run>Select And Run from the menu bar.
Select jspTutorial in the Select a Target dialog box.
Click OK.
Your default browser displays the simplestart.jsp Web page.
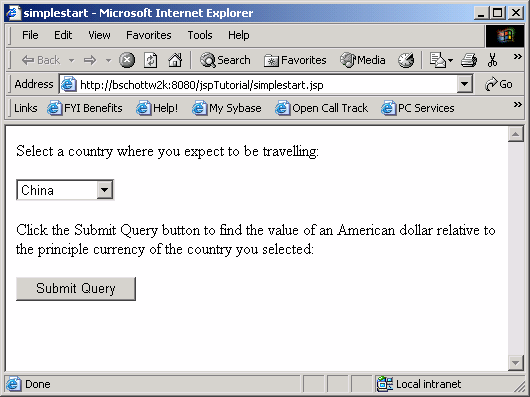
Select a country from the drop-down list and click Submit Query.
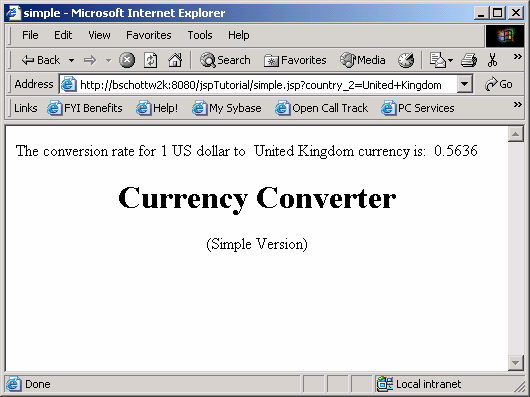
The conversion rate is calculated for the currency of the country you selected and the result is displayed on the simple.jsp page.
