Now you create the executable file for your application. The executable file you generate contains definitions for all the objects in the application. For the tutorial application, this includes the bitmap file used in the login window, since you did not include a separate resource file with your project.
You can create the executable in the Project painter, but usually, once you have defined the project, you do not need to open the painter again.
Workspaces and targets in the System Tree have Incremental Build, Full Build, and Deploy items on their pop-up menus that enable you to build and deploy some or all of the projects in a target or in the whole workspace. Incremental Build and Full Build compile your code. Deploy compiles the code and, for applications like the one you built in this tutorial, creates an executable file and optional dynamic libraries. For other projects, such as server component projects, Deploy also deploys the component and supporting files to the server.
In this lesson you look at the property sheets where build and deploy options are specified and then create the executable from the PowerBar.
Close the Project painter.
Click Yes if prompted to save changes.
Right-click the pbtutor target in the System Tree.
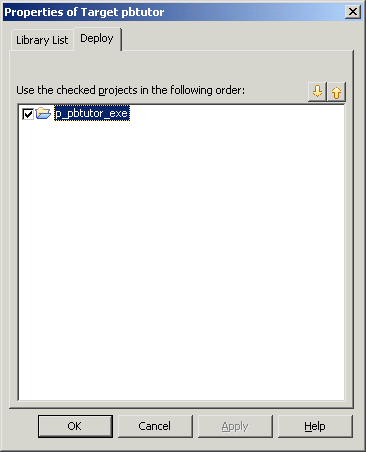
Select Properties and select the Deploy tab.
This page shows all the projects in this target (currently only one).

If you have more than one project in the target, you can change the order in which they are executed and select which projects you want to build.
Leaving p_pbtutor_exe checked, click the Cancel button.
Right-click MyWorkspace in the System Tree.
Select Properties and select the Deploy Preview tab.
The Deploy Preview page shows all the targets in your workspace and the projects in each that have been selected for deployment, in the order in which they are to be deployed. You cannot change anything on this page—you use it to check that you have set up deployment options for your workspace the way you want to. All the projects shown on this page are deployed when you click the Deploy button in the PowerBar.
This workspace has only one target and only one project, so you can use the Deploy button to create the executable.
Click the Cancel button to close the property sheet.
Click the Deploy button in the PowerBar.

The process of creating the executable file might take a few moments. While PowerBuilder is working, you can look at the Output window at the bottom of the screen to see what PowerBuilder is doing.
If you wanted to stop the deployment process, you could click the Stop button in the PowerBar. When deployment is complete, the Output window displays the following text: Finished Deploy of workspace MyWorkspace.