![]()
![]()
TRAN-IDE provides prebuilt Health Level 7 (HL7) formats you can use with the database repository. The HL7 repository contains TRAN-IDE field objects for standard 2.1, 2.2, and 2.3 inbound HL7 message segments, and skeleton TRAN-IDE rule objects with rule component objects for standard 2.1, 2.2, or 2.3 outbound HL7 message segments.
These objects are stored in the HL7 repository with a:
Type – clTrFld for field objects and a clRule for rule objects.
Name – in the format “segname_ver,” where “segname” is the three letter name for the segment (for example, OBX for observation segment), and “ver” is the version of the segment (2.1, 2.2, or 2.3).
Keyword – in the format “segname_ver_in” for field objects and “segname_ver_out” for the rule objects, where “segname” is the three letter name for the segment (for example, “OBX” for observation segment), and “ver” is the version of the segment (2.1, 2.2, or 2.3).
Some of these objects require that other objects be loaded first.
Before you can use the HL7 repository, you must set up the database connection to the repository.
![]() Configuring the HL7 repository connection
Configuring the HL7 repository connection
On Windows, select Start | Settings | Control Panel.
Select Administrative Tools.
Select Data Sources (ODBC). The ODBC Data Source Administrator window appears.
Select the System DSN tab and click Add.
From the driver list, select “imc54 Adaptive Server Anywhere 8.0” and click Finish.
![]() Typically, the e-Biz Impact server is installed on a
different machine from the e-Biz Impact client. If you have the
server and client installed on the same machine, two entries display
in the driver list; however, both entries represent the same driver.
Typically, the e-Biz Impact server is installed on a
different machine from the e-Biz Impact client. If you have the
server and client installed on the same machine, two entries display
in the driver list; however, both entries represent the same driver.
The ODBC Configuration for Adaptive Server Anywhere 8 window appears.
Complete these options on the ODBC tab:
Data Source Name – enter HL7repo.
This tells the ODBC driver manager or Embedded SQL library where
to look in the file or registry to find the ODBC data source information.
Description – enter an optional longer description of the data source to help you or end users to identify this data source from among their list of available data sources.
Leave the remaining fields blank.
![]() See the ASA Database Administration Guide for
more information:
See the ASA Database Administration Guide for
more information:
Go to the Technical Library Product Manuals Web site at Product Manuals, select SQL Anywhere Studio from the product drop-down list, and click Go.
When the Core Documentation list displays, select SQL Anywhere Studio 8.0, then choose the PDF or online version of the ASA Database Administration Guide.
Select the Login tab, then select Supply User ID and Password, but leave the actual user ID and password fields blank.
Select the Database tab and complete these options:
Server Name – the name of the local machine or network server where the HL7 repository is located and the e-Biz Impact client is installed.
Start Line – leave blank.
Database Name – enter HL7repo,
which is the name of the HL7 database to which you want to connect.
This entry is case sensitive.
Database file – enter the full path and name of the Adaptive Server Anywhere database file. Click Browse to locate the file. For example:
x:\Sybase\ImpactClient-5_4\DevApplication\.bin\hl7repo.db
Accept the defaults for the remaining options.
Click OK to save your entries and close the ODBC Configuration window.
Click OK to exit the ODBC Data Source Administrator.
![]() Starting the database
Starting the database
Start Adaptive Server Anywhere.
Go to x:\Sybase\ImpactServer-5_4\asa\ on Windows (where “x” is the drive or network server where the e-Biz Impact server is installed), and double-click dbsrv8.exe.
When the Server Startup Options dialog box appears, complete these fields:
Database – browse to x:\Sybase\ImpactClient-5_4\DevApplication\bin (where “x” is the drive where the client is installed) and select hl7repo.db.
Server Name – enter the name of your local host; that is the PC on which the e-Biz Impact client is installed.
Cache Size – accept the default.
Options – enter -n hl7repo.
Click OK. You see the Sybase Adaptive Server Anywhere window that confirms the database start up.
In a terminal window, go to ~/Sybase/ImpactServer-5_4/asa (where “~” is where the e-Biz Impact server is installed) and enter:
dbsrv8 -n hl7repo.db
![]() Loading the repository in TRAN-IDE
Loading the repository in TRAN-IDE
TRAN-IDE is available only on Windows.
On Windows, select Start | Programs | Sybase | e-Biz Impact 5.4 | TRAN-IDE.
When the TRAN-IDE window appears, select File | Repository | Load Objects From.
When the Select Data Source window appears, select HL7repo and click OK.
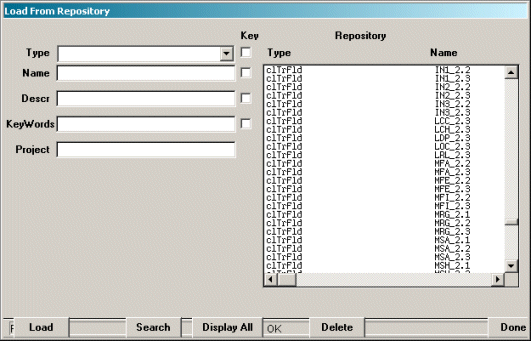
When the Connect to Adaptive Server Anywhere window appears and you see the User ID of “cai” on the Login tab, click OK. You see the Load From Repository window with the HL7 objects listed in the Repository pane (Figure 2-3).
Figure 2-3: HL7 repository objects
![]() Using TRAN-IDE field objects
Using TRAN-IDE field objects
Determine what HL7 message segments are in the incoming transaction.
Scroll down the list to the beginning of the clTrfld types. Select the appropriate version of the field object for the inbound message header (MSH) segment in the Repository list. The selection’s properties display on the left.
Click Load.
Repeat step 2 to load in the other inbound segments required to define the transaction, following these load order restrictions:
Load the batch header segment (BHS) before the batch trailer segment (BTS).
Load the file header segment (FHS) before the file trailer segment (FTS).
When you finish, click Done. Your selections display in the Input Fields list in main TRAN-IDE window.
![]() Using TRAN-IDE rule objects and their rule component
objects
Using TRAN-IDE rule objects and their rule component
objects
In the main TRAN-IDE window, click Rules.
Select File | Repository | Load Objects. Because you previously opened the repository to use the field objects, you see the Load From Repository window.
Determine which HL7 message segments should be in the outgoing transaction.
Select the appropriate version of the rule object (clRule type) for the outbound MSH segment, then click Load.
Repeat step 4 to load in the other rule objects for the outbound segments required to build the outgoing transaction, following the load order restrictions listed below.
Load the BHS segment before the BTS segment.
Load the FHS segment before the FTS segment.
For each rule object, double-click the rule in the Output Rules list to build the outgoing transaction. The rule and rule component objects are only blank templates; you must edit them to specify what the object should place in the outgoing transaction.
| Copyright © 2005. Sybase Inc. All rights reserved. |
|
|
