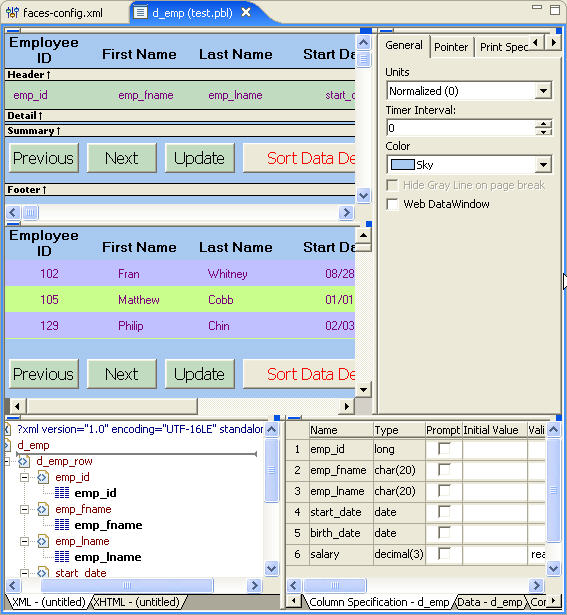
You can import DataWindow libraries into Sybase WorkSpace and then reuse any DataWindow object in a Web page.
![]() Importing a DataWindow library
Importing a DataWindow library
By default, DataWindow libraries extensions display during the import process.
To verify that the DataWindow library extensions are selected to display in the WorkSpace Navigator, click the Menu icon (down arrow) and select Navigator Extensions|DataWindow Library Extension.
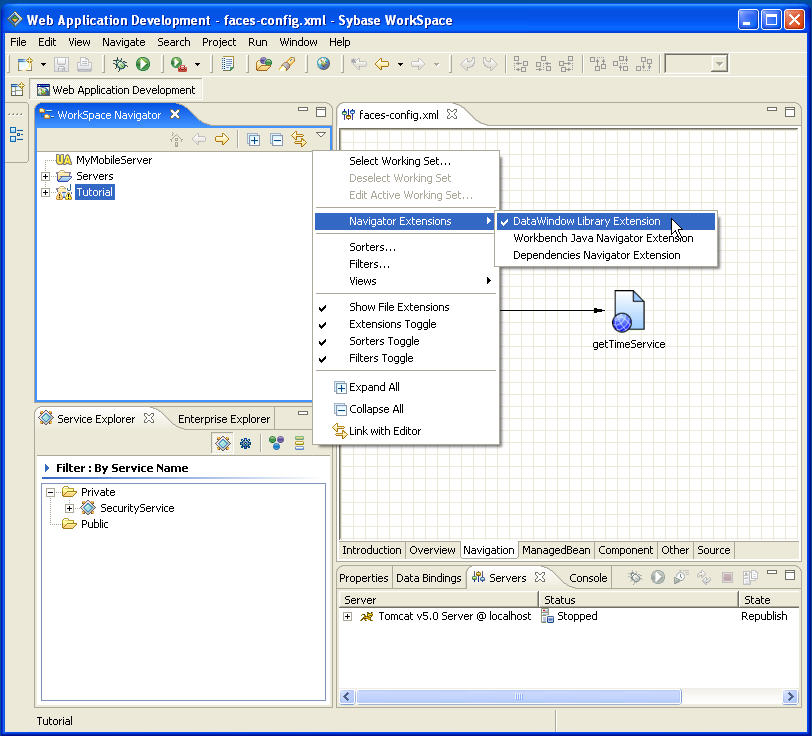
The check mark to the left of the menu item indicates it is already selected. Do not deselect the menu item by clicking on it.
In the Workspace Navigator, right-click Tutorial and select Import from the context menu to import an existing DataWindow library into your project.
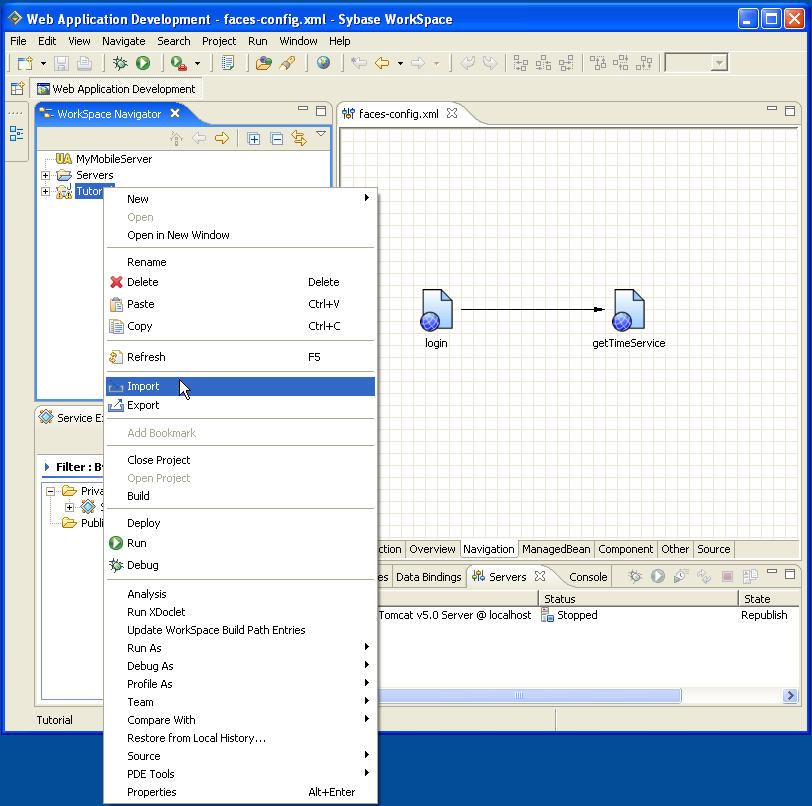
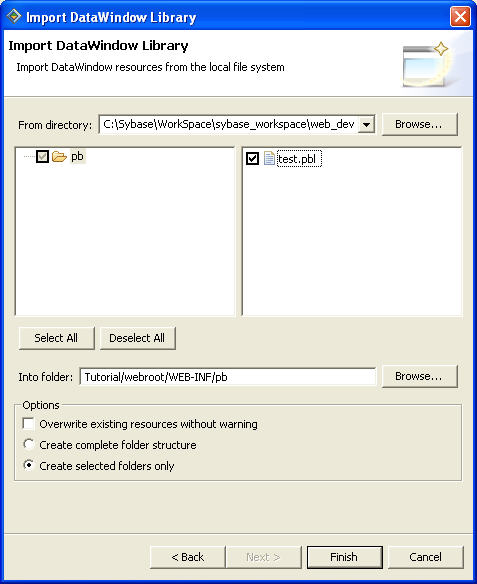
The Import wizard displays.
Select DataWindow Library (.pbl) and click Next.
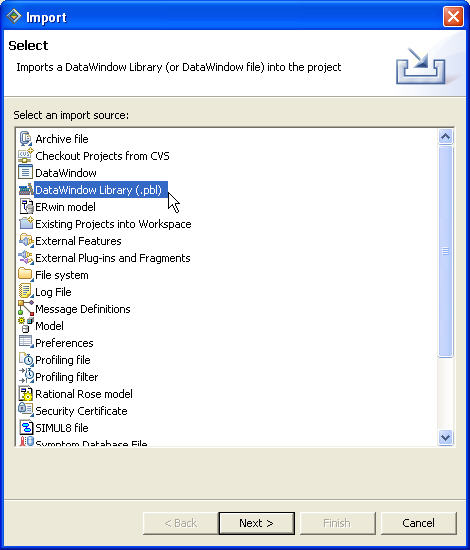
In the From directory field, click Browse and select this path: <installation directory>\sybase_workspace \web_development\eclipse\plugins \com.sybase.stf.jmt.template_1.5.0\tutorial \webroot\WEB-INF\pb
Click the test.pbl check box in the right pane.
Verify that the Into folder field reads:
Tutorial\webroot\WEB-INF\pb
Accept the remaining default settings, and click Finish.
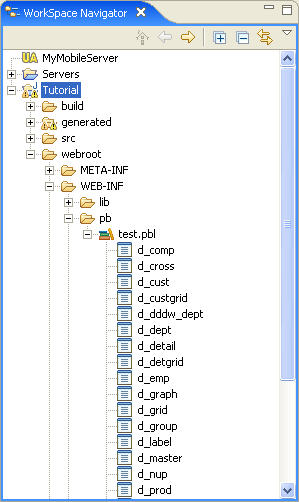
Verify that you successfully imported the test.pbl file by expanding its contents in the WorkSpace Navigator.
![]() Importing the connection
profile and viewing an imported DataWindow
Importing the connection
profile and viewing an imported DataWindow
A connection profile enables connection to servers, message transports, and databases. Before you can open and view a DataWindow, you must connect to the database so you have access to the DataWindow object data sources.
Double-click the startdemo.bat file to start the Adaptive Server Anywhere server and the sample database.
<installation directory>\DevRuntimes\ASA\startdemo.bat
Adaptive Server Anywhere successfully starts when you see its icon in the Windows taskbar.

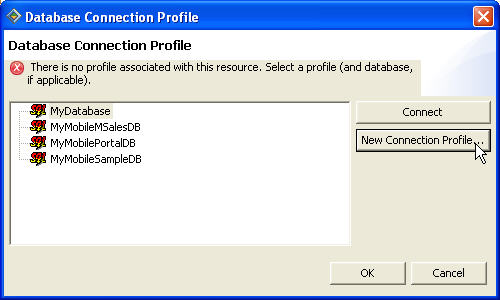
In the WorkSpace Navigator, right-click the d_emp DataWindow library and select Open from the context menu to create a connection profile for the tutorial database that contains the datasources for this DataWindow object.
In the Database Connection Profile dialog box, click New Connection Profile.
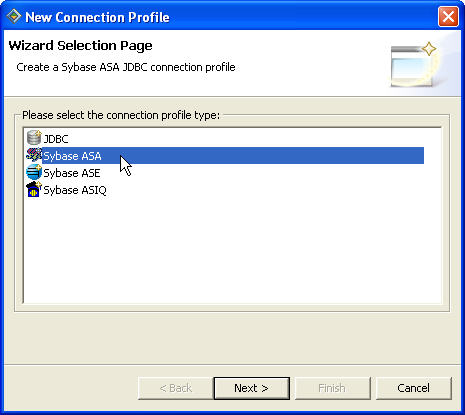
In the New Connection Profile wizard, select Sybase ASA and click Next.
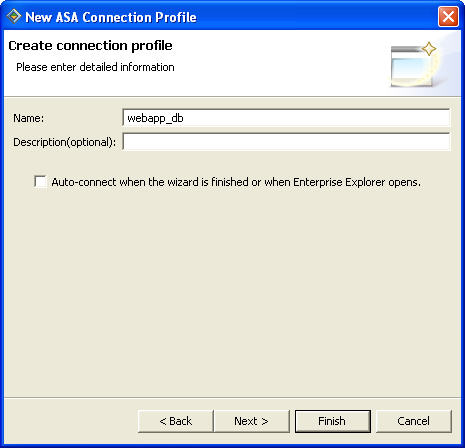
In the Name field, enter webapp_db and
click Next.
In the Specify a Driver and Connection Details page, click Test connection to verify that you can successfully connect to the server.
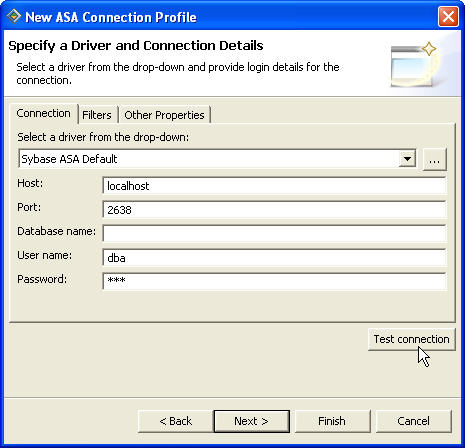
Do not proceed until the ping succeeds. If the ping does not succeed, see your system administrator for assistance.
In the Success dialog box, click OK to continue.
Click Finish to create the connection profile.
In the Database Connection Profile dialog box, click webapp_db and then Connect.
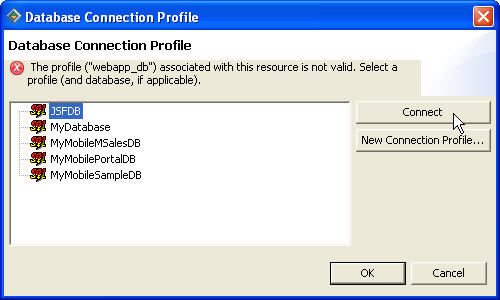
Click OK to connect to the asaDemo database.
The d_emp DataWindow opens in the editor.
