In this lesson, you return to the d_master and d_detail DataWindow libraries that you imported earlier and create a Web page using DataWindow objects in these libraries.
![]() Creating a Web page using a DataWindow object
Creating a Web page using a DataWindow object
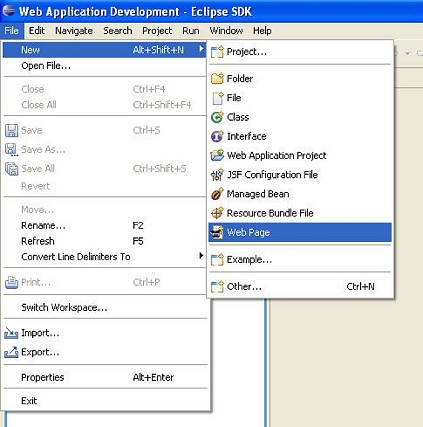
Select File| New|Web Page from the menu bar to open the New Web Page wizard.
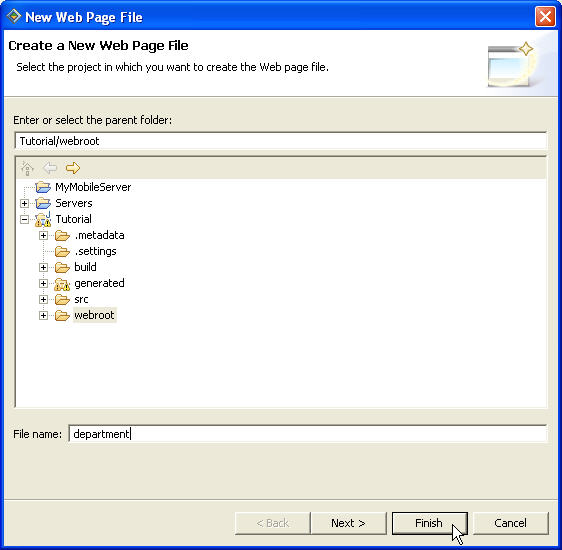
In the Create a New Web Page File page, make sure that parent folder is Tutorial\webroot.
In the File name field,
enter department, and click Finish.
Sybase WorkSpace creates department.jsp with the default JSF contents and opens it in a Web Page editor.
To open a DataWindow object, in WorkSpace Navigator, expand the Tutorial\webroot\WEB-INF\pb\text.pbl folder, and drag and drop the d_master DataWindow onto the design pane of the department.jsp page.
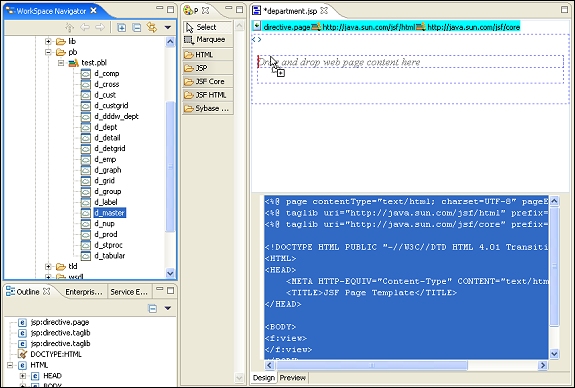
The Web Page editor displays code for that DataWindow and its graphical representation on the design pane.
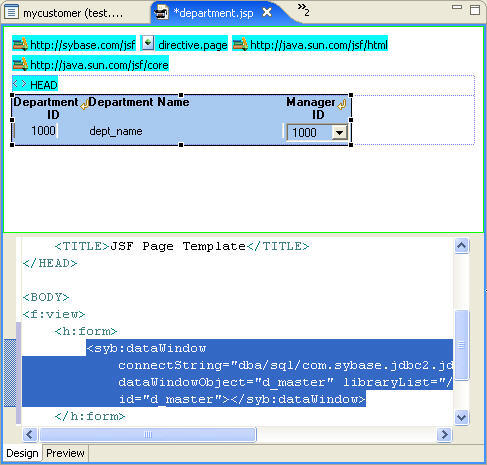
Select the Preview tab in the Web Page editor to preview the Web page.
Select File|Save from the menu bar to save the Web page.
To test the Web page on the Tomcat 5.0 server, in the WorkSpace Navigator, right-click department.jsp and select Run from the context menu.
Select Choose an existing server, select Tomcat v5.0Server @ localhost, and click Finish.
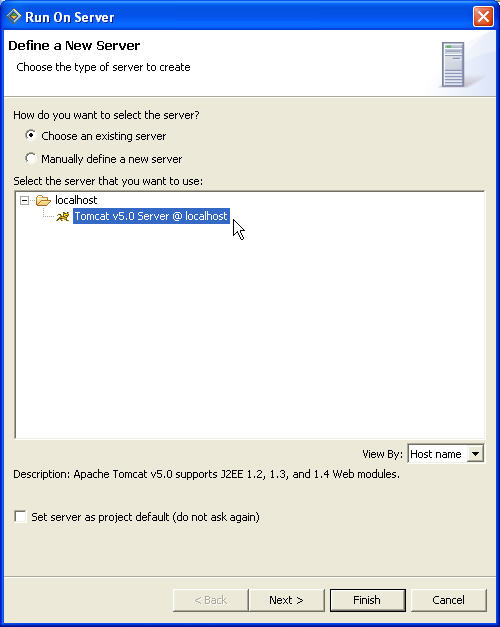
The Apache Tomcat server starts, and the JSF Page Template opens.
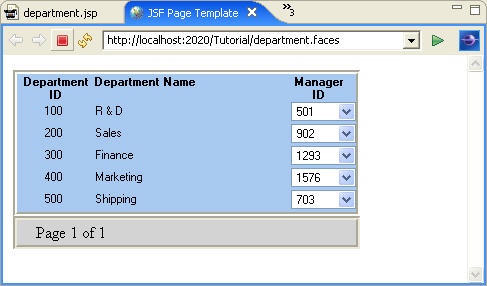
In the Console view, click the Terminate icon to stop the server before continuing.
![]() Adding a detail DataWindow object to a Web page
Adding a detail DataWindow object to a Web page
Add a detail DataWindow object to the Web page.
At the bottom of the department.jsp page, click the Design tab to switch to the Web Page editor.
In the design pane, place your cursor at the end of the DataWindow object and press Enter twice to add two line break tags.
These appear as <br > <br> in
the Web Page editor source view.
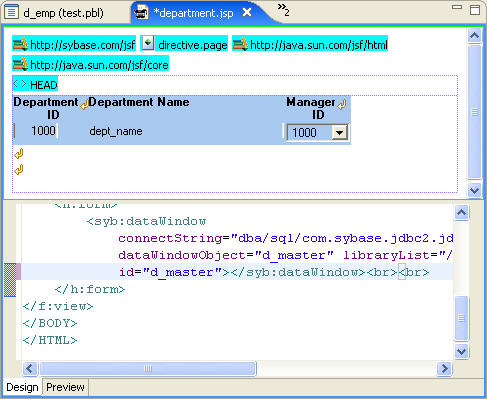
In WorkSpace Navigator, expand the Tutorial\webroot\WEB-INF\pb\text.pbl folder and drag and drop the the d_detail DataWindow under the second line break on the design pane of the department.jsp page.
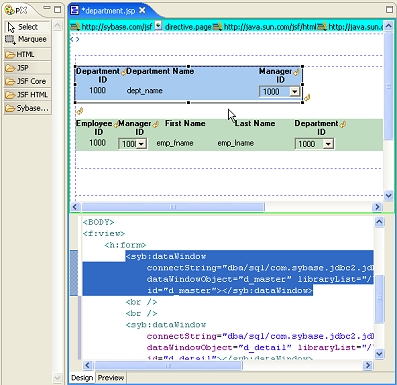
On the department.jsp page, right-click the Department ID DataWindow and select Add Object Link from the context menu.
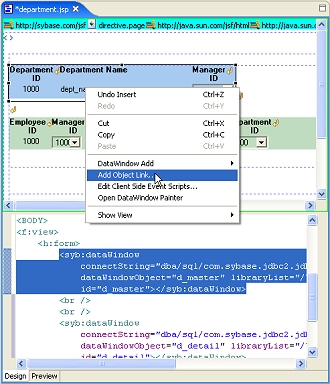
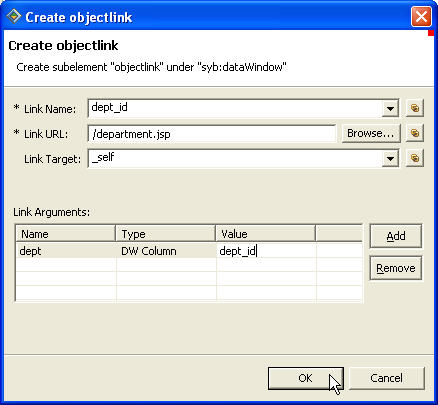
The Create objectlink dialog box displays.
In the Link Name field,
enter dept_id.
In the Link URL field,
enter /department.jsp.
In the Link Target field,
enter _self.
In the Link Arguments list, click Add to define the argument properties and then click OK.
In the Name field,
enter dept.
In the Type field, select DW Column from the drop-down menu.
In the Value field,
enter dept_id.
Select File|Save from the menu bar to save the Web page.
To test the Web page on the server, right-click department.jsp and select Run from the context menu.
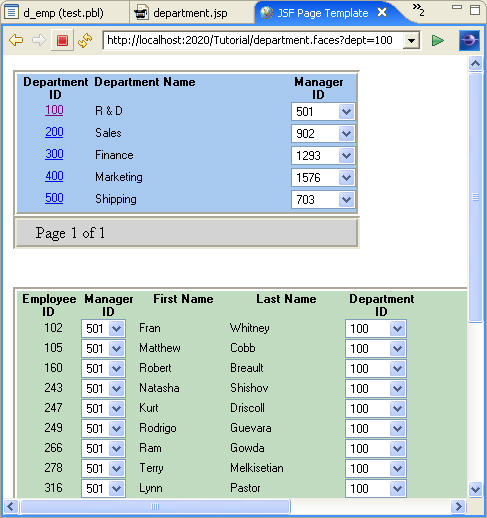
The department.jsp page opens in the JSF Page Template.
Click any link under Department ID.
The bottom of the JSF Page Template window displays the employee details below.
