![]()
![]()
![]()
![]()
In this lesson, you create a filter to view only the log file’s exception messages.
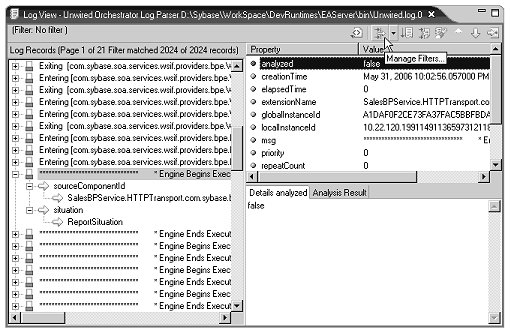
Click the Manage Filters icon on the Log View toolbar to create a new log file filter.
When the Filters dialog box opens, select Log as the type of filter to add and click OK.
In the Edit Filters dialog
box, enter a name for the filter, such as my_uo_filter.
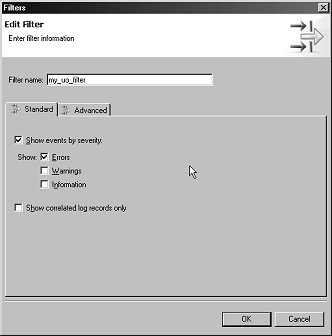
Select the Advanced tab and click Add to add a new filter.
In the Add Filter Property dialog box, complete these options:
Attribute – select Msg from the drop-down list.
Operator – select like from the drop-down list.
Value – enter *exception*.
Click OK to close the Add Filter Property dialog box.
Click OK to close the Edit Filter dialog box.
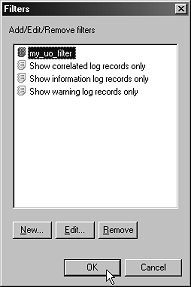
Click OK to close the Filters Add/Edit/Remove list box.
Now you see only messages that include the text “exception.”
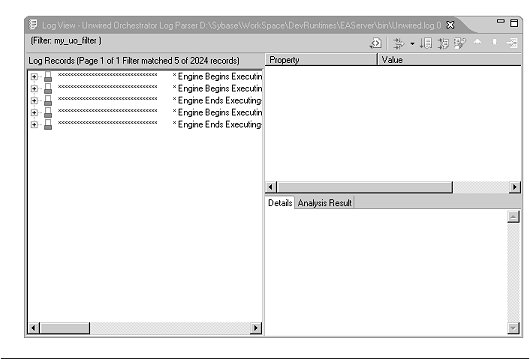
Expand the tree view beneath one of the exception messages to view that message’s details.
Turn off the filter to view the complete contents of the log again.
You have created a filter to view only the log file’s exception messages, looked at the details of an exception message, then turned the filter off.
Congratulations! You have completed the logging tutorial.
