![]()
![]()
![]()
![]()
In this lesson, you create a new transformation service for the SybStore application.
Open the Service Development perspective.
Select File|New|Service from the main menu bar.
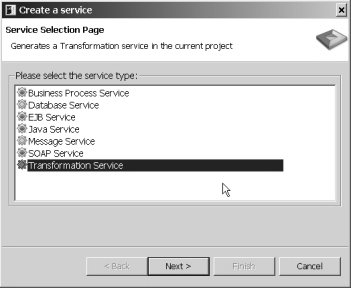
In the Service Selection Page window, select Transformation Service and click Next.
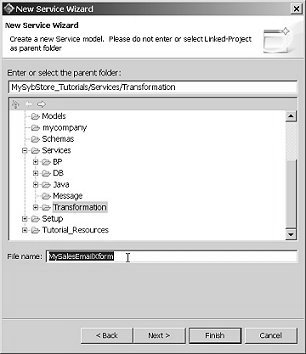
When the New Service Wizard window opens, expand MySybStore_Tutorials/Services/Transformation, the parent folder, to populate the Enter or Select the Parent Folder field.
Enter MySalesEmailXform in
the File Name field and click Next.
When the Service Summary page appears, select Transformation in the Category list box and click Next.
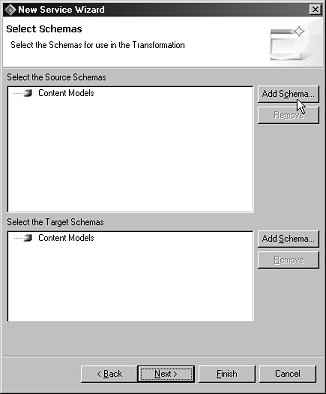
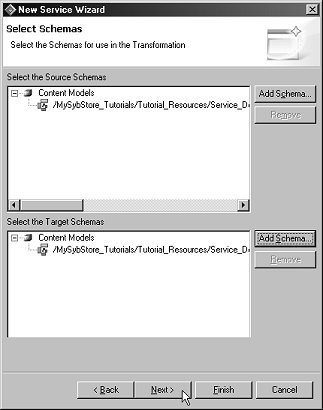
When the Select Schemas page appears, beside Select the Source Schemas pane, click Add Schema.
When the Schema Browser appears, expand the folders MySybStore_Tutorials/Tutorial_Resources/Service_Development, then locate and select the SybStore.xsd file.
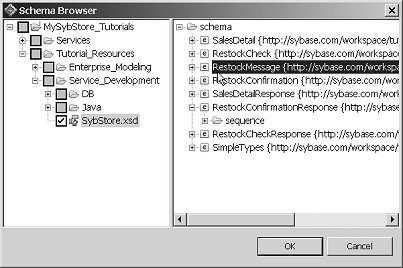
Elements in the XSD appear in the right pane of the Schema Browser.
Select the RestockMessage schema in the right pane and click OK.
On the Select Schemas page, click Add Schema beside the Select the Target Schemas pane.
When the Schema Browser appears, expand the folders MySybStore_Tutorials/Tutorial_Resources/Service_Development, then locate and select the SybStore.xsd file.
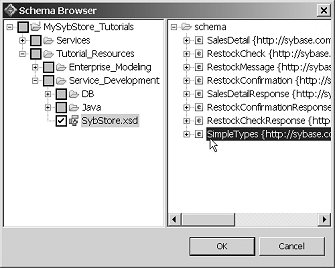
Select the SimpleTypes schema in the right pane and click OK.
Click Next in the Select Schemas window.
When the New Service Wizard Summary page appears, click Finish.
The service is created and opens in the Transformation Service Editor.
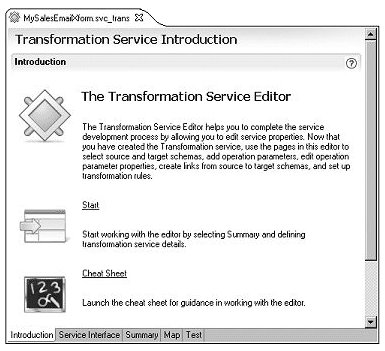
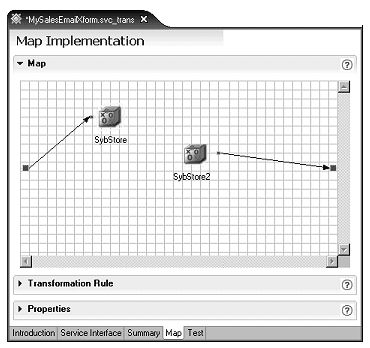
Select the Map tab at the bottom of the editor.
A diagram displays the unmapped source and target models. In the next lesson, you define the mapping.
Click the minimize button on the boxes in the diagram to view them as icons.
Select File|Save from the WorkSpace main menu.
Leave the new transformation service file open for the next lesson.
