In this lesson, you will add two tables to a new database model. Before you begin, complete “Lesson 1: Creating a database model”.
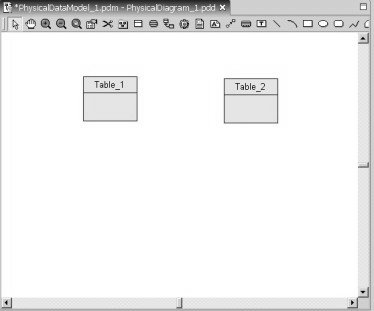
Click the Table tool in the palette, then click inside the editor, which is below the palette.

A table symbol appears where you clicked in the editor.
Click inside the editor again to add another table.

Table names appear as Table_1 and Table_2, using system-assigned sequential numbers that indicate the sequence in which the objects are created.
Click the pointer tool on the editor toolbar, then complete these steps to rename both tables:
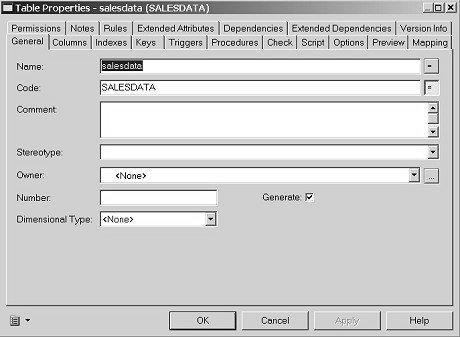
Double-click Table_1 in the editor.
In the Table Properties dialog
box, enter salesdata in the Name field
and click OK.

Double-click Table_2 in the editor.
In the Table Properties dialog
box, enter warehouse_inventory in the Name field,
then click OK.
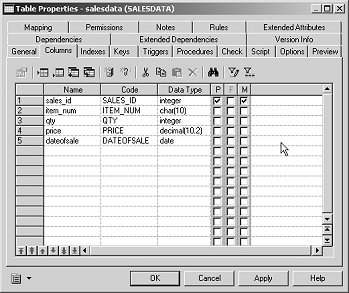
Double-click the salesdata table in the editor.
Select the Columns tab in the Table Properties dialog box.
On the Columns page, enter the information from the table below to create six columns. When you enter the column Name, the Code field is filled in automatically.
![]() To enter the
To enter the char(10) datatype,
select char(%n) from the drop-down
list, then overwrite the “%n” with “10”.
To enter the decimal(10.2) datatype,
select decimal(%n) from the drop-down
list, then overwrite the “%n” with “10.2”.
Name |
Datatype |
P |
|---|---|---|
|
|
|
|
|
|
|
|
|
|
|
|
|
|
Verify that the P option is selected for the sales_id column to identify that column as an element of the primary key.

Click OK.
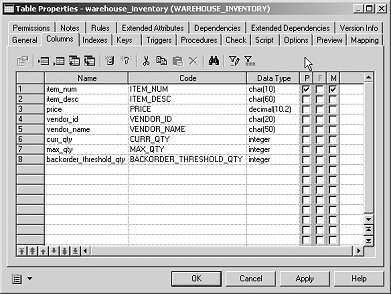
Double-click the warehouse_inventory table in the editor.
Select the Columns tab in the Table Properties dialog box.
On the Columns page, enter the information from the table below to create eight columns. When you enter the column Name, the Code field is filled in automatically.
![]() To enter the
To enter the char(10), char(60),
and char(50) data types, select char(%n) from
the drop-down list, then overwrite the “%n” with
the number that represents the maximum characters this field accepts.
To enter the decimal(10.2) datatype,
select decimal(%n) from the drop-down
list, then overwrite the “%n” with “10.2”.
Name |
Datatype |
P |
|---|---|---|
|
|
|
|
|
|
|
|
|
|
|
|
|
|
|
|
|
|
|
|
|
|
|
Verify that you selected the P option for the item_num column to identify that column as an element of the primary key.

Click OK.
Select File|Save to save the tables. You have finished adding tables to the database model.