

Chapter 6 Exchanging data with databases supporting XML
Generating a DAD file for IBM DB2
IBM DB2 v8.1 (or higher) is a database server with an add-in for XML storage and retrieval called IBM DB2 Extender. XML data (elements, attributes) are mapped to relational data (tables, columns) through Document Access Definition files (.DAD).
There are three types of DAD files:
| Type of storage
|
Type of mapping
|
Description
|
|---|
| Xcolumn
|
column
|
The Root element is mapped to a table, and its attributes or child elements are mapped to columns identified by an XPath
|
| Xcollection
|
SQL
|
The DAD file starts with a SQL statement for the table mapped to the Root element, and each child element or attribute is mapped to a column or a table name
|
| Xcollection
|
RDB
|
A Relational Database node, with a table and a column name, is associated with each attribute or child element of the Root element
|
An XML model targeted with DTD allows you to generate DAD files for IBM DB2. You need first to map an XML model to a PDM, then to attach the IBM DB2 DAD extended model definition to the mapped XML model, and finally (optional) to define extended attributes for global elements. Extended attributes specify the type of DAD file generated for each global element. The DAD file is generated with the DTD file and a SQL file for stored procedures.
WARNING! Caution
The following procedure assumes you have a PDM open in the workspace and targeted with IBM DB2 UDB 8.x Common Server as DBMS.
If the PDM is not targeted with the proper DBMS, select Database→Change Current DBMS.
 To generate a DAD file for IBM DB2:
- In the PDM menu bar, select Tools→XML Builder Wizard.
The Model Selection dialog box is displayed.
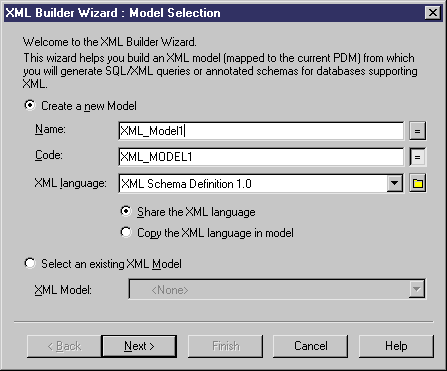
- Select the new model option. Type a name and a code for the new model, and select Document Type Definition 1.0 in the XML language list.
or
Select the existing model option. Select a model in the XML Model list. This model must be targeted with DTD.
- Click Next.
The Tables and Views Selection dialog box is displayed with the PDM tables list.
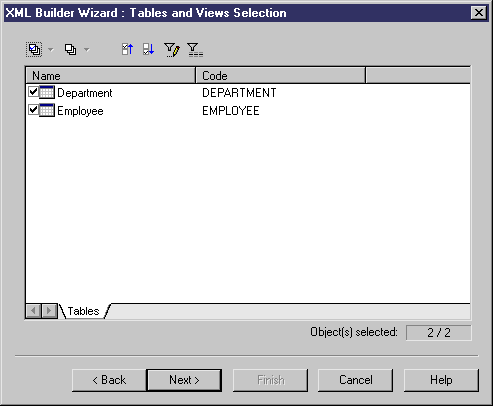
All tables are selected by default.
- <Optional> Click the Deselect All tool and select the tables you want to generate into XML elements.
- Click Next.
The XML Hierarchy Design dialog box is displayed. By default, the XML hierarchy corresponding to the PDM is displayed in the right pane.
You can use the Properties tool to display the property sheet of the table selected in the left pane. The second tool allows you to add the selected object to the selected position in the XML model hierarchy. The last tool allows you to add to the XML model an object with the objects it is related to.
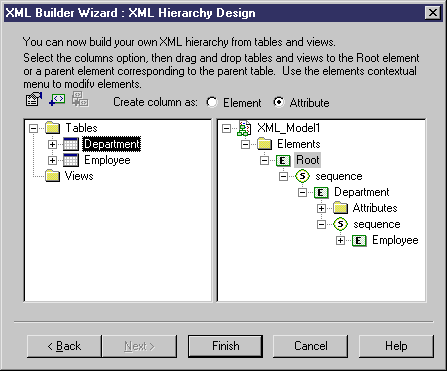
- Click the Element radio button, if you want to create columns as elements.
or
Click the Attribute radio button, if you want to create columns as attributes.
- Drag and drop tables from left to right panel and modify the XML hierarchy.
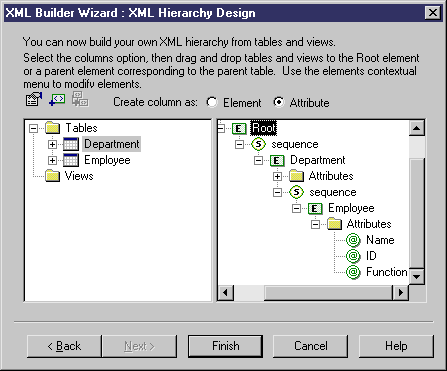
For more information on building an XML hierarchy, see section Generating an XML model via the XML Builder Wizard, in chapter Generating from a PDM, in the PDM User's Guide
.
- Click Finish.
The new XML model is displayed in the workspace with the generated elements and attributes.
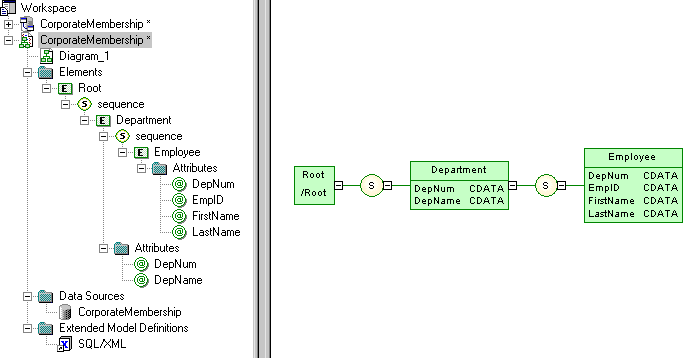
In the case of an existing XML model, the generated elements appear next to the existing elements.
 Extended model definitions
The
SQL/XML extended model definition is automatically attached to the generated XML model.
You can attach the
XML Document extended model definition to generate a simplified XML file that will help you understand the annotated schema. (See Note in step 11)
- Select Model→Extended Model Definitions.
The List of Extended Model Definitions is displayed.
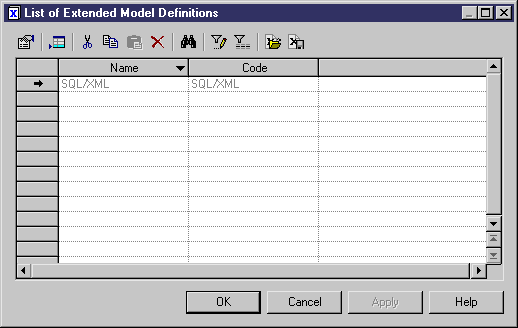
- Click the Import an Extended Model Definition tool.
The Extended Model Definition Selection dialog box is displayed.
- In the XML in Database tab, select IBM DB2 DAD.
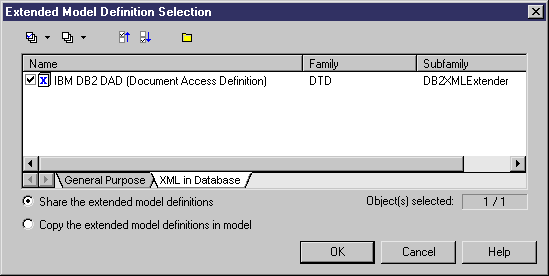
Note: In the General Purpose tab, you can select the XML Document extended model definition to generate a simplified XML file that will help you understand the annotated schema.
- Click OK in the Extended Model Definition Selection dialog box.
IBM DB2 DAD is displayed in the List of Extended Model Definitions.
- Click OK in the List of Extended Model Definitions.
The IBM DB2 DAD extended model definition is displayed in the Browser tree view, attached to the generated XML model.
 DAD file preview
In the Preview tab of the Root element property sheet, click the
DB2XMLExtender.DAD File tab to preview the DAD file.
If the DAD File tab is not available, click the Select Generation Targets tool to select IBM DB2 DAD in the Targets list and click OK.
- <Optional> <Defining the type of DAD file> Double-click a global element in the diagram to display its property sheet.
- In the Extended Attributes tab, click the DB2XMLExtender tab and select a value for the StorageType (Xcollection or Xcolumn). In the case of an Xcollection, select a value for the MappingType (RDB or SQL).
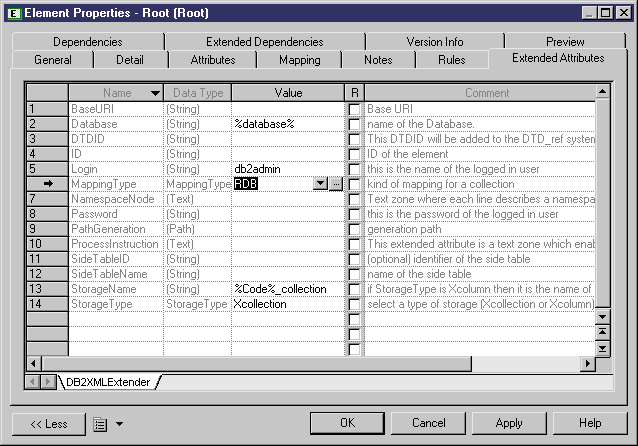
You can define a value for the following extended attributes:
| Extended attribute
|
Description
|
|---|
| Database
|
Name of the database
|
| DTDID
|
ID added to the DTD_ref system table in DB2 XML Extender
|
| Login
|
Name of the logged-in user
|
| MappingType
|
Type of mapping for a collection
|
| NamespaceNode
|
Text zone where each line describes a namespace couple (name = value). The separator character is '='
|
| Password
|
Password of the logged-in user
|
| PathGeneration
|
Generation path
|
| ProcessInstruction
|
A text zone that enables the user to enter some instruction
|
| SideTableID
|
Identifier of the side table (optional)
|
| SideTableName
|
Name of the side table
|
| StorageName
|
If StorageType is Xcolumn, then it is the name of the sidetable column
|
| StorageType
|
Type of storage (Xcollection or Xcolumn)
|
- Click OK.
- Repeat steps 14 to 16 for each global element you want to determine the type of DAD file or other extended attributes.
- Select Language→Generate Document Type Definition File.
The Generation dialog box is displayed with IBM DB2 DAD selected in the Targets tab.
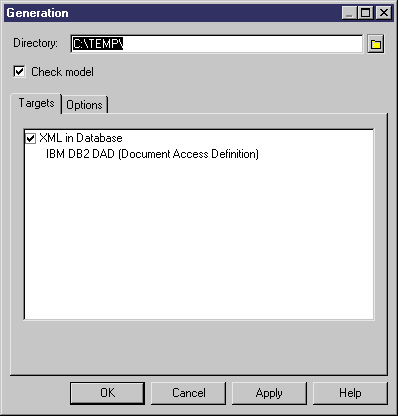
Note: The DAD files will be generated simultaneously with the DTD file and a SQL file for stored procedures.
- <optional> In the Options tab, generation options are set by default. You can change their value.
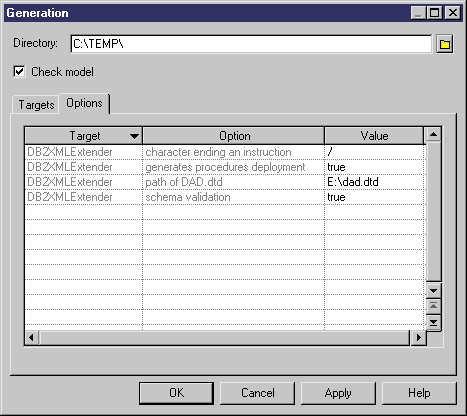
| Option
|
Description
|
|---|
| Character ending an instruction
|
Character ending instructions in the SQL file for stored procedures
|
| Generates procedures deployment
|
Generation of a SQL script for stored procedures enabling XML data storage and facilitating XML data retrieval
|
| Path of DAD.dtd
|
Path of the DTD file installed with IBM DB2 Extender and describing the specific syntax of DAD files
|
| Schema validation
|
Validation tag in the DAD files to check the conformity of DAD files with the DAD syntax
|
- Click the Select a Path button, beside the Directory box, to select a path for the DAD, DTD and SQL files.
- Click OK.
The Result dialog box is displayed with the paths of the generated DAD, DTD and SQL files.
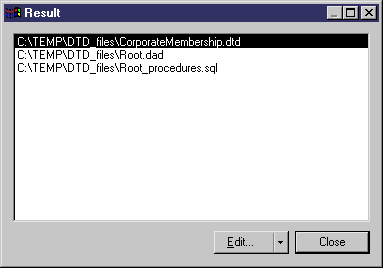
- Select the path of a DAD file and click Edit.
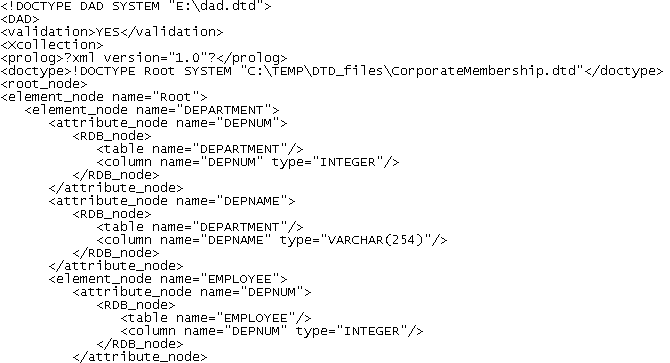
The selected DAD file is displayed in the Editor window.
- Extract of a DAD file defined with Xcollection as StorageType, and RDB as MappingType:
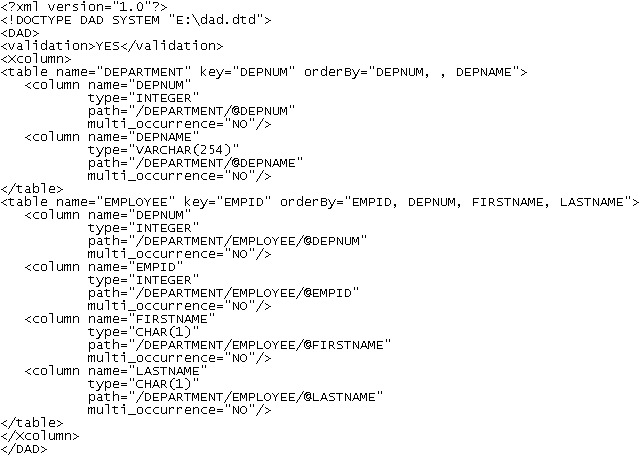
- DAD file defined with Xcolumn as StorageType:
- Repeat step 22 to edit another DAD file.
or
Click Close in the Result dialog box.
|
Copyright (C) 2007. Sybase Inc. All rights reserved.
|

|


![]() To generate a DAD file for IBM DB2:
To generate a DAD file for IBM DB2:


