

Chapter 2 Installing PowerDesigner
Copying files on the server
The first part of the administrative install consists in copying the PowerDesigner files on a server.
During that first step, you do not have to type any product key or select any feature to install, all PowerDesigner setup files are decompressed on the server directory. Note that this is just a copy, the server registry and system files will not be affected.
Before you start the copy, make sure you have enough disk space on the network drive.
 To copy the files on the server:
- Insert the CD-ROM in the drive.
The setup program automatically starts and the initial setup dialog box is displayed.
- Click the Administrative Installation button.
or
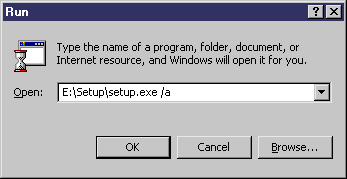
Select Start→Run, type the PowerDesigner setup.exe path followed by /a in the Run dialog box and click OK.
The welcome page is displayed.
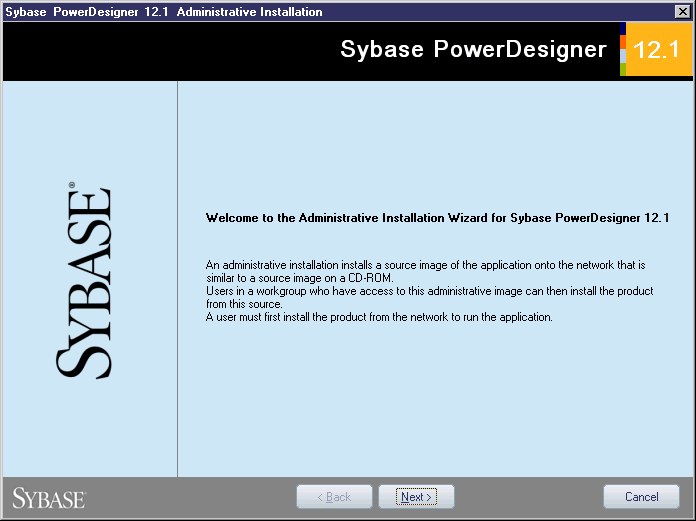
- Click Next.
The network location page is displayed and allows you to specify a network location where the product files will be stored.
- Type a location or select a location using the Browse button.
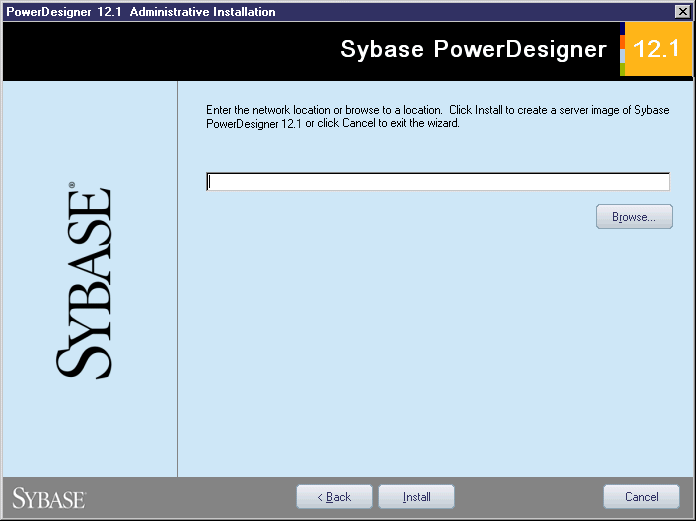
- Click Install.
The setup status page is displayed to indicate that copy starts. A progress box is displayed and Setup copies files to the destination directory.
The PowerDesigner setup files are copied on the network drive. Make sure there is enough disk space on this drive.
The InstallShield Wizard Complete page is displayed when copy is done.
- Click Finish.
|
Copyright (C) 2006. Sybase Inc. All rights reserved.
|
|