
Chapter 4 Managing a Report
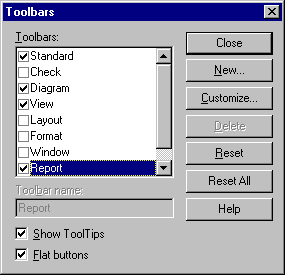
PowerDesigner provides a predefined Report toolbar that is designed to provide quick access to the most commonly used commands for report management.
![]() To display the Report toolbar:
To display the Report toolbar:

For more information about managing toolbars, see the "Managing toolbars" section in the "Using the PowerDesigner Interface" chapter in the PowerDesigner General Features Guide .
The following table indicates the names and actions of common tools in the Report toolbar:
| Tool | Name | Action |
|---|---|---|

|
Report Wizard | Displays the Report Creation Wizard. |

|
Print Preview | Displays a report print preview. |

|
Prints a report. | |

|
Generate RTF | Generates a report as an RTF file. |

|
Generate HTML | Generates a report as an HTML file. |

|
Add Item | Adds item to the Report Items pane. |

|
Up One Level | Moves item up one level. |

|
Down One Level | Moves item down one level. |

|
Raise Level | Moves item at the same level as the book item (item that contains other items) that precedes. |

|
Lower Level | Moves item within the book item that follows. |
| Copyright (C) 2005. Sybase Inc. All rights reserved. |

| |