

Chapter 5 Using MS Word with a requirements model
Inserting a requirements model into an existing MS Word document
A requirements model being a descriptive list of requirements, you might want to insert it into an existing MS Word document, e.g. a functional or technical specification.
A package containing at least one requirement can also be inserted into a document.
The following procedure assumes you have a requirements model open in the workspace and not linked to an existing document. MS Word can be open or closed.
 To insert a requirements model into an existing MS Word document:
- In the Browser tree view, right-click the model name and select Merge with an Existing Word Document in the contextual menu.
or
In the menu bar, select Tools→Merge with an Existing Word Document.
If MS Word is already open, you might need to click its button which blinks in the taskbar.
The Open dialog box appears.
- Select a directory in the Look in dropdown listbox, and an MS Word file (.doc) in the list.
- Click Open.
The MS Word document is parsed.
When the parsing is over, the Select a Place in Document dialog box appears in the PowerDesigner window.
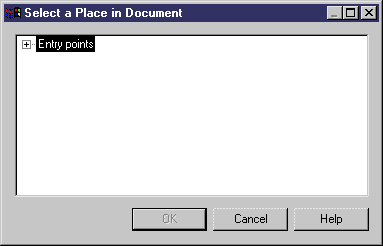
- Expand the Entry points node and all its sub-nodes, and select a title beneath which the requirements will be added.
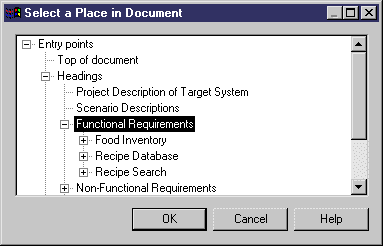
- Click OK.
The MS Word file appears in the Browser, in a Files folder within the model item. The requirements model is now linked to the MS Word document.

- Double-click the MS Word file in the Browser tree view.
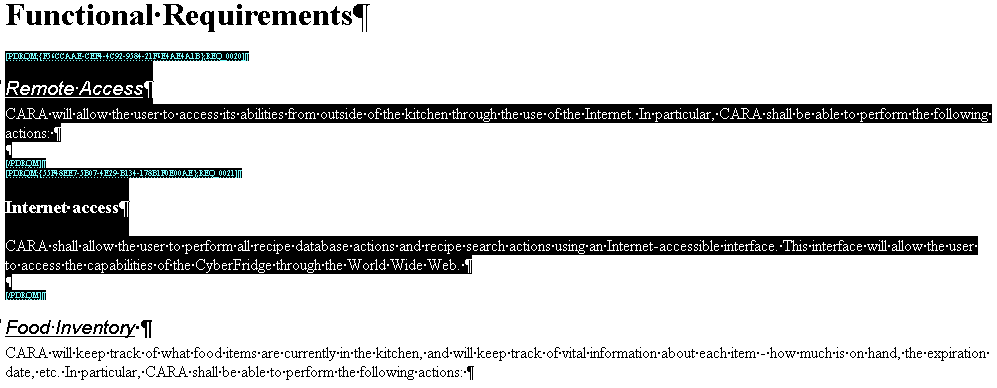
The MS Word document appears with the added requirements.
The Merge feature is no more available in the contextual menu of the model item.
If you insert a package into an existing document, the MS Word file is attached to the package.
|
Copyright (C) 2005. Sybase Inc. All rights reserved.
|
|