

Chapter 2 Installing PowerDesigner
Installing a Standalone - Served or a Floating - Served License of PowerDesigner
The same setup steps apply to both types of licenses.
Prerequisites
You need to have a license server installed in order to get the license to authorize PowerDesigner on your client machine. Make sure you know the server name. You may also need the TCP port number if the administrator who installed the license server defined a specific TCP port number. In this case, you must specify this user-defined TCP port number.
For more information on license server setup, see the "Setting up a License Server" section.
You also need to know exactly which PowerDesigner package you are going to use. PowerDesigner is available in various packages that provide different levels of functionality. A package is available on the server if a license file defines it, the list displays all packages available on the server but it does not reflect license availability.
When you select a package that has no available license on the server, an error message appears when you click Next and you need to modify the package selection.
 License server and PowerDesigner application
Do not install a license server and PowerDesigner on the same workstation.
Served licenses limitation
If you are using a standalone served or a mobile floating license and you work disconnected from the server, and if your workstation hosts other products that also use Flexlm served licenses, you may have problems for returning your license to the server.
 To install a standalone seat - local license of PowerDesigner:
- Insert the CD-ROM in the drive.
The setup program automatically starts and the initial setup dialog box is displayed. If the setup program does not automatically start and display the initial dialog box, double-click the SETUP.EXE file in the setup directory of the CD-ROM.
- Click the Install PowerDesigner 12.0 button.
The welcome page appears.
- Click Next.
The license selection page appears.
- Select the Standalone Seat - Served radio button.
or
Select the Floating License - Served radio button
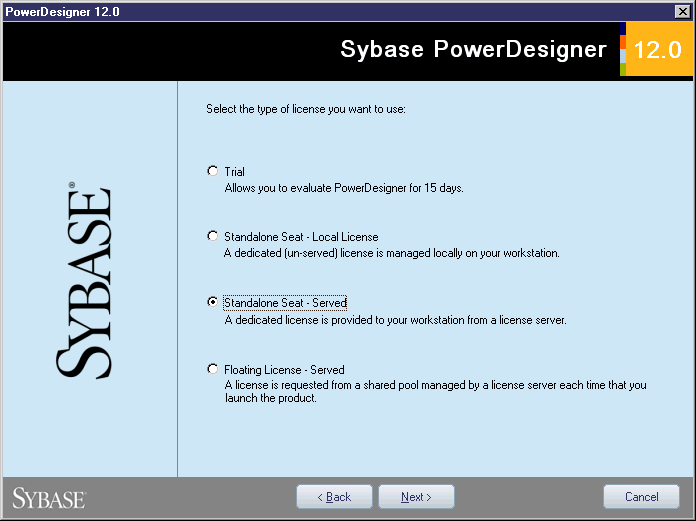
- Click Next.
The license server identification page appears.
- Type the name of the license server computer.
- [optional] Type a TCP port number.
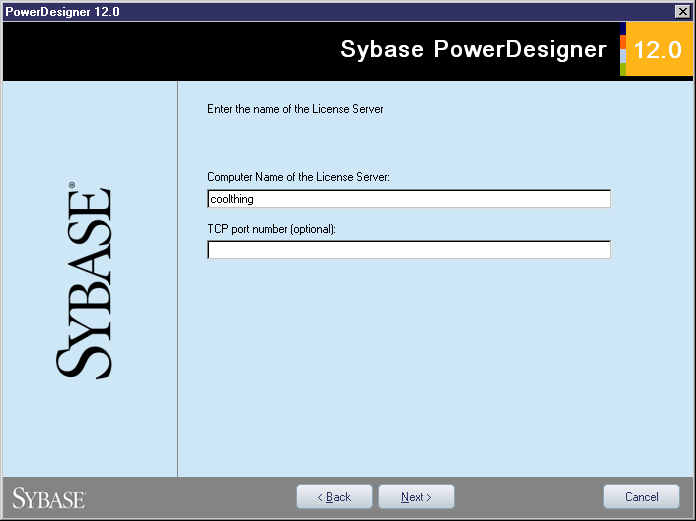
- Click Next.
The package selection page appears.
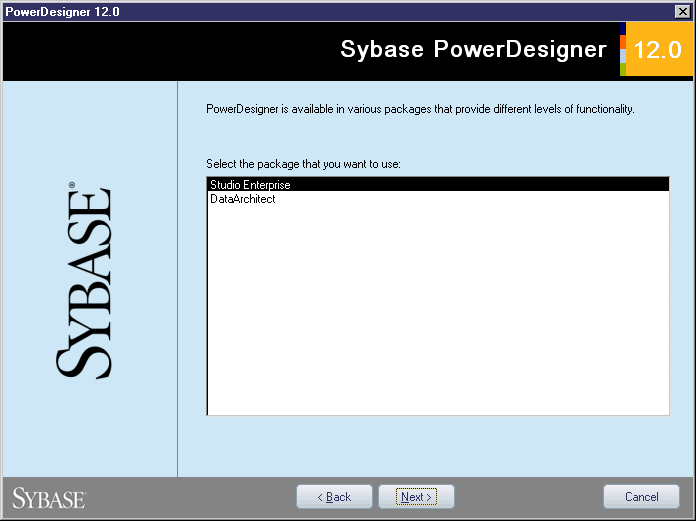
- Select a package and click Next.
The license agreement page appears.
- Select the location where you are installing the software in the dropdown listbox in the upper part of the dialog box. Read the License Agreement and click the I Agree radio button to accept the terms of the agreement. If you click I Do Not Agree, you cannot proceed with the Setup program and you have to cancel install.
Printing the License Agreement
You can print the License Agreement from the Setup\Licenses directory on the product CD.
- Click Next.
The directory selection page appears.
Setup suggests a directory in which to install PowerDesigner files. By default, this directory is different from the directories where previous versions of PowerDesigner are installed. You should avoid installing a new version of PowerDesigner in a directory that stores another version of PowerDesigner.
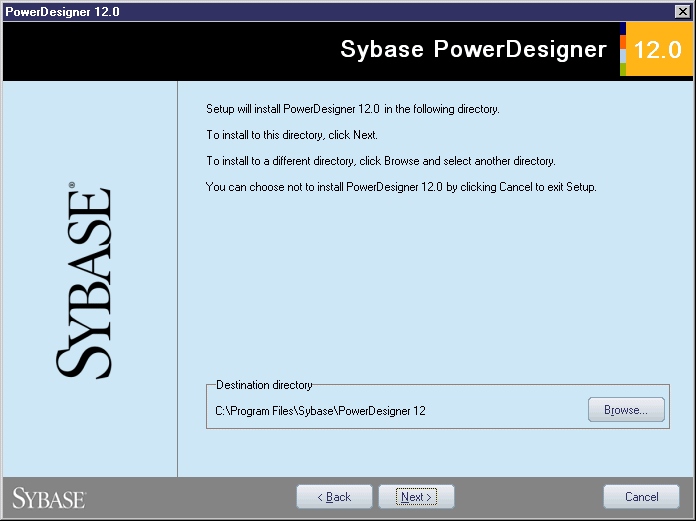
- Click Next to accept the suggested destination directory.
or
Click Browse, select a different destination directory, and click Next.
The component selection page appears. It contains a list of products and features that are available with the installation. Each node can be expanded in order to let you select the features you wish to install.

Modify install
When you are modifying an install, if you deselect a feature check box, this feature will be removed from the disk. See
Using Installation Maintenance.
- Select or clear check boxes to add or remove products or features and click Next.
The ODBC and Eclipse shared directory selection page appears if you selected the ODBC drivers and/or the Eclipse 3 Plug-in in the list of components.
In the Shared directory box, Setup suggests a directory to install ODBC driver files, this directory is shared among Sybase applications using ODBC drivers.
You also have to select the Eclipse installation directory. Note that the Eclipse plugin destination folder must correspond to an Eclipse 3.1 installation.
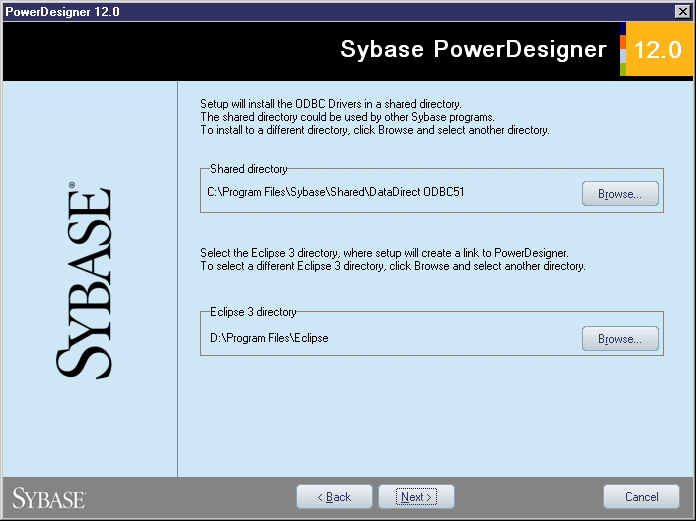
- Click Next.
The program folder selection page appears. You can create a new folder or select an existing folder and insert the PowerDesigner program folder in it.
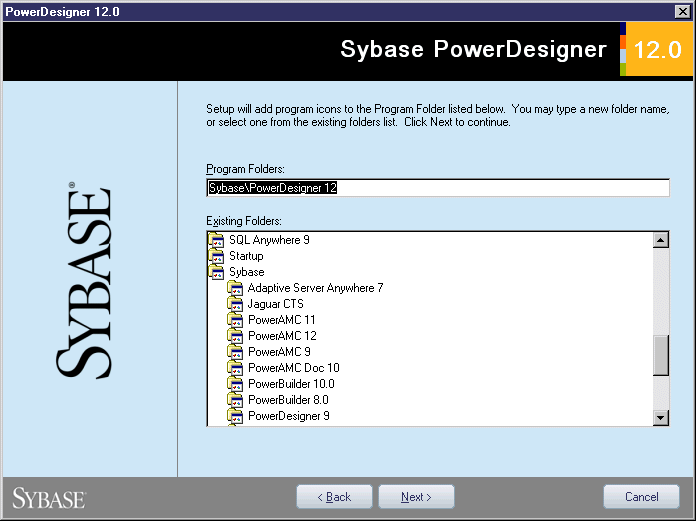
- Select a program folder from the Existing Folders list and click Next.
or
Type a program folder name in the Program Folders textbox and click Next.
The start copying files page appears. The Current Settings box lists all your setup choices.
You can also select the Keep PowerDesigner Settings check box to preserve the settings defined in the previous version installed on your machine.
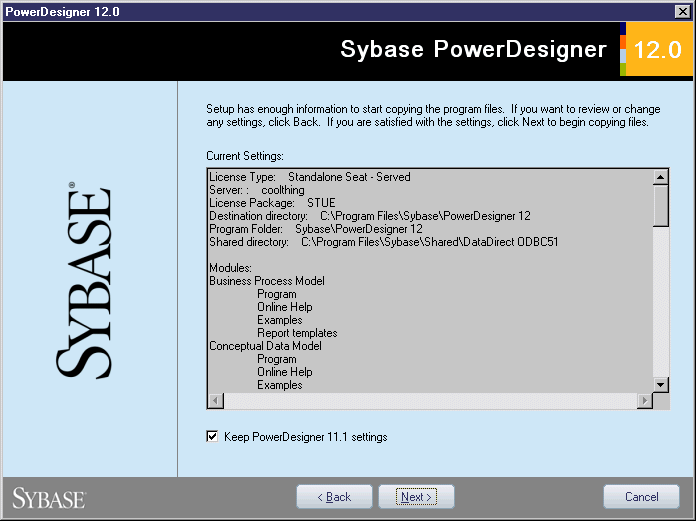
- Click Next to accept the current settings and start copying files.
The copy starts. A progress box appears and Setup copies files to the destination directory.
- Wait for the setup complete page to appear and click Finish.
Depending on your working environment, Setup may ask you to reboot your machine.
Readme.html
The Readme.html file contains important release information. You can open it using a text editor from the /PowerDesigner directory by default.
|
Copyright (C) 2005. Sybase Inc. All rights reserved.
|
|