Chapter 3 Building Physical Diagrams


Selecting a data type for a column

There are two ways to select a data type for a column:

Note   About check parameters
Check parameters indicate data ranges and validation rules. You can set check parameters for domains, tables, and columns.

Steps To select a data type for a column:

  1. Double-click a table in the diagram to display the table property sheet.
  2. Click the Columns tab.

    The Columns page appears. It lists columns associated with the table.
  3. Click the column that you want to define.

    An arrow appears at the beginning of the line.
  4. Click the Properties tool.

    or

    Double-click the arrow at the beginning of the line.

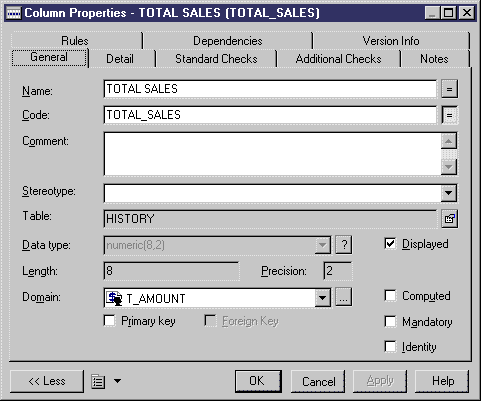
    The column property sheet appears.


    Note   Opening property sheets at last accessed page
    Property sheets open to the General page by default. However, you can choose to open property sheets at the last page accessed by selecting Tools→Options→Dialog, and selecting the option Keep Last Tab in the Property Sheets groupbox.

  5. Select a data type from the Data Type dropdown listbox.

    or

    Click the Question mark button at the end of the Data Type listbox.

    A list of standard data types appears.

    Select the radio button corresponding to the data type you want to apply.

    Click OK
  6. Type the data type length in the Length box.

    or

    Type the level of data type precision in the Precision box.

    Note   Undefined data type
    If you do not want to select a data type immediately, you can choose the <undefined> data type. When you generate the database, this data type is replaced by the default data type for your database, as defined in the DBMS.

  7. Click OK.

    You return to the Columns page. The new data type for the column appears in the Data Type column.
  8. Click OK.

    or

    Click another column in the list.


Copyright (C) 2005. Sybase Inc. All rights reserved.