Chapter 3 Building Physical Diagrams
Creating a sequence
To create a sequence:
Select Model→Sequences to display the List of Sequences.
Click a blank line in the list.
or
Click the Add a Row tool.
An arrow appears at the beginning of the line.
Type a sequence name and a sequence code.
Click Apply.
Double-click the arrow at the beginning of the line with the new sequence name to display the sequence property sheet.
Select a sequence owner in the General page.
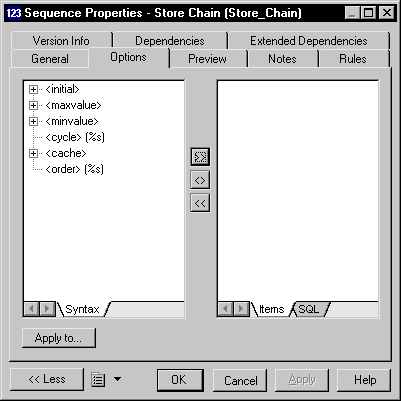
Click the Options tab to display the Options page.
The Syntax page in the left pane lists the sequence options available.
Select an option from the list on the Syntax page in the left pane.
Click the Add tool.
The name of the option appears on the Items page in the right pane.
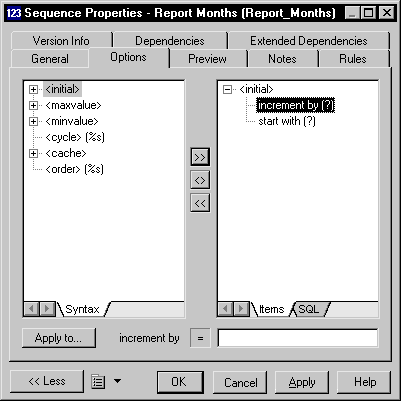
Expand the option and select one of its parameters.
The parameter name appears with an equals sign next to a text box at the bottom of the dialog box.
Type a value for the parameter in the text box below the right pane.
The parameter on the Items page displays the value.
If required, select another parameter and similarly type a value for it.
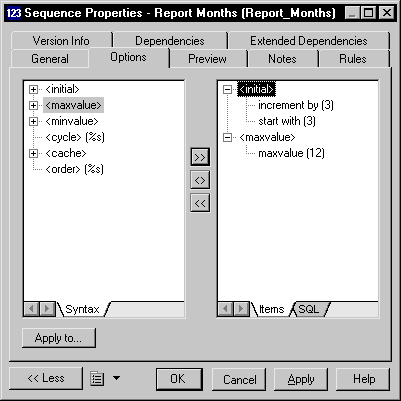
Repeat steps 7 to 11 to define the sequence options you want.
The above example shows the options and values to create a sequence of months in a year when quarterly reports are published.
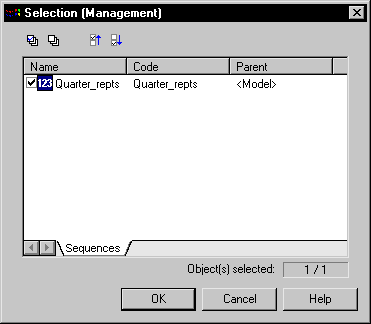
<optional> Click the Apply To button to open a selection list and select the sequence to which the options will apply.
You may apply the options to more than one sequence if you have previously created sequences.
Click OK in each of the dialog boxes.
Copyright (C) 2005. Sybase Inc. All rights reserved.