

Chapter 4 Managing Profiles
Create object stereotypes
The robustness analysis classifies objects in three categories:
- Boundary objects are used by actors when communicating with the system; they can be windows, screens, dialog boxes or menus
- Entity objects represent stored data like a database, database tables, or any kind of transient object such as a search result
- Control objects are used to control boundary and entity objects, and represent transfer of information
To implement the robustness analysis in PowerDesigner, you are going to create stereotypes for objects in the collaboration diagram. These stereotypes correspond to the three object categories defined above. You will also attach custom tools in order to create a palette specially designed for creating objects with the <<Entity>>, <<Control>>, or <<Boundary>> stereotype.
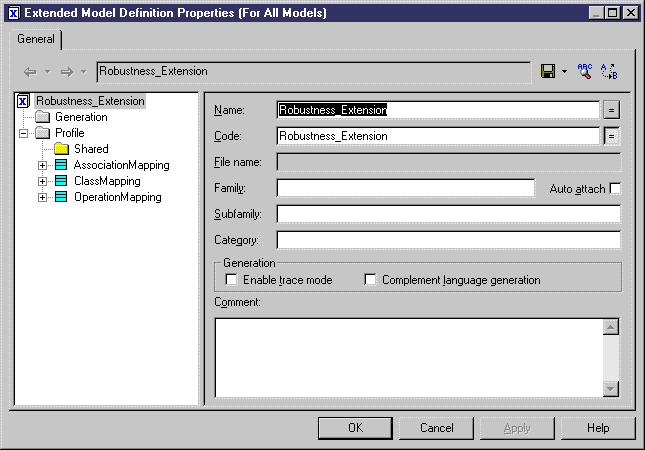
You create these stereotypes in the Profile category of the extended model definition attached to your model.
 To create object stereotypes:
- Select Model→Extended Model Definition and double-click the arrow beside Robustness Extension in the list to display the resource editor.
- Right-click the Profile category and select Add Metaclasses.
The Metaclass Selection dialog box is displayed.
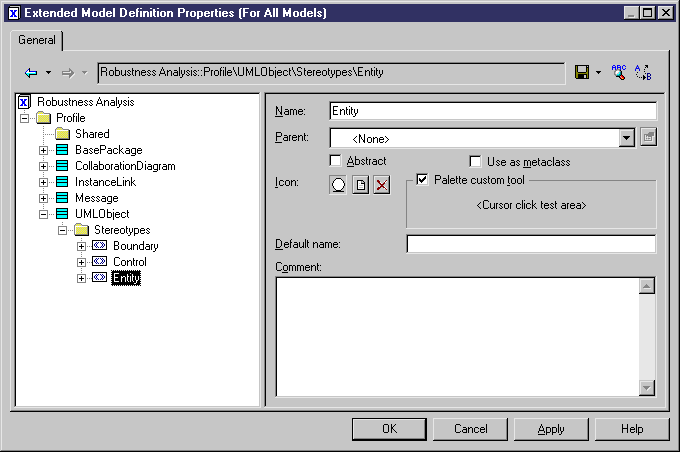
- Select UMLObject in the list of metaclasses displayed in the PdOOM tab and click OK.
The UMLObject category is displayed under Profile.
- Right-click the UMLObject category and select New→Stereotype.
A new stereotype is created under the UMLObject category.
- Type Boundary in the Name box.
- Select the Palette Custom Tool check box.
- Click the Browse tool and select file boundary.cur in folder \Examples\Tutorial.
- Repeat steps 4 to 7 to create the following stereotypes and tools:
| Stereotype
|
Cursor file
|
|---|
| Entity
|
entity.cur
|
| Control
|
control.cur
|
You should see the 3 stereotypes under the UMLObject metaclass category.
- Click OK.
- Click Yes to save the extended model definition.
The tool palette with the stereotype tools is displayed in the diagram.

- Move the List of Extended Model Definitions to the bottom of the screen.
- Click one of the tools and click in the collaboration diagram.
An object with the predefined stereotype is created:

- Right-click to release the tool.
|
Copyright (C) 2005. Sybase Inc. All rights reserved.
|
|