Creating a List Report

A list report documents a single object type within a model, and is displayed as a customizable list with columns and rows that you can filter as necessary.

You can create snapshots (called result sets) of a list report to keep a history of the execution of a list report in your model. Result sets are listed in the browser beneath their parent list report, and are saved with the model. For more information, see Creating Result Sets.

A list report is saved in the model and can be exchanged between models of the same type.

You can also right-click a list report in the Browser and select Generate > Format .

You can right-click a list report in the Browser and select Preview to preview the list report before printing. You can also right-click a list report in the Browser and select Print without previewing the list report.

You can create a list report in any of the following ways:


  • Select Report > List Report Wizard to launch the List Report Wizard. You can complete all the steps or click the Finish button at any time after having selected an object type for the report.

  • Select Report > List Reports to access the List of List Reports, and click the Add a Row tool.

  • Right-click the model, package or object category in the Browser, and select New > List Report.

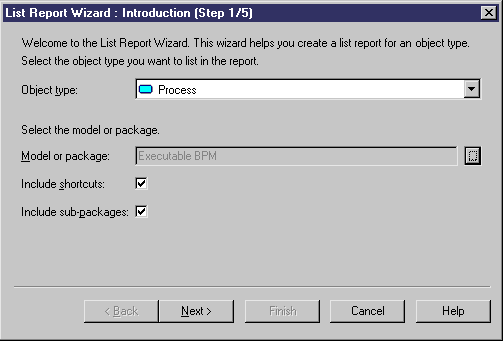
  1. Select Report > List Report Wizard (or select Report > List Reports and click the List Report Wizard tool in the toolbar) to launch the Wizard:

  2. The Introduction page allows you to specify an object type for the list report. You can also select whether to base the list report on the model or on a package, and whether to include shortcuts and objects in sub-packages.

    When you are satisfied, click Next:


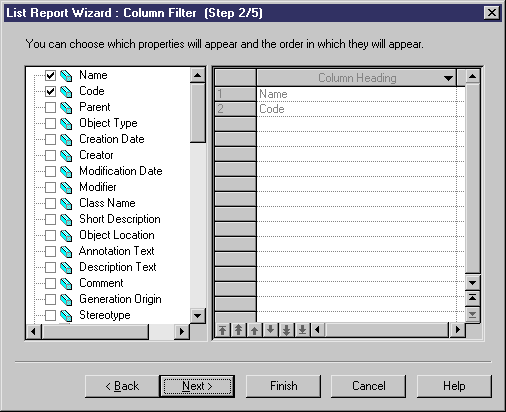
  3. The Column Filter page allows you to specify which of the object's properties will be included in the list report. Select a property in the left-hand pane to add it to the list in the right-hand pane. You can promote or demote properties in the list using the arrows at the bottom of the pane.

    When you are satisfied, click Next:


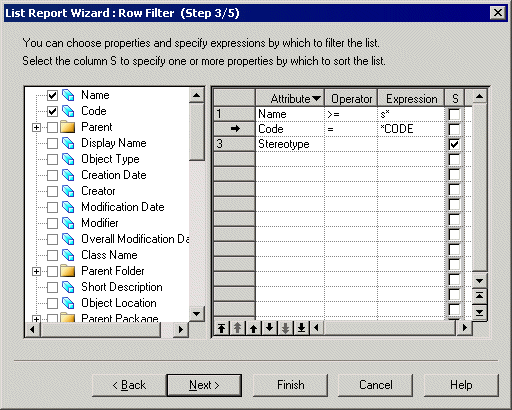
  4. The Row Filter page allows you to specify filters to restrict the objects that will be included in the list report. Select a property in the left-hand pane to add it to the list in the right-hand pane, select an operator, and then enter an expression to filter by. You can specify to sort the list on the values of a property by selecting the S[ort] checkbox. For more information about the operators and the expression syntax, see Defining a Filter Expression.

    When you are satisfied, click Next:


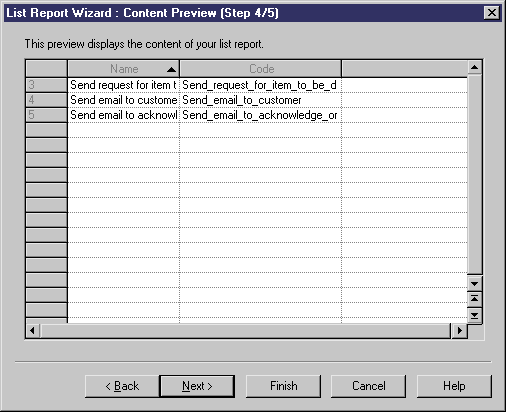
  5. The Content Preview page allows you to visualize the results of your choices so far. To alter the definition click the Back button. Otherwise, click Next:

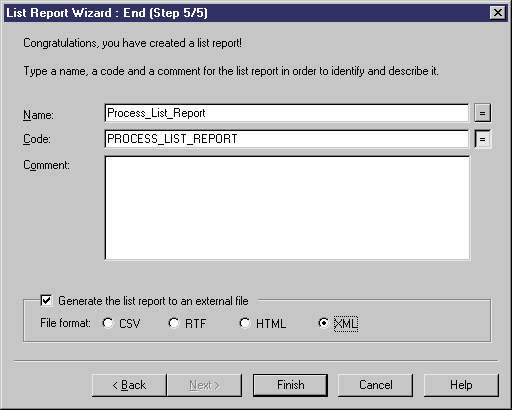
  6. The End page allows you to specify a name and code for the list report, and to add a comment. You can also specify whether to generate the report to an external file.

    Click Finish to exit the wizard. If you have selected to generate the report to an external file, you will be asked to specify a file name.

    The list report is added to the model and listed in the Browser under the List reports folder