The Sybase IQ Extended Enterprise Edition CD contains two products:
Sybase IQ ETL Server
Sybase IQ Server
If you plan to install both products, install Sybase IQ ETL first because Sybase IQ Server requires a system reboot.
If you do not require ETL capability, skip to “Installing Sybase IQ Server”.
![]() Installing Sybase IQ ETL Server
Installing Sybase IQ ETL Server
Sybase IQ ETL Server provides Extract/Transform/Load capability for Sybase IQ.
In Task Manager, check for the process GridNode.exe. Make sure that the Show Processes From All Users box is selected. If this process is running on your system, stop it before installing Sybase IQ ETL Server.
Choose Sybase IQ ETL Server from the servers listed on the first screen and click Next.
Select a setup language and click OK to continue.
Read the welcome screen and click Next.
Read the license agreement. To continue the install, select “I accept the agreement,” and click Next. To stop the procedure without installing Sybase IQ ETL Server, click Cancel.
If you do not find a license agreement that matches your location, or if the license agreement is unreadable on your system, you can read all available license agreements at the Local Sybase Software Licenses Web site and rerun setup.exe.
The default location for Sybase IQ ETL Server is C:\Program Files\SYBASE\IQETLServer421 and C:\Program Files (x86) \SYBASE\IQETLServer421. To install in the default location, click Next. Otherwise, click Browse to specify a new location. Sybase recommends that installation paths contain only alphanumeric characters.
The default location for the program shortcut is the Start Menu folder Sybase\. To install in the default location, click Next. Otherwise, click Browse to specify a new location.
Click Next to register Sybase IQ ETL Server as a Windows System Service. This lets you use Services to start or stop Sybase IQ ETL Server. If you prefer not to register, click the Register as Windows System Service box to remove the checkmark before you click Next.
The installation procedure displays the installation locations, Start Menu folder, and additional tasks specified. To install, click Install. To change the locations or tasks, click Back. To exit without installing, click Cancel.
View the Readme file and click Next to continue.
Click Finish to exit Setup for Sybase IQ ETL Server.
The Setup wizard returns you to the Sybase IQ Extended Enterprise Edition Main Menu..
To exit, click Finish. To install Sybase IQ Server, see the next section, “Installing Sybase IQ Server.”
![]() Sybase strongly recommends that you check the online
support Web site for software updates after you install the software.
If a software update (EBF) has been released, it contains bug fixes
made after this product shipped. For details, see “Finding the latest information on EBFs and software maintenance”.
Sybase strongly recommends that you check the online
support Web site for software updates after you install the software.
If a software update (EBF) has been released, it contains bug fixes
made after this product shipped. For details, see “Finding the latest information on EBFs and software maintenance”.
To begin using Sybase IQ ETL, see ETL User’s Guide for Sybase IQ (DC00608-01-0421-01). This document is available online and on the Getting Started Sybase IQ 12.7 Extended Enterprise Edition CD.
Choose Sybase IQ Server from the servers listed on the first screen and click Next.
On the Welcome screen, press Next to continue or Cancel to stop the installation. (If you have previously installed Sybase IQ, you may choose to modify, repair, or remove installed files.)
From the drop-down menu, select the location where you are installing the software.
If the country where you are located is not listed, select the most appropriate area, such as (“Americas (Mid/So.) and Asia Pacific — General” or “Europe, Middle East, and Africa — General”).
If you do not find a license agreement that matches your location, or if the license agreement is unreadable on your system, you can read all available license agreements at the Local Sybase Software Licenses Web site and rerun setup.exe passing it the parameter -I_accept_sybase_license. For example:
H:\>start E:\setup.exe -I_accept_sybase_license
Read the License Agreement. To accept it and continue the install, select “I accept the terms of this agreement” and click Next. To stop the procedure without installing Sybase IQ, click Cancel.
On the Customer Information screen, enter your name and your company name in the text boxes and click Next.
On the Setup Type screen, choose Complete or Custom install. (This screen specifies the default installation location C:\Program Files\Sybase.) The Complete install is recommended for most users. For a Complete install, skip to step 15.
The Custom install lets you select components to install. Sybase IQ and related components are installed in separate folders. The defaults are:
C:\Sybase for Software Developer’s Kit
C:\Program Files\Sybase\Shared\Sybase Central 4.3 for Sybase Central Java Edition
C:\Program Files\Sybase for other products
Accept the default or click the Browse button (Alt+R) to select another destination folder. Click Next (Alt+N).
![]() If you move ahead in the install procedure and return
to this screen, the installer resets target locations to their defaults.
Check locations carefully.
If you move ahead in the install procedure and return
to this screen, the installer resets target locations to their defaults.
Check locations carefully.
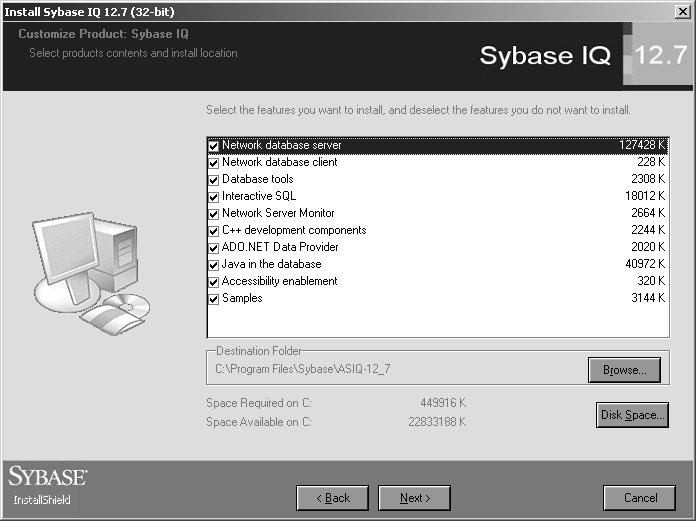
For a Custom install, the Products Selection screen lists components. By default, all products are selected; click any component to deselect it. If a selected product requires a component, you cannot deselect that component.
After choosing desired products, click Next (Alt+N).
The Customize Product screen displays destination folders beneath the feature list. To change the default installation location for any Sybase IQ product, use the Browse button (Alt+R). Click Disk Space (Alt+S) to examine space available on the selected destination disk.

When satisfied with locations of IQ components, click Next.
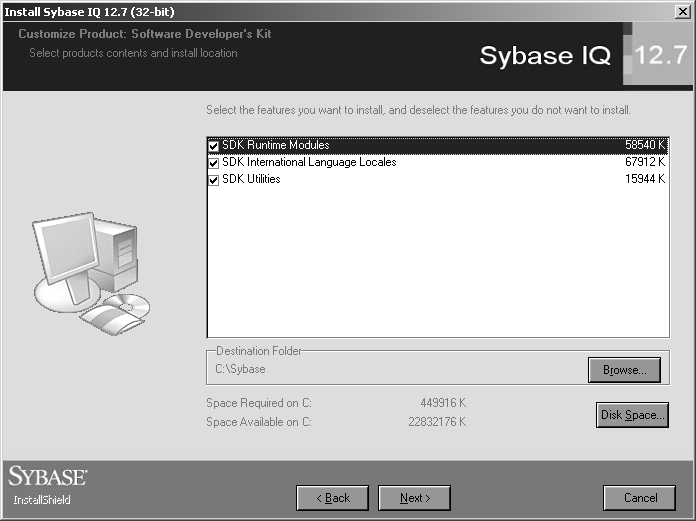
To change the default installation location for any Software Developer’s Kit (Open Client) component, use the Browse button.

Click Disk Space to examine space available on the selected destination disk.
![]() You must install Software Developer’s Kit 15.0
or have 15.0 Open Client/Open Server installed on your
system to run Sybase IQ.
You must install Software Developer’s Kit 15.0
or have 15.0 Open Client/Open Server installed on your
system to run Sybase IQ.
When satisfied with locations of SDK components, click Next.
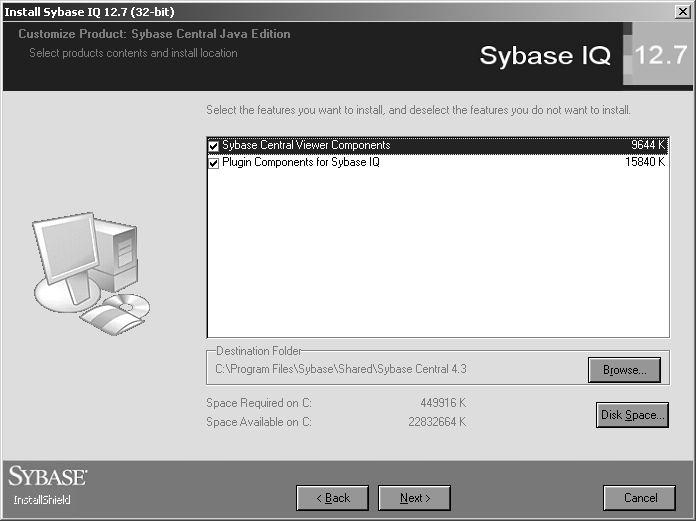
Examine the locations where the procedure will install the Sybase Central Java Edition components, and change them if desired, using Browse and Disk Space keys.

When satisfied with locations of Sybase Central components, click Next.
![]() You must run the IQ Agent in order to use Sybase Central.
See the Sybase IQ System Administration Guide for instructions on configuring and
running the IQ Agent.
You must run the IQ Agent in order to use Sybase Central.
See the Sybase IQ System Administration Guide for instructions on configuring and
running the IQ Agent.
To keep the default login and password for the Utility Database, click Next on the Utility Database Access screen. To change them, type the new login and password, verify the password, then click Next.
If you have optional components to install, enter each component and its key on the Component menu. Type the installation key exactly as it appears on your installation key document. Click Register, then click Next. If you have no optional components to register, simply click Next.
The installation procedure displays a list of items to be installed and their locations. Click Next to install, or Back to change the items or locations. During installation, a gauge displays the percentage and names of files installed.
![]() It is best to reboot after any program installation
to ensure that registry and environment settings are correct.
It is best to reboot after any program installation
to ensure that registry and environment settings are correct.
When the installation procedure completes, it prompts you to reboot your system. To reboot your system now, remove the installation CD from the CD drive and click Finish. To reboot at a later time, click “No, I will restart my computer later,” then click Finish.
Sybase strongly recommends that you check the online support Web site for software updates after you install the software. If a software update (EBF) has been released, it contains bug fixes made after this product shipped. For details, see “Finding the latest information on EBFs and software maintenance”.