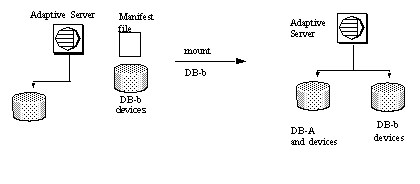


Use the mount command to add the information for devices and other attributes for the database to the destination or secondary Adaptive Server. The mount command decodes the information in the manifest file and makes the set of databases available online. All the required supporting activities are done, including adding database devices if not present and activating them, creating the catalog entries for the new databases, recovering them, and putting them online. When you mount databases onto an Adaptive Server:
You cannot mount a subset of the databases described in the manifest. All the databases and devices present in the manifest must be mounted together.
The databases being mounted must have the same page size as the previous Adaptive Server.
There must be enough devices configured on the secondary Adaptive Server for the successful addition of all the devices belonging to the mounted databases.
The configuration parameter number of devices must be set appropriately.
Database names and devices with the same names as the mounted database must not already exist.
Adaptive Server must have the same version as the mounted database.
The mounted database must be from the same platform as the Adaptive Server.
![]() Remember that if you use the unmount command,
the database is removed from the original Adaptive Server with its
information on attributes, device names, and so on.
Remember that if you use the unmount command,
the database is removed from the original Adaptive Server with its
information on attributes, device names, and so on.
Syntax:
mount all from <manifest_file>
For example:
1> mount database all from "/work2/Devices/Mpubs_file"
2> go

Redo pass of recovery has processed 1 committed and 0 aborted transactions.
MOUNT DATABASE: Completed recovery of mounted database 'pubs2'
Once the mount is completed, the database is still offline. Use the online database command to bring the database online. You do not have to restart the server.
| Copyright © 2005. Sybase Inc. All rights reserved. |

|
|