Sybase HIPAA Accelerator installs to the following default directory: C:\Program Files\Sybase\HIPAA60.
If you have made custom changes to the existing maps, you need to apply your changes to 6.0 maps. See the ECMap User’s Guide for instructions.
![]() Installing Sybase HIPAA Accelerator
Installing Sybase HIPAA Accelerator
If you are upgrading from a previous Sybase HIPAA Accelerator release, you must uninstall the older version first using the Control Panel > Add or Remove Programs option.
Insert the installation CD into the drive.
If Autorun is enabled, the install wizard loads automatically. If you disabled Autorun, use Windows Explorer or My Computer to navigate to the directory of your installation CD and double-click Setup.exe.
The installation program starts.
Click Next at the Setup/Welcome screen.�
Click the License Agreement scroll bar and select your location; for example, US and Canada.
Read the license agreement and click I accept to proceed with the installation.
Click Next to accept the default destination folder C:\Program Files\Sybase. Alternatively, browse to another directory.
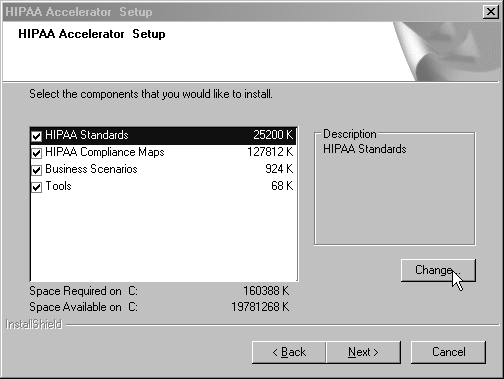
When the next screen displays, all Sybase HIPAA Accelerator features (Standards, Maps, Business Scenarios, and Tools) are selected by default.
![]() Maps and Standards are the core of Sybase HIPAA Accelerator. Do not
clear them unless you are sure that you will not send or receive
that type of transaction.
Maps and Standards are the core of Sybase HIPAA Accelerator. Do not
clear them unless you are sure that you will not send or receive
that type of transaction.
Choose one of the following:
To install all features, click Next and proceed to Step 7.
To skip the installation of a feature, clear the checkbox (for example, Business Scenarios), click Next, and proceed to Step 7.
![]() Maps and Standards are the core of Sybase HIPAA Accelerator. Do not
clear them unless you are sure that you will not send or receive that
type of transaction.
Maps and Standards are the core of Sybase HIPAA Accelerator. Do not
clear them unless you are sure that you will not send or receive that
type of transaction.
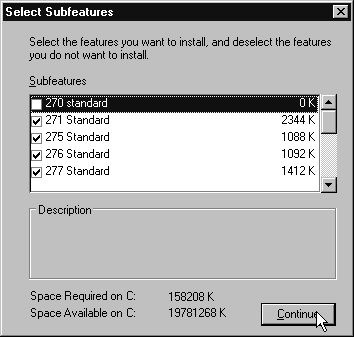
If you require only a subset of the supplied maps or standards (for example, you do not need the 270 standard):
Highlight HIPAA Standards and click Change.

The Select Subfeatures window displays.
Clear the appropriate subfeature, such as the 270 Standard. Only the selected items will be installed.

Click Continue to return to the Select Features window.
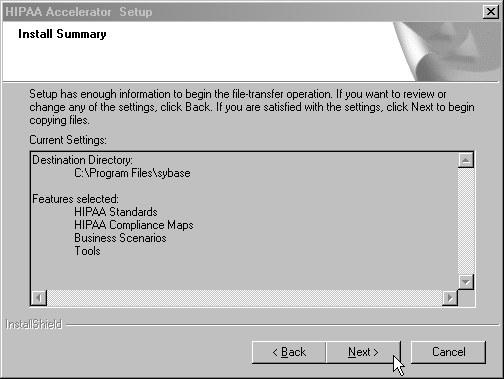
If you have finished modifying the install with the subfeatures you want, click Next to proceed to the Install Summary screen.
At this point you can choose to remove additional subfeatures, such as from Maps.
![]() Business Scenarios and Tools cannot be broken down into subfeatures.
Business Scenarios and Tools cannot be broken down into subfeatures.

Click Next to proceed with the installation or Back to change your selections.
When the InstallShield Wizard Complete window displays, click Finish.
After the installation is complete, refer to the Sybase HIPAA Accelerator User’s Guide for instructions on setting up and running transactions using the Sybase HIPAA Accelerator 6.0 compliance maps.
Refer to the ECMap documentation for more detailed usage instructions. Go to Product Manuals.