![]()
![]()
![]()
![]()
In this procedure, link ModifyHelpDeskCase and CreateHelpDeskCase to the data source table, RemedyLinkedParams. It is important for parameters to use the same display name used in the Display_Name column in the data source table, or the linked parameters will not work.
For example, if the display name for a linked parameter is “Create_Helpdesk_Case.Department” in an application, but the display name is “Department” in the data source table, you must change the display name to “Department” in the application in order for the linked parameter to work.
![]() Linking parameters for multilevel lookup
Linking parameters for multilevel lookup
From Mobile Web Studio, select Build | Applications in the left pane, select Approved in the Applications Manager Status menu.
Select ModifyHelpDeskCase in
the detail pane, and click Edit to launch Application Builder.
![]() When prompted to fill in all the required fields for
preview, click OK to bypass.
When prompted to fill in all the required fields for
preview, click OK to bypass.
Select Params, and click Next.
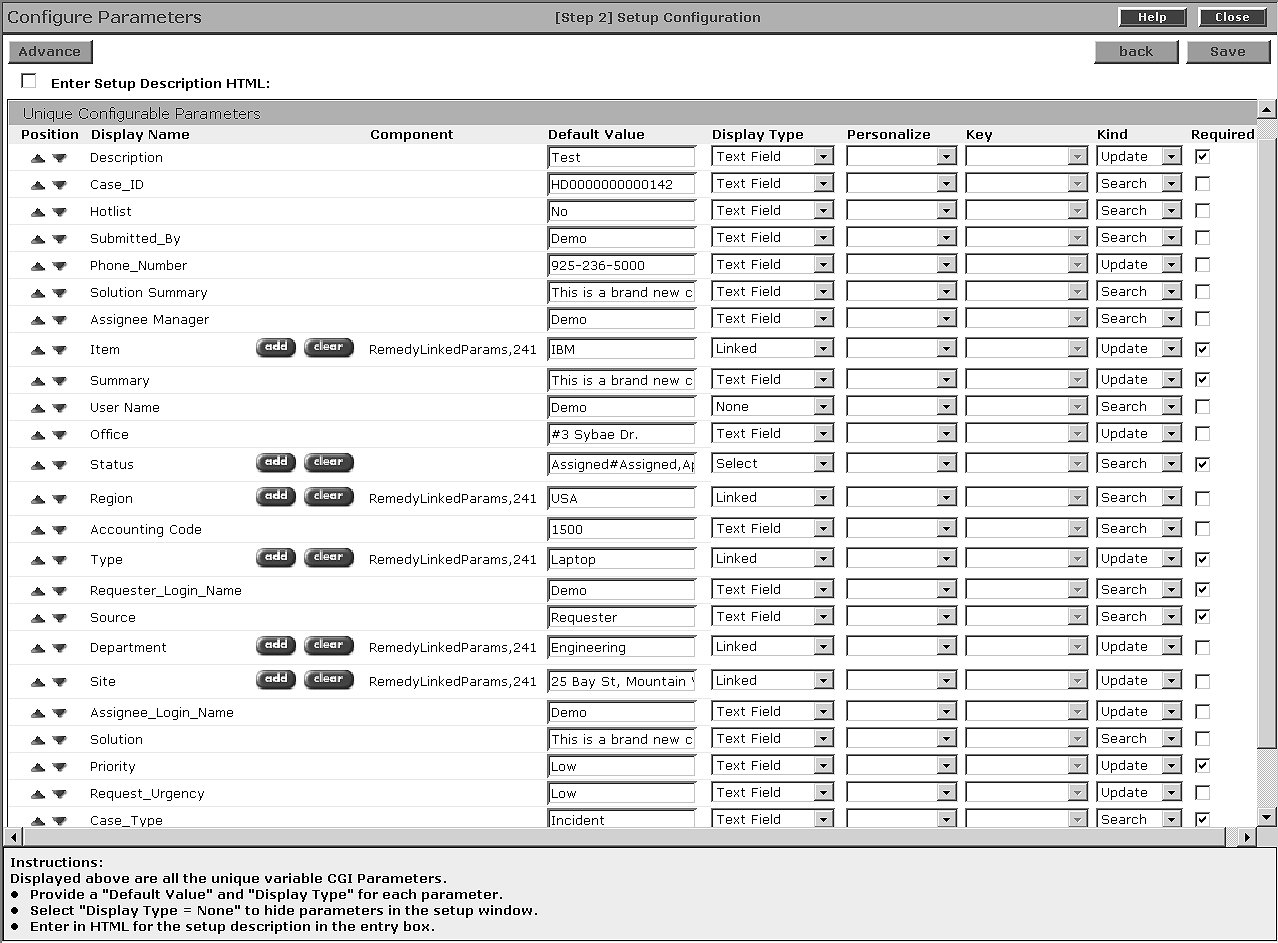
In Configure Parameters, look for the parameters with the Add and Clear buttons exposed. (When you created the applications, you selected Linked in Display Type to expose the Add and Clear buttons).
Click one of the Add buttons.
In Find Portlet, click Search, then find and select
the RemedyLinkedParams application,
and click Add. This links all the linked parameters to the data
source file.
![]() To remove a linked parameter, click Clear.
To remove a linked parameter, click Clear.
Click Save, and close the window. The linked application displays in the Component column. Figure 13 shows several parameters—Item, Region, Type, Department, Site, and Category—that are linked to the RemedyLinkedParams.jsp file for the CreateHelpDeskCase application.
Figure 13: Linking parameters for multilevel lookup
Optional. Make any additional configuration parameter settings you require, and edit your application using regular procedures.
In the Configure Parameters window, click Save, and close the window.
In Application Builder, click Save, and OK to confirm.
Click Close to exit Application Builder.
Repeat the procedure for the CreateHelpDeskCase application.
