![]()
![]()
![]()
![]()
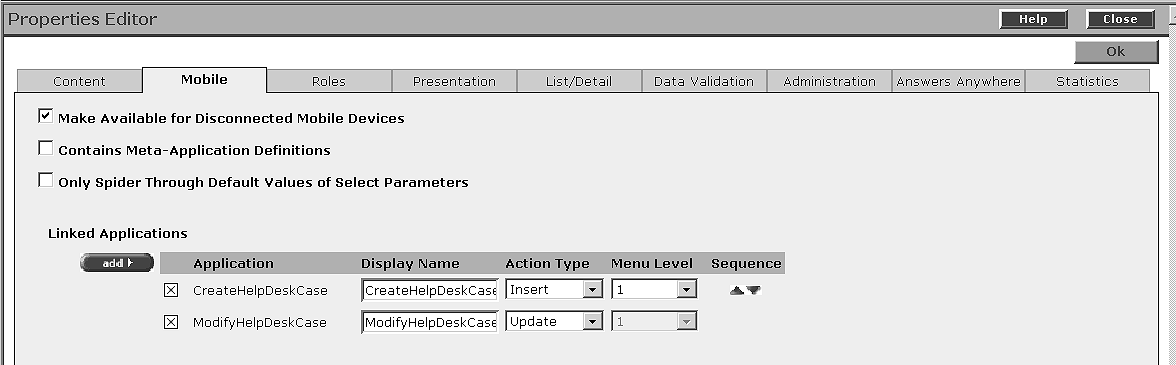
Once you have created the master, update, and insert applications, link the ModifyHelpDeskCase and CreateHelpDeskCase applications to the GetHelpDeskList master application.
![]() Linking the update applications to the master
application
Linking the update applications to the master
application
In Applications | Approved, select the GetHelpDeskList application, and
click Edit.
In Application Builder, click Properties.
In the Properties Editor window, click the Mobile tab.
Link GetHelpDeskList to ModifyHelpDeskCase:
Under Linked Applications, click Add.
In the Find Application window, click Search.
From the Results pane, select the ModifyHelpDeskCase application,
and click Add.
In the Properties Editor window, where you see the ModifyHelpDeskCase application
listed as a linked application, enter:
Action Type – select Update from the list.
Menu Level – accept the default value of 1.
Link GetHelpDeskList to CreateHelpDeskCase:
Under Linked Applications, click Add.
In the Find Application window, click Search.
From the Results pane, select the CreateHelpDeskCase application,
and click Add.
In the Properties Editor window, where you see the CreateHelpDeskCase application
listed as a linked application, enter:
Action Type – accept Insert from the list.
Menu Level – accept the default value of 1.
Figure 11: Linking applications
Click OK.
In Application Builder, click Save, and OK to confirm.
Click Close in the upper-right corner of Application Builder.
