In this lesson, you will learn how to use Sybase WorkSpace to view and change the contents of the referenced tables for an Adaptive Server Enterprise server database.
�Before you can perform the steps in this lesson, create a stored procedure and then run the stored procedure, as described in the previous lessons, “Lesson 2: Create a stored procedure” and “Lesson 3: Run a stored procedure”.
![]() Viewing #temp tables during debugging
Viewing #temp tables during debugging
If necessary, select Window|Open Perspective|Database Development from the main menu bar to open the Database Development perspective.
In the Database Explorer view, open the Procedures & Functions folder under the appropriate pubs sample database.
Find the play_proc stored procedure that you created in “Lesson 2: Create a stored procedure” and double-click it to open it in the SQL Editor.
To view the contents of a #temp table for a stored procedure, use the stored procedure debugger. When you stop at a breakpoint in the stored procedure, you can view and modify the contents of the #temp table.
First, add breakpoints to the stored procedure and then invoke the debugger.
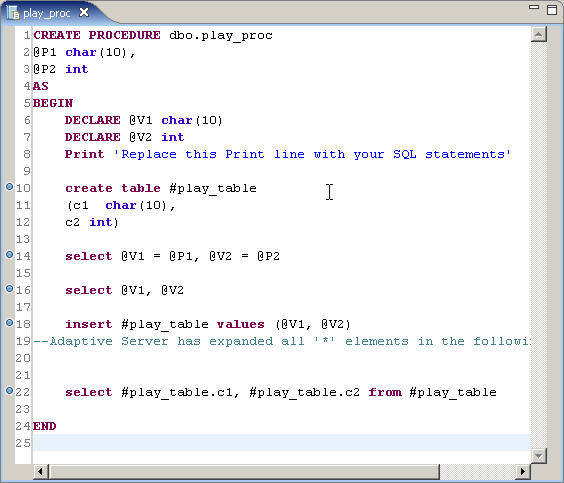
Add breakpoints to the following lines.
If you look at the following figure, these statements correspond to line numbers 10, 14, 16, 18, and 22. However, if you added comments or selected the Recompile option when creating the stored procedure, your line numbers may differ.
Create table #play_table
select @V1 = @P1, @V2 = @P2
select @V1, @V2
insert #play_table values (@V1, @V2)
select #play_table.c1, #play_table.c2 from #play_table
You can add a breakpoint using either method:
Double-click the vertical gray border on the immediate left of the line number.
Right-click the vertical gray border to the immediate left of the line number and select Toggle Breakpoint.
Sybase WorkSpace indicates a breakpoint by a light blue dot to the left of the line number in the SQL Editor.
Now you will debug the stored procedure.
Right-click in the SQL Editor and select Debug from the context menu.
The Configure Parameters wizard displays.
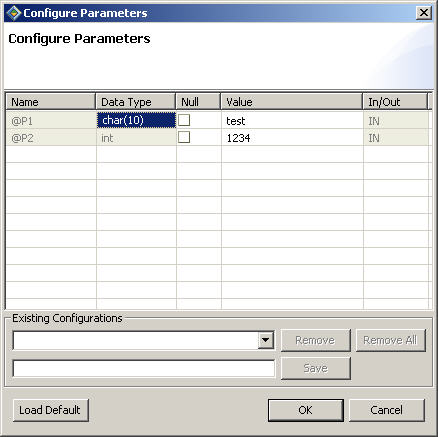
Next, retain or change the values for the stored procedure invocation.
As you can see, the Value fields display the values you selected when initially running the stored procedure.
![]() Enter values the first time you run/debug a
stored procedure. When subsequently running the stored procedure,
you can use the values you previously entered or enter new values.
Enter values the first time you run/debug a
stored procedure. When subsequently running the stored procedure,
you can use the values you previously entered or enter new values.
Click OK to run the procedure.
The stored procedure execution starts, and Confirm Perspective Switch dialog box displays, which confirms that you want to change to the Database Debug perspective.
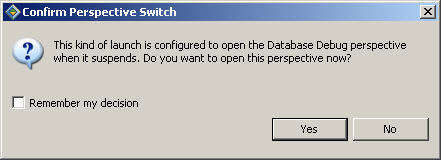
Select Yes in the Confirm Perspective Switch box to switch to the Database Debug perspective.
Sybase WorkSpace stops at the first breakpoint on line 10.
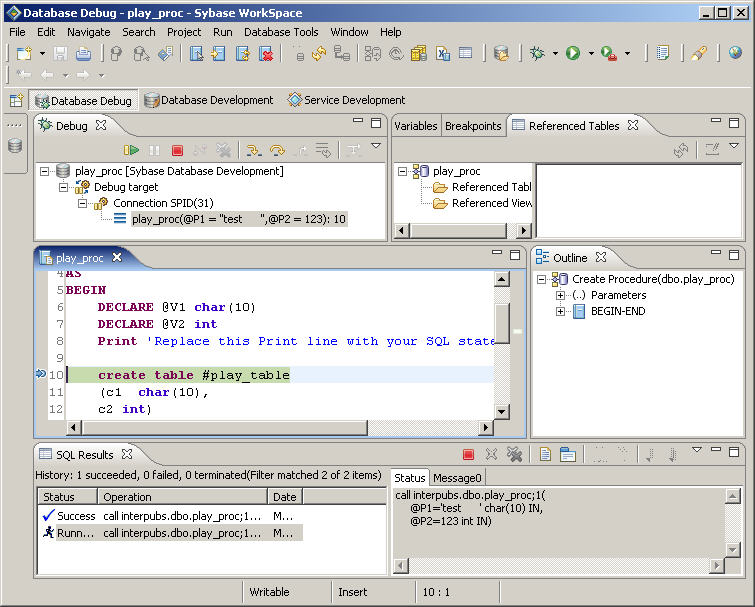
Click the Resume icon once, located on the Debug view toolbar, to step to the next breakpoint.
The Referenced Tables view opens in the upper right corner of the Database Debug perspective.
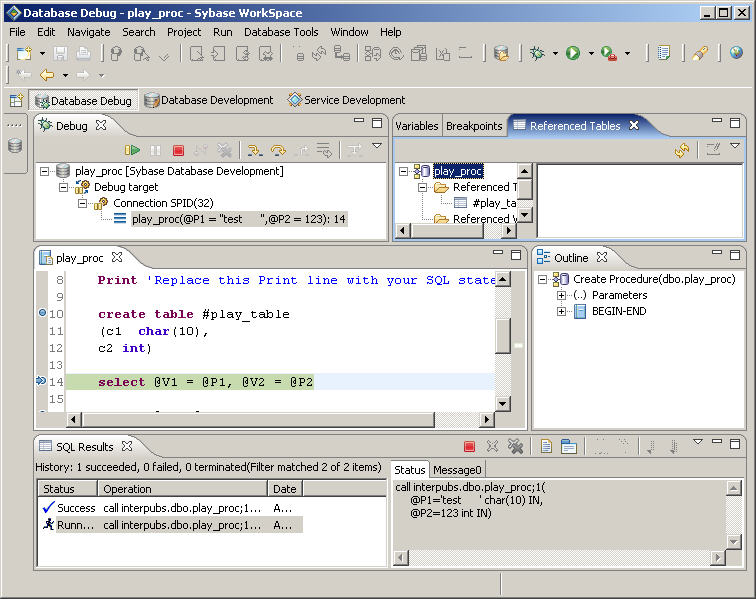
Click the #play_table temp table in the Referenced Tables view to display its contents.
At this point the temp table is empty because you just created it.

Finish walking through the breakpoints until you reach line 22 (just below the insert statement) by clicking the Resume icon three more times.
Now, you can view and modify the contents of the #play_table.
View the contents of the #play_table by clicking #play_table in the left pane of the Referenced Tables view.

Modify the contents of #play_table; right-click anywhere in the right pane of the Referenced Tables view and select Edit Table Data from the context menu.
The #play_table editor displays, which enables you to insert, delete, and modify rows in the table.
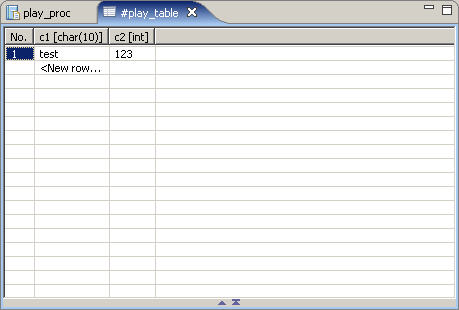
Change the value 123 to 456.
Select 123 in the C2[int] column, right-click, and select Update Value from the context menu.
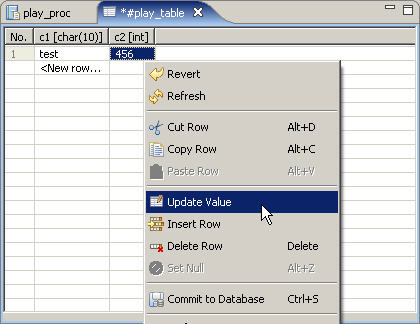
Sybase WorkSpace highlights the existing value.
Enter 456 to overwrite
the existing value.
Insert another row in the table using either method:
Double-click <New row>.
Right-click anywhere in the #play_table grid and select Insert Row from the context menu.
Add some new values for the new row.
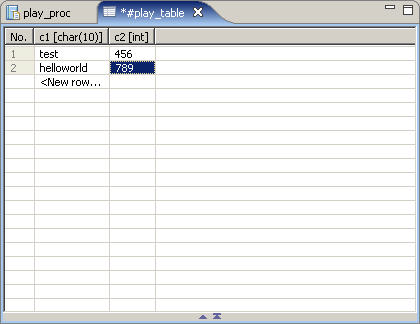
Right-click anywhere in the #play_table grid and select Commit to Database from the context menu.
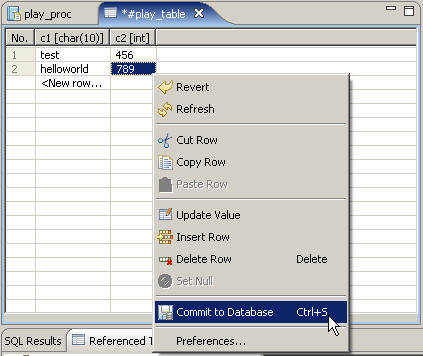
The #play_table contents you just changed in the table editor now match the table contents in the Referenced Tables view.
Continue execution of the stored procedure and confirm that the changes you made to the #play_table display in the SQL Results view.
Display the play_proc editor by clicking its tab. Complete the stored procedure execution by selecting the Resume icon one more time.

Click the Result1 tab in the SQL Results view to see the values reflect the modifications that you made during the debug session.

Select File|Close on the main menu bar to close the editor.
You can easily make changes to the stored procedure and save it back to the server.��