![]()
![]()
![]()
![]()
In this lesson, you add order-processing logic that calls the discount service that you created in lesson 1 of this tutorial.
The business process waits for the discount data to come back via a correlated response. Upon receiving the discount data, the order processing completes.
In the WorkSpace Innovator, expand MySybStore_Tutorials/Services/BP and double-click MyHandleOrdersBP.svc_bpmn to open the file in the Business Process Service Editor.
In the Business Process Service Editor, select the Business Process tab.
Arrange the Properties and Variables panes so you can work with them more easily. Right-click in the Business Process Service Editor canvas and select Show Properties Panel, then right-click again and select Show Variables Panel to move the panels into outside views.
![]() You can also move the views to other locations in the
WorkSpace main window for ease of use.
You can also move the views to other locations in the
WorkSpace main window for ease of use.
Click anywhere on the editor canvas to have the Properties Panel display Properties, click New beneath the Correlation Sets pane, then click Create below the Variables table.
Enter corr_customerid in
the variable Name column.
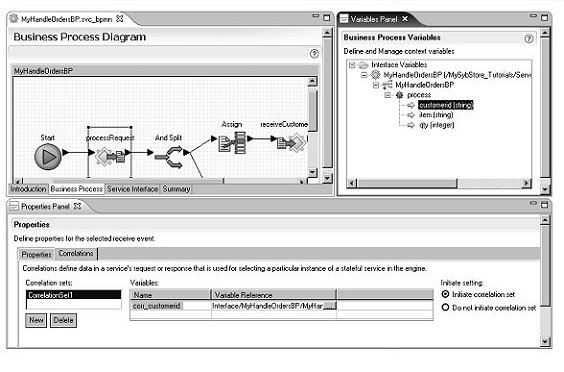
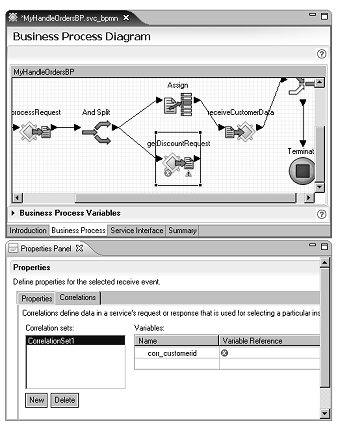
Select the processRequest activity in the editor canvas, expand the Properties pane (not the Properties Panel), and select the Correlations tab.
Click New below the Correlation Sets pane. By default, the correlation set you just created (CorrelationSet1) displays.
Expand the Business Process Variables view of the Variables Panel and drag and drop customerid to the Variable Reference column in the Properties pane.
Click Initiate Correlation Set on the far right of the Variables table. You may have to maximize the WorkSpace window to see this option.
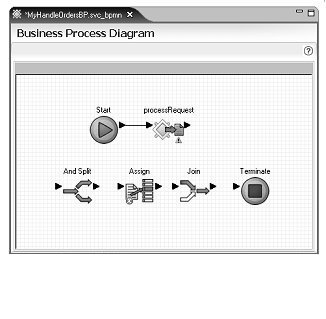
Right-click in the editor canvas and select Show Tool Palette. In the following order, drag and drop these objects to the editor canvas.
(Tool Palette category | [Logic|Activity|Exception])
Logic | And Split
Activities | Assign
Logic | Join
Exception Processing | Terminate
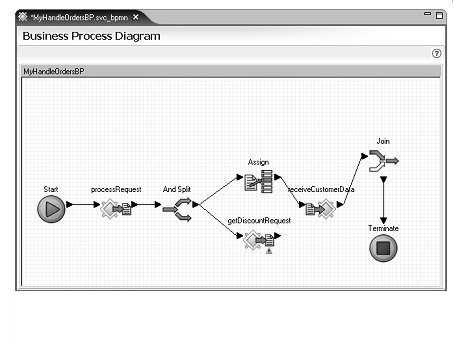
The editor canvas should look like this:
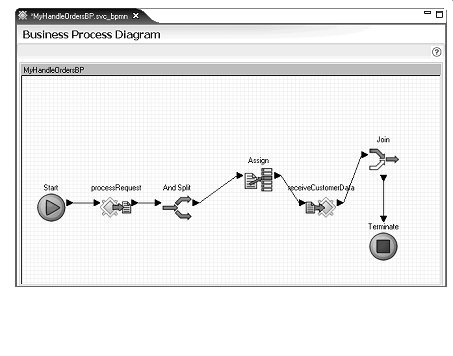
In the Service Explorer, expand Public/MyDiscountSOAP/MyCalculateDiscountBP and drag receiveCustomerData to the editor canvas and drop it between the Assign and Join objects.
On the editor canvas, horizontally line up the And Split, Assign, receiveCustomerData, Join, and Terminate objects after the processRequest object.
Join the following business logic activities. Rearrange the objects on the canvas as necessary to achieve a look similar to the graphic that follows.
Click the right arrow of processRequest, drag to and click the left arrow of And Split.
Click the right arrow of And Split, drag to and click the left arrow of Assign.
Click the right arrow of Assign, drag to and click the left arrow of receiveCustomerData.
Click the right arrow of receiveCustomerData, drag to and click the left arrow of Join.
Click the right arrow of Join, drag to and click the left arrow of Terminate.
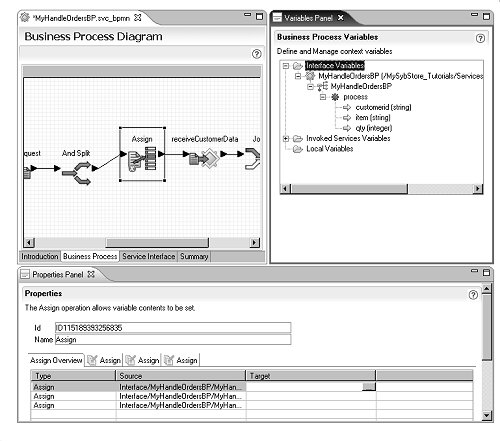
In the editor canvas, select the Assign object and expand the Properties Panel
In the Properties Panel, click New (below the Assign Overview table) twice to create two additional assignments.
In the Variables Panel, and expand Interface Variables/MyHandleOrdersBP/MyHandleOrdersBP/process in the tree view.
Drag and drop the customerid, item, and qty parameters to the Source column of the three new assignments.
In the Variables Panel expand Invoked Services Variables/MyDiscountSOAP/MyCalculateDiscountBP/receiveCustomerData/message/receiveCustomerData/sequence in the tree view.
Drag and drop the customerid, item, and qty to the Target column of the three assignments.
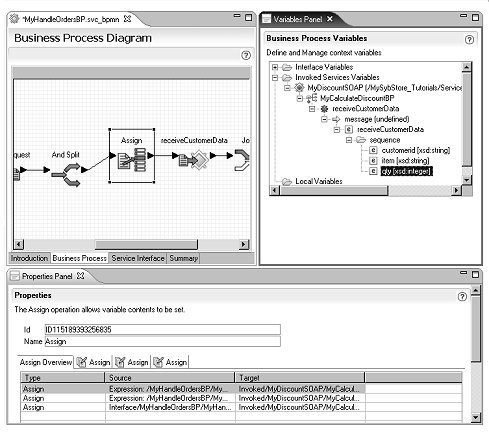
Select File|Save from the WorkSpace main menu. When you select the editor canvas again, the red “X” that was on the Assign icon disappears because you have specified the Assign’s target and source.
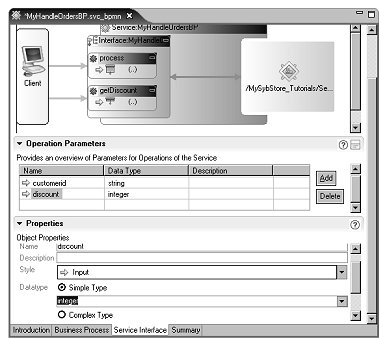
In the Business Process Service Editor, select the Service Interface tab, right-click in the Interface:MyHandleOrdersBP box in the diagram, and select Add Operation from the context menu.
Select the new operation, expand the Properties Panel,
and enter getDiscount in the Name field.

Expand the Operation Parameters pane in the editor and select the new getDiscount operation in the diagram.
Click Add twice to add two parameters to getDiscount operation.
Parameter 1:
Name – customerid
Style – Input
Data type – Simple integer
Parameter 2:
Name – discount
Style – Input
Data type – Simple integer
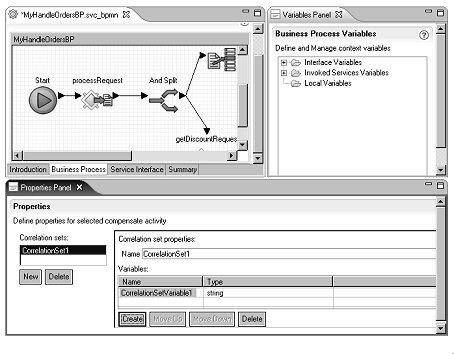
Select the Business Process tab on the editor. It should show the newly added operation getDiscountRequest activity.
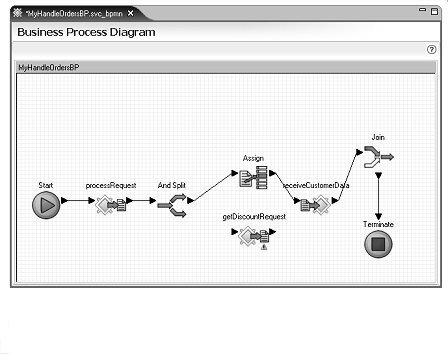
Move the getDiscountRequest activity below the And Split activity in the editor canvas. Click the right arrow of And Split and drag to and click the left arrow of getDiscountRequest.
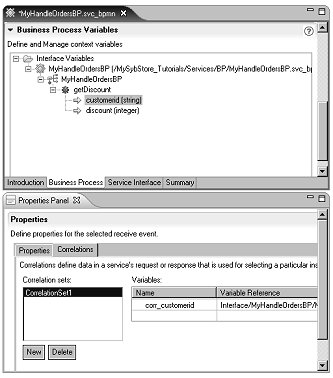
In the editor canvas, select getDiscountRequest, expand the Properties Panel, select the Correlations tab, and click New below the Correlation Sets pane.
Expand the Business Process Variables pane and expand Interface Variables/MyHandleOrdersBP/MyHandleOrdersBP/getDiscount to locate customerid.
Drag and drop customerid to the Variable Reference column in the Variables table on the Correlations tab.
Select File|Save from the WorkSpace main menu bar and leave the service open in the editor.
