![]()
![]()
![]()
![]()
In this lesson, you create a basic Java service for the SybStore application.
To open the Service Development perspective, select Window|Open Perspective|Other, choose Service Development (default) from the Select Perspective dialog box, and click OK.
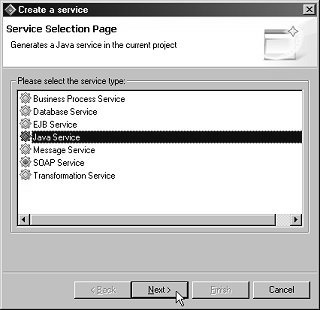
Select File|New|Service from the WorkSpace main menu bar. The Create a Service wizard appears.
On the Service Selection Page, select Java Service and click Next.
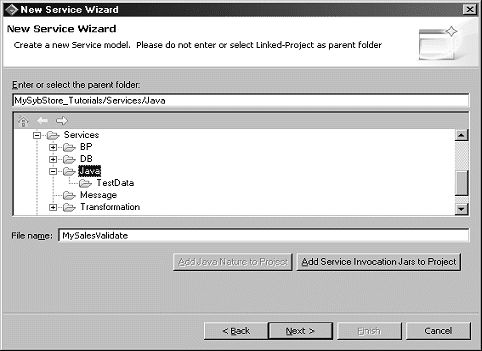
When the New Service Wizard page opens, select the MySybStore_Tutorials/Services/Java folder to populate the Enter Or Select the Parent Folder field.
Enter MySalesValidate in
the File Name field and click Next.
When the Service Summary window opens, click Next. The Implementation Type page appears.
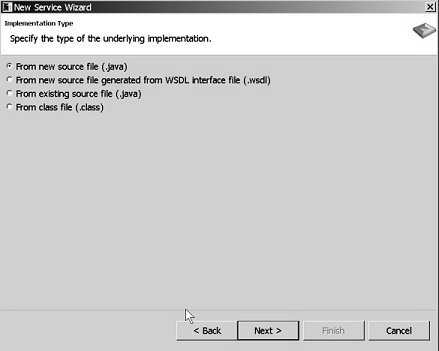
Select the From New Source File (.java) option and click Next.
The Java Class window opens.
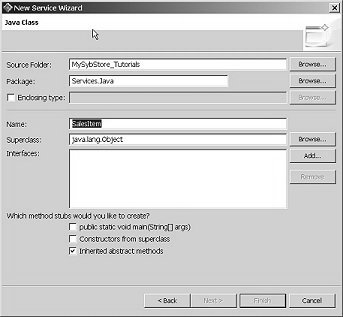
Enter Services.Java in
the Package field, or click Browse and
select Services.Java from the Package
Selection window.
Enter salesItem in
the Name field and click Next.
![]() If you see a warning about the format of the package
name, you can ignore it.
If you see a warning about the format of the package
name, you can ignore it.
When the Dependencies page appears, click Next.
When the Summary page appears, click Finish to create the Java service. The service is created and opens in the Java Service Editor.
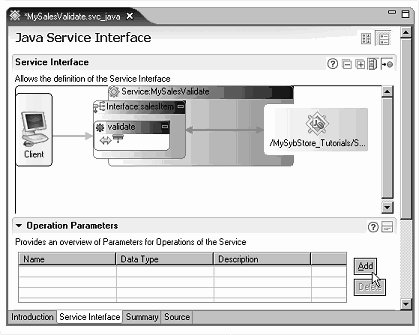
Select the Service Interface tab.
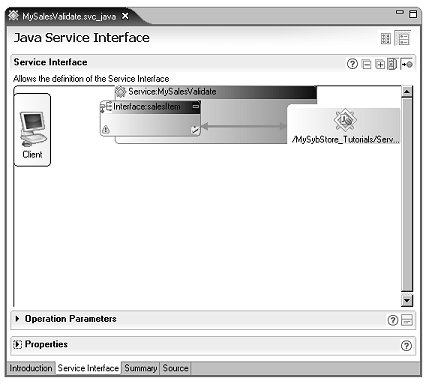
The Java Service Interface page contains three panes: a Service Interface diagram, Operation Parameters, and Properties.
In the Service Interface diagram, right-click the Interface:SalesItem box, and select Add Operation|Create a New Method from the context menu.
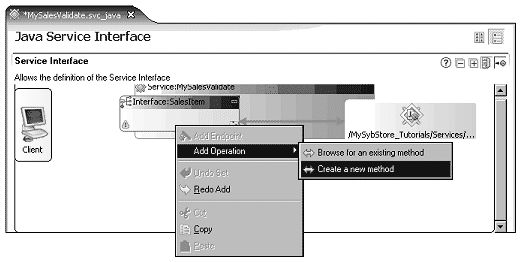
You see the new operation represented in the diagram.
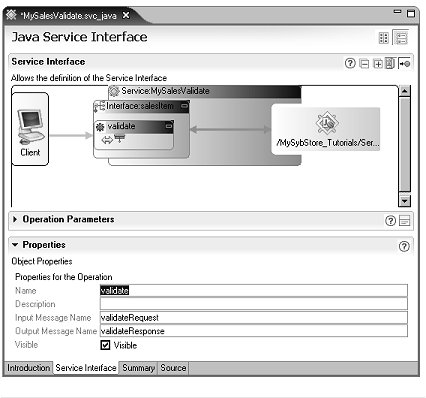
Expand the Properties pane,
select operation1 in the diagram, and enter validate in
the Object Properties Name field.
In the WorkSpace Navigator, expand the MySybStore_Tutorials/Tutorial_Resources/Service_Development folder.
Right-click the SybStore.xsd file and select Create Java Bindings from the context menu. The Creat Java Bindings for Schema dialog box displays.
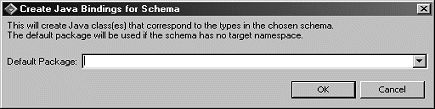
Leave the Default Package field empty and click OK. This generates Java types for the XSD schema, which provides the seamless ability to handle XSD-based type definitions and generated Java class types.
When you see the message “Java
Binding creation was successful,” click OK.
Open the Operation Parameters pane in the center of the Java Service Editor.
In the Service Interface pane, select the validate operation box in the diagram, then click Add in the Operation Parameters pane to add a new parameter.
In the Operation Parameters pane, select the new parameter in the table, which by default is named newParameter1.
In the Properties pane
(below the Operation Parameters pane),
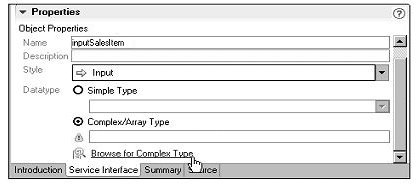
enter inputSalesItem in the Name field.
Continuing in the Properties pane, scroll down if necessary, and select Complex/Array Type for the Datatype.
Click Browse for Complex Type at the very bottom of the Properties pane.
When the New Parameter dialog box opens, click Browse for the Type field.
When the Parameter Type dialog box opens, enter the letter “s” in the Select the Type For This Parameter field.
![]() You must enter the first letter of the parameter type
you are searching for in the Select the Type For This Parameter
field, or the Matching Types list will remain empty.
You must enter the first letter of the parameter type
you are searching for in the Select the Type For This Parameter
field, or the Matching Types list will remain empty.

Scroll down the list of Matching Types and
select SalesDetail. When you select SalesDetail,
the selection changes to SalesDetail - com.sybase.workspace.tutorials.sybstore.schemas.
Click OK.
When you return to the New Parameter dialog box, click OK.
Select File|Save from the WorkSpace main menu.
Leave MySalesValidate.svc_java open in the editor for the next lesson.
