![]()
![]()
![]()
![]()
In this lesson, you create a basic database service for the SybStore application.
To start Sybase WorkSpace, select Start|Programs|Sybase|Sybase WorkSpace|Sybase WorkSpace 1.5.
To open the Service Development perspective, select Window|Open Perspective|Other, choose Service Development (default) from the Select Perspective dialog box, and click OK.
The Service Development perspective includes the WorkSpace Navigator view, the Service Explorer view, and Enterprise Explorer view in the WorkSpace main window.
In the Enterprise Explorer, expand the Databases folder, right-click the MySybStore connection profile, and select Create Database Service from the context menu.
![]() You can also create a database service by selecting File|New|Service from
the WorkSpace main menu bar.
You can also create a database service by selecting File|New|Service from
the WorkSpace main menu bar.
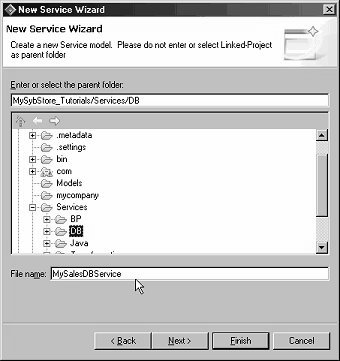
When the New Service Wizard opens, expand the MySybStore_Tutorials/Services/DB folder to populate the Enter or Select the Parent Folder field.
Enter MySalesDBService in
the File Name field, then click Next.
On Service Summary page, click Next.
On the Browse Available Connection Profiles page, select MySybStore from the drop-down list for the connection Profile.
Expand MySybstore/Schemas/DBA/Procedures & Functions. You see the stored procedures in the SybStore tutorial database.
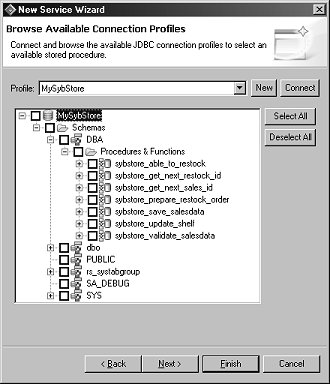
Select the Procedures & Functions check box, then click Finish to create a database service operation for each selected stored procedure in the MySybStore database.
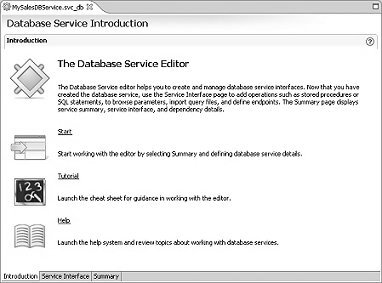
The new database service is created (MySalesDBService.Svc_db) and opens in the Database Service Editor.
![]() To enlarge the editor display, minimize or close other
windows by clicking the “X” on the window’s
title tab. You can also click the editor’s maximize button
to it take up the entire WorkSpace window.
To enlarge the editor display, minimize or close other
windows by clicking the “X” on the window’s
title tab. You can also click the editor’s maximize button
to it take up the entire WorkSpace window.
Select the Service Interface tab to see a graphical representation of the service’s interface.
The diagram shows an operation for each stored procedure in the database.
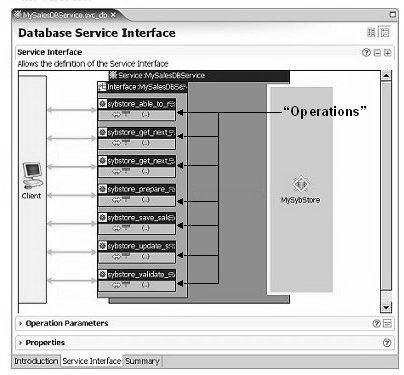
In the Service Interface diagram, select the first operation within the Interface:MySalesDBService object—sybstore_able_to_restock.
Expand the Properties pane (at the bottom of the Database Service Interface tab) and select the Autocommit option.
For the other six operations, select the operation in the diagram, expand the Properties pane and select Autocommit.
Select File|Save from the WorkSpace main menu bar.
Select File|Close from the main menu to close the editor.
