In this lesson, you will create an analysis BPM and define some BPM objects in the model. Before you begin, complete all lessons in “Creating a database model”.
If the tutorial database is already running, go to step 2.
If the tutorial database is not running, in the WorkSpace Navigator, expand the folder MySybStore_Tutorials/Setup/Database. Right-click startMySybStore.bat and select Open With|System Editor to start the tutorial database.
You should see the Adaptive Server Anywhere icon in your Windows system tray.
If a connection to the SybStore tutorial database is already established, skip to step 3. When there is a successful connection, you see a database icon below the SybStore connection profile in the Enterprise Explorer.
If you are not connected, in the Enterprise Explorer, right-click the MySybStore connection profile, which you created in the tutorial setup, and select Connect to connect WorkSpace to the tutorial database.
If the Enterprise Modeling perspective is not open, select Window|Open Perspective|Enterprise Modeling from the main menu bar.
Select File|New|Model from the main menu bar.
When the New Model wizard appears, select Add To An Existing Project, click MySybStore_Tutorials to select that project, then click Next.
In the Destination Folder window, select the MySybStore_Tutorials/Models folder and click Finish.
In the New dialog box, define the following:
Model Type – select Business Process Model
Select New Model
Model name – accept the default
Process language – select Analysis
Select Share the Process Language Definition
First Diagram – select Business Process Diagram.
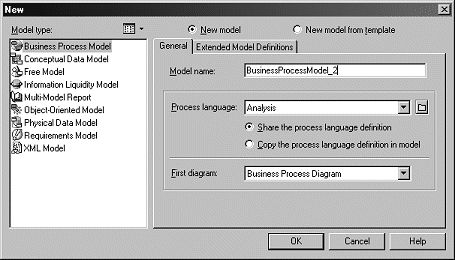
Click OK. The Business Process Model editor displays an empty diagram and a toolbar. The Modeling Output view appears below the editor.
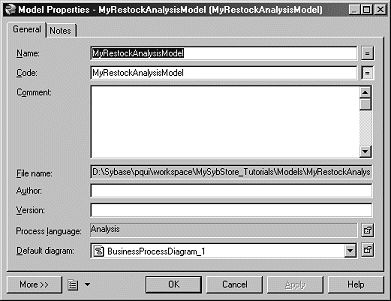
Select Model|Model Properties from the WorkSpace main menu bar.
When the Model Properties dialog
box opens, change the model name to MyRestockAnalysisModel and
click OK.
Click Start on the editor toolbar.

Click in the editor. A start symbol appears where you clicked.
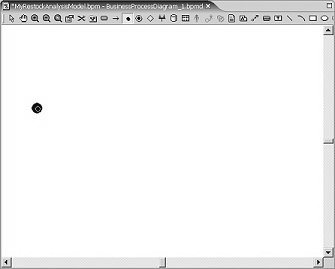
Right-click in the editor to restore the pointer tool.
Click Process on the editor toolbar.

Click in the editor. A process symbol appears where you clicked.
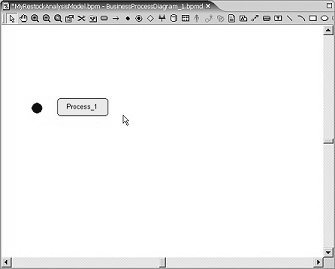
Right-click in the editor to restore the pointer tool.
Double-click the Process_1 symbol in the editor.
When the Process Properties dialog
box opens, change the process Name to Receive
Restock Confirmation Data, then click OK.
![]() If the start symbol seems to disappear, use the pointer
to move the process symbol. The start symbol may be hidden behind
the process symbol.
If the start symbol seems to disappear, use the pointer
to move the process symbol. The start symbol may be hidden behind
the process symbol.
Repeat steps 13 through 18 to create these processes:
Validate Confirmation Data
Save Confirmation Data
Send Confirmation Response
Send Failure Response
![]() To remove the horizontal and vertical black page lines
(shown to the left of the start symbol in the graphic below), select Tools|Display
Preferences from the WorkSpace main menu. When the Display
Preferences dialog box opens, select General in
the Category list, then deselect the Show
Page Delimiter option in the Diagram section. Click OK to
close the dialog box.
To remove the horizontal and vertical black page lines
(shown to the left of the start symbol in the graphic below), select Tools|Display
Preferences from the WorkSpace main menu. When the Display
Preferences dialog box opens, select General in
the Category list, then deselect the Show
Page Delimiter option in the Diagram section. Click OK to
close the dialog box.
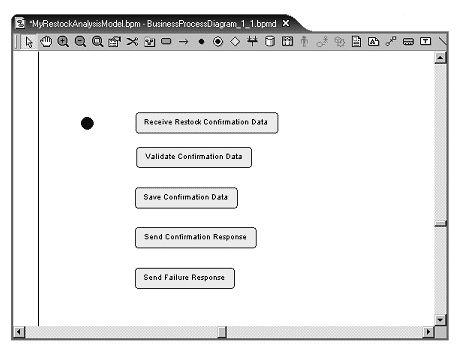
Save your work. Select File|Save from the WorkSpace main menu.
Click Resource on the editor toolbar.

Click inside the editor. A resource symbol (a database icon) appears where you clicked.
Right-click in the editor to restore the pointer tool.
Double-click the resource symbol in the editor.
When the Resource Properties dialog
box opens, change the resource name to SybStore
Database and click OK.
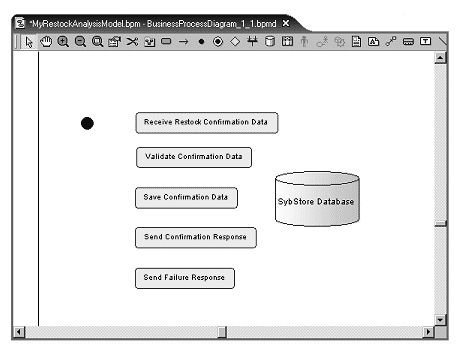
Click Decision on the editor toolbar.

Click in the editor. A decision symbol appears in the editor where you clicked.
Right-click in the editor to restore the pointer tool.
Double-click the decision symbol.
When the Decision Properties dialog
box opens, change the decision Name to Confirmation
Data Valid, then click OK.
Use the pointer to rearrange the symbols so they do not overlap each other.
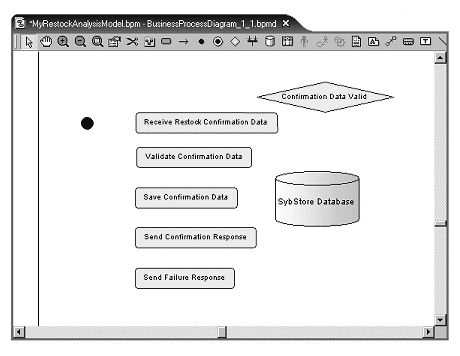
Click Synchronization in the palette.

Click in the editor. A horizontal synchronization symbol (a line) appears in the editor where you clicked.
Right-click in the editor to restore the pointer.
Click the synchronization symbol, then select the center marker and drag up to make the line symbol higher than it is wide.
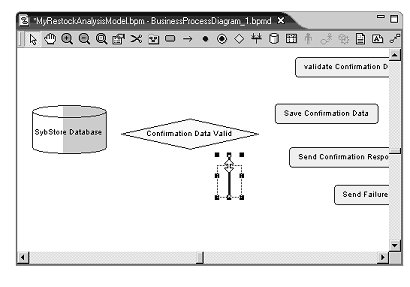
The synchronization symbol becomes vertical.
Click End in the palette.

Click inside the editor. An end symbol appears in the editor where you clicked.
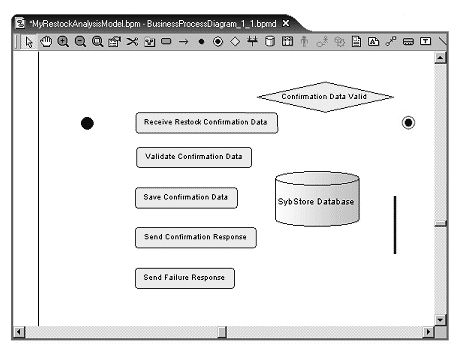
Right-click in the editor to restore the pointer tool.
Click Flow on the editor toolbar.

Click the start symbol and hold down the mouse button. Drag the pointer to the first process symbol (Receive Restock Confirmation Date), and release the mouse button.
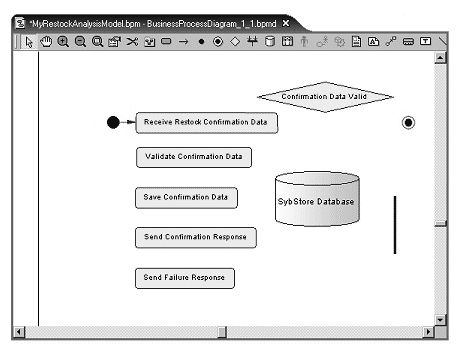
Click the decision symbol and hold down the mouse button. Drag the pointer to the Send Failure Response process symbol. A flow line appears.
Right-click in the editor to restore the pointer tool.
Right-click the flow line arrow that you just created and select Format.
When the Symbol Format dialog box opens, change the Corners style to horizontal/vertical, then click OK.
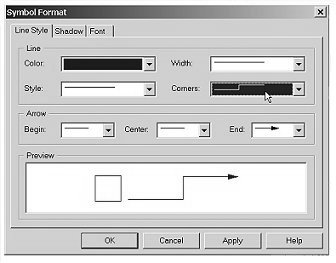
Select the Flow tool again and create more flows until your diagram resembles the following graphic.
![]() Click the maximize button in the upper right corner
of the editor to to expand the diagram. Select the pointer tool
from the editor toolbar to select and rearrange the symbols as necessary.
Click the maximize button in the upper right corner
of the editor to to expand the diagram. Select the pointer tool
from the editor toolbar to select and rearrange the symbols as necessary.
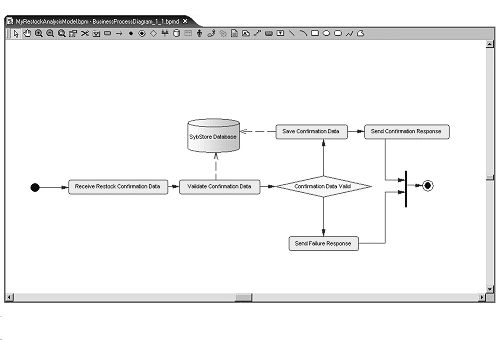
Right-click the flow line between the Confirmation Data Valid decision symbol and the Send Failure Response process symbol and select Properties.
Select the Condition tab,
enter False in the Alias field, and
click OK.
The flow displays the [False] condition,
which indicates that if Confirmation Data Valid is
not true, the flow proceeds to the Send Failure Response process.
Otherwise, it goes to the Save Confirmation Data process.
Select File|Save from the main menu bar to save the model.
Select File|Close to close the perspective.
![]() Leave the perspective open if you plan to continue with
the next tutorial.
Leave the perspective open if you plan to continue with
the next tutorial.