In this lesson, you will generate XSD from an XML model. Before you start this lesson, you must complete “Lesson 1: Creating an XML model”.
Open the Enterprise Modeling perspective. Select Window|Open Perspective|Enterprise Modeling from the WorkSpace main menu bar.
To easily locate a model’s associated files, select a model in the Model Explorer, and have WorkSpace point you to a file in the WorkSpace Navigator.
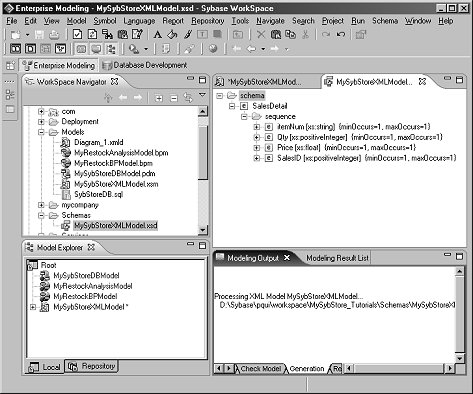
In the Model Explorer, on the Local tab, right-click MySybStoreXMLModel and select Find in WorkSpace Navigator from the context menu.
The MySybStoreXMLModel.xsm file is highlighted in the WorkSpace Navigator.
In the WorkSpace Navigator, double-click MySybStoreXMLModel.xsm to open the file in the editor.
Select Language|Generate XML Schema Definition File from the WorkSpace main menu bar.
When the Generation dialog box opens, click Browse to select the destination for the generated file. The recommended location is:
%WS_INSTALL_DIR%\<user_name>\workspace\MySybStore_Tutorials\
Schemas\
where <user_name> is your personal WorkSpace directory.
Deselect the Check Model option and click OK.
When the Generated Files message displays showing the path of the generated XSD file, click Close.
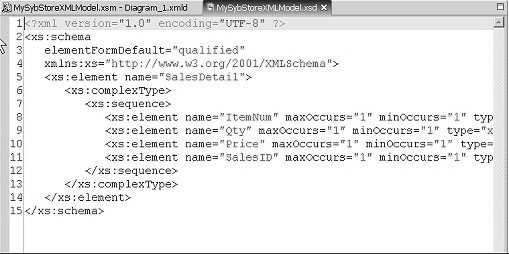
In the WorkSpace Navigator, expand the folder MySybStore_Tutorials/Schemas, then double-click MySybStoreXMLModel.XSD to open the schema in the XSD viewer.

To edit the XSD document, right-click MySybStoreXMLModel.XSD and select Open With|Sybase XML Editor or XML Editor.
Select File|Close All from the WorkSpace main menu to close any open editors.
The XSD document appears in the XML editor.

Look at the XML menu toolbar for additional for XML editing options.
Select File|Save from the main menu bar to save the XML model.
Select File|Close from the main menu bar to close the perspective.