

Chapter 4 Building Physical Diagrams
Creating a Sequence
There are two steps to using sequences:
- Create a sequence (including defining sequence options)
- Apply and enable a sequence to a column
 To create a sequence:
- Select Model→Sequences to open the List of Sequences.
- Click the Add a Row tool and type a name for the new sequence.
- Double-click the arrow to the left of the new sequence to display its property sheet.
- Click the Physical Options tab and enter any appropriate parameters. These options are DBMS-specific. For more information on using this tab, see Physical Options.
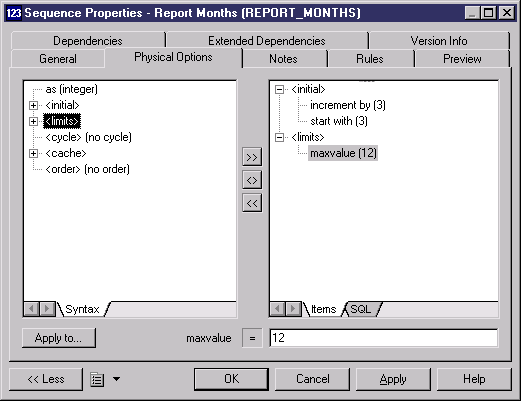
The above example shows the options and values to create a sequence of months in a year when quarterly reports are published.
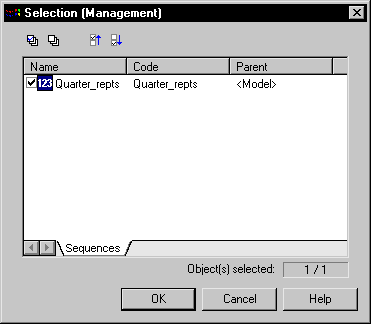
- [optional] Click the Apply To button to open a selection list and specify other sequences to which these same options will apply.
- Click OK in each of the dialog boxes.
To apply and enable a sequence on a column:
- Open the property sheet of the column to which you want to apply the sequence.
- On the General tab, select a sequence from the Sequence list.
- Click OK to close the property sheet.
- Select Tools→Rebuild Objects→Rebuild Triggers to open the Rebuild Triggers dialog box.
- Click the Selection tab and select the table or tables containing the column to which you want to attach a sequence.
- Click OK.
The triggers are rebuilt and the sequence is enabled on the column.
For more information on rebuilding triggers, see the Building Triggers and Procedures chapter.
|
Copyright (C) 2008. Sybase Inc. All rights reserved.
|
|