
Chapter 3 Building Process Hierarchy Diagrams
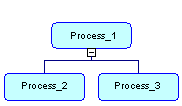
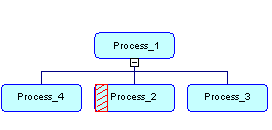
You build a process hierarchy using the Process tool. The following table summarizes the different types of processes that you can create with this tool:
| To create a ... | Cursor | Click... |
|---|---|---|
| Root process | 
|
Any empty space in the diagram window. Example: 
|
| Sub-process | 
|
A root process symbol or the bottom part of any other process. Example: 
|
| Sibling process | 

|
The left or right part of any process symbol, except the root process. Example: 
|
By default, a process hierarchy displays from top to bottom. To change the orientation, select Tools→Display Preferences→General in the menu bar, and select Horizontal in the Orientation groupbox. Symbols are automatically re-arranged to respect the new display preference.
Not that, you cannot use the composite view feature for a process in a PHD. For more information about the composite view feature, see "Decomposed processes and sub-processes" in the Building Business Process Diagrams chapter.
![]() Creating processes from the Browser or the List of Processes
Creating processes from the Browser or the List of Processes
You can also create root processes by right-clicking the model node in the Browser, and selecting New→Process, or from the list of processes available from the Model menu.
You can decompose a process and create sub-processes in the Browser by right-clicking a process and selecting Decompose Object in the contextual menu. Except for root processes, processes created in the Browser are not automatically displayed in the diagram. To display one or all of the missing sub-process symbols, right-click the parent process symbol, and select Complete or Complete All in the contextual menu.
| Copyright (C) 2008. Sybase Inc. All rights reserved. |

| |