

Chapter 5 Setting up the Repository on any DBMS
Install the repository schema
When you establish the first connection to the database, you have to install the repository.
 To install the repository schema :
- Click OK in the Connect dialog box.
An error message is displayed to warn you that the repository tables are not found in the database.
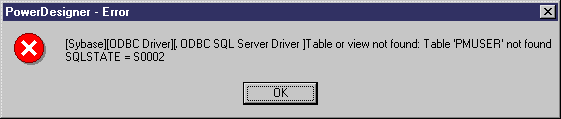
- Click OK.
A confirmation dialog box asks you to install the repository on the database.

- Click Yes.
The Repository Installation Script dialog box is displayed. It lists initialization and upgrade statements that need to be performed on the database.
The Separator list lets you select the separator that corresponds to your interpreter. When you change separator using the Separator list, the script automatically displays this change.
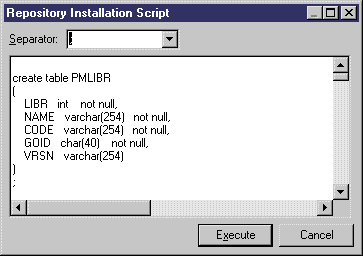
If you need to modify the statements (add physical options for example) you have to copy the text, and paste it in a script interpreter, click Cancel in the Repository Installation Script window, then modify and complete the repository installation manually.
- Click Execute.
Statements appear in the Output window during the repository creation. When the repository has been successfully installed, a final message "Repository installation completed" is displayed in the Output window. In the repository Browser, the root of the repository tree now displays the repository name, the repository user and the current branch (MyBase::ADMIN::<Default>).
You are now connected and you can start working with the repository.
|
Copyright (C) 2006. Sybase Inc. All rights reserved.
|
|